A few years back, my friend who is both gluten and dairy free was requesting I make a tiramisu dessert for her birthday. So, I whipped up this gluten free tiramisu cake inspired by the classic Italian dessert and it was a big hit! I've been thinking about this recipe ever since and decided it was definitely time to share it with you. I hope you love it as much as we do!
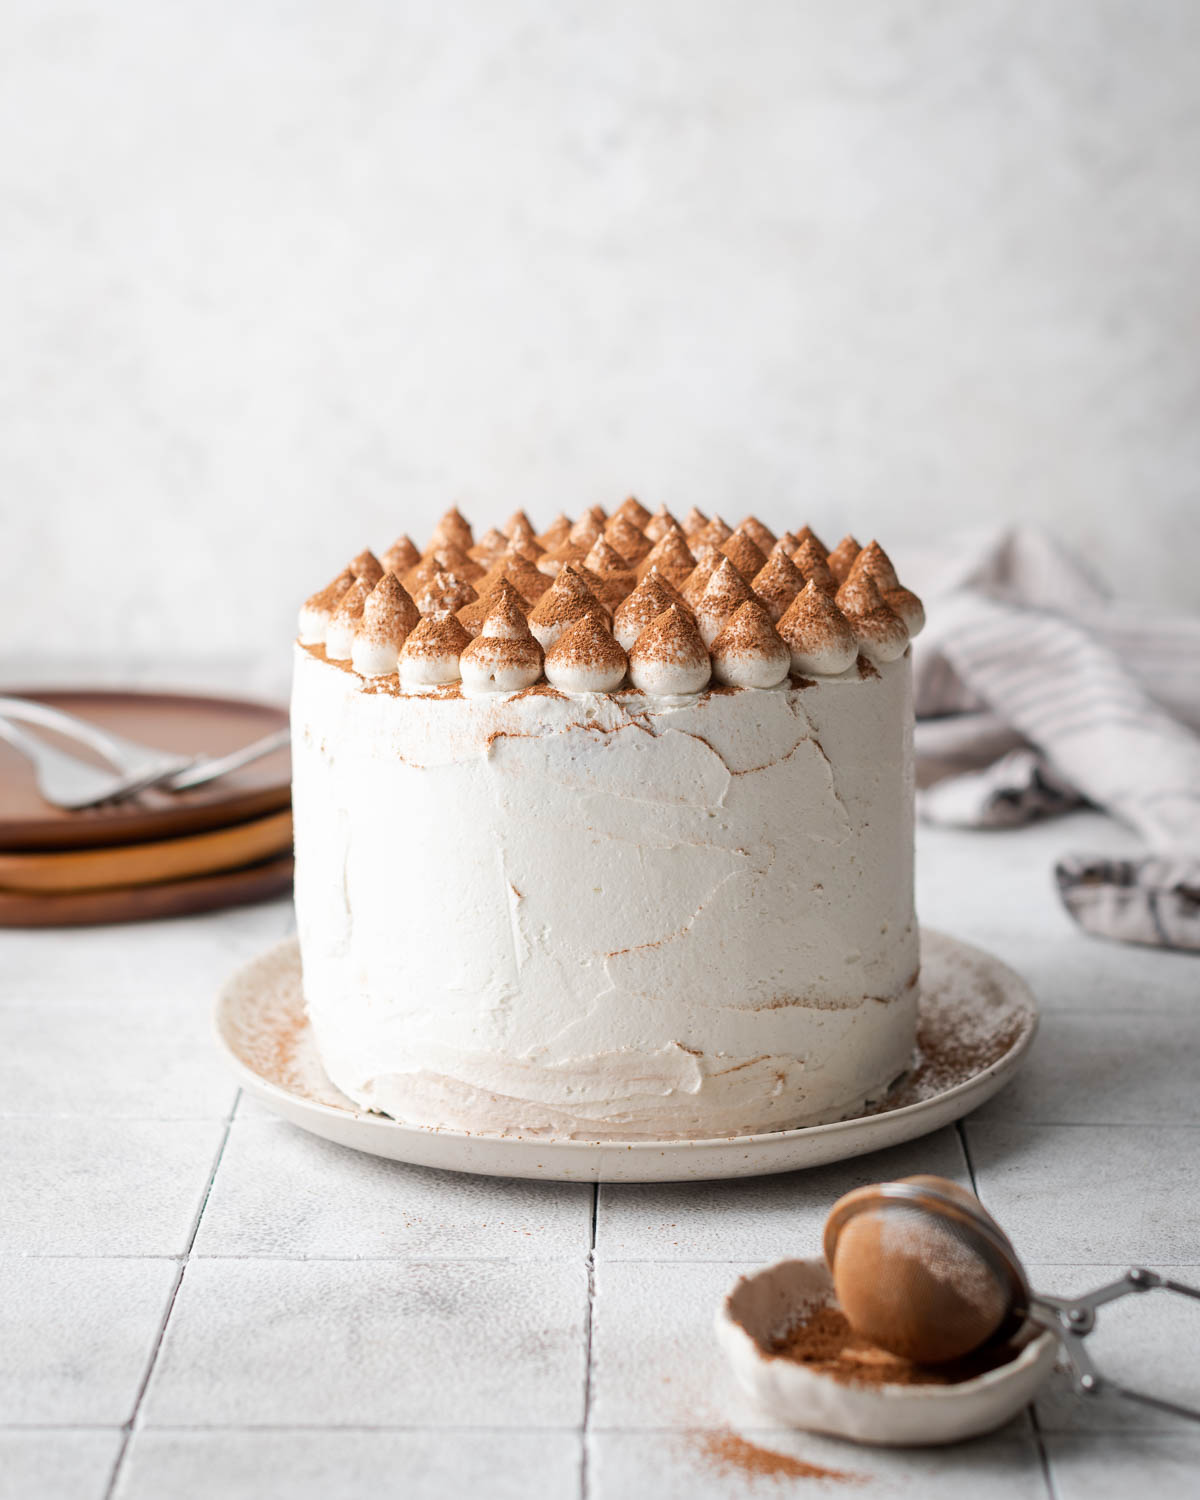
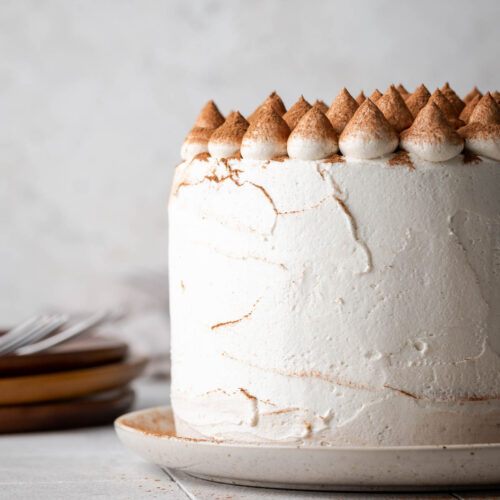
Three layers of gluten free hazelnut cake are soaked with an espresso syrup and covered with a dairy free frosting reminiscent of marscapone cheese. The finished cake is dusted with a little cocoa powder to complete the look.
Jump to:
Want to save this recipe?
Enter your email below and we will send it straight to your inbox!
You will also be added to our weekly email list.
Why You'll Love This Tiramisu Cake Recipe
- It's gluten free and dairy free!
- The cake comes out perfectly moist and soft (no one will guess it's gluten free).
- It uses a combination of dairy free cream cheese, vegan butter and coconut cream to mimic the marscapone cream that comes in tiramisu.
Ingredient List

For the cake, you will need the following ingredients:
- Gluten Free 1-to-1 Flour Blend - I use Bob's Red Mill 1:1 Flour when developing and testing my recipes. You can use another flour blend of your choice, but the results may vary. As always, weighing your flour will provide the best results.
- Hazelnut Flour - Again, I use Bob's Red Mill brand. In this recipe it just gives a slight hazelnut flavor, especially nice if you enjoy a hazelnut coffee.
- Baking Powder
- Salt
- Sugar
- Vanilla
- Non-Dairy Milk - I use unsweetened coconut milk in the carton. You can substitute with another non-dairy milk or regular milk in the same measure.
- Oil - I use light flavored olive oil. You can use any other light flavored cooking oil. Do not substitute for butter. Because the cake is refrigerated, oil allows the cake to stay soft even when served cold.
For the syrup & frosting, you will need the following ingredients:
- Powdered Sugar
- Vegan Butter
- Vegan Cream Cheese
- Coconut Cream - This is the fat from a can of full fat coconut milk. Refrigerate your unopened can ahead of time, then open and scoop out the separated fat on top.
- Espresso Powder
- Sugar
Substitutions or Additions
- Gluten Free Flour Blend - If you prefer to use a brand other than Bob's Red Mill, you should weigh out 222g of flour.
- Hazelnut Flour - You can use another nut flour, such as almond flour in place of hazelnut. The measure is 74g.
- If you prefer not to use nut flour at all, increase the amount of 1-to-1 flour to 1 ¾ cups and increase the oil to ¾ cup.
How to Make a Gluten Free Tiramisu Cake
- Step 1: Combine your gluten free flour, hazelnut flour, baking powder and salt in a medium size bowl. Whisk together.
- Step 2: Beat oil and sugar on medium speed for 3 minutes until light.
- Step 3: Add the vanilla.
- Step 4: Add the eggs, one at a time, beating about 60 seconds between each addition.
- Step 5: Turn the mixer to the lowest speed and slowly add half of the flour mixture.
- Step 6: Add half of the milk. Then the remaining flour. Followed by the remaining milk.
- Step 7: Divide your batter into 3, 6-inch cake pans. (You can also make a 2-layer 8 inch cake or 24 cupcakes with this recipe).
- Step 8: Bake

How to Assemble and Decorate a Tiramisu Cake
- Once your cakes have baked and been removed from the oven, prepare the coffee syrup. Both the cakes and syrup need to cool before soaking, otherwise the cake will just crumble apart.
- After everything is cooled, prepare your frosting. I use cold ingredients, so the frosting stays pretty stiff. It makes it easier to work with, especially because vegan butter melts so easily.
- Put a dab of frosting on your plate and then place the first cake layer down. Dab the top with about ⅓ cup of the coffee syrup, making sure to get the whole top covered. You can make multiple passes over the same area giving it time to soak in.
- Then place about ¼ of the total amount of frosting on the cake layer and work it into a smooth layer to the edges of the round.
- Place your second layer, repeat the soaking and the frosting as list above. And again with a third layer if you're using one.
- If you find your frosting is getting a little soft, you can chill the whole cake and the remaining frosting in the refrigerator for about 30 minutes before proceeding.
- Use some of the remaining frosting to coat the sides of the cake, making a nice smooth layer.
- Then put the final bit of frosting into a piping bag and decorate the top. This is optional of course, you can always just go with the basic cake frosting top.
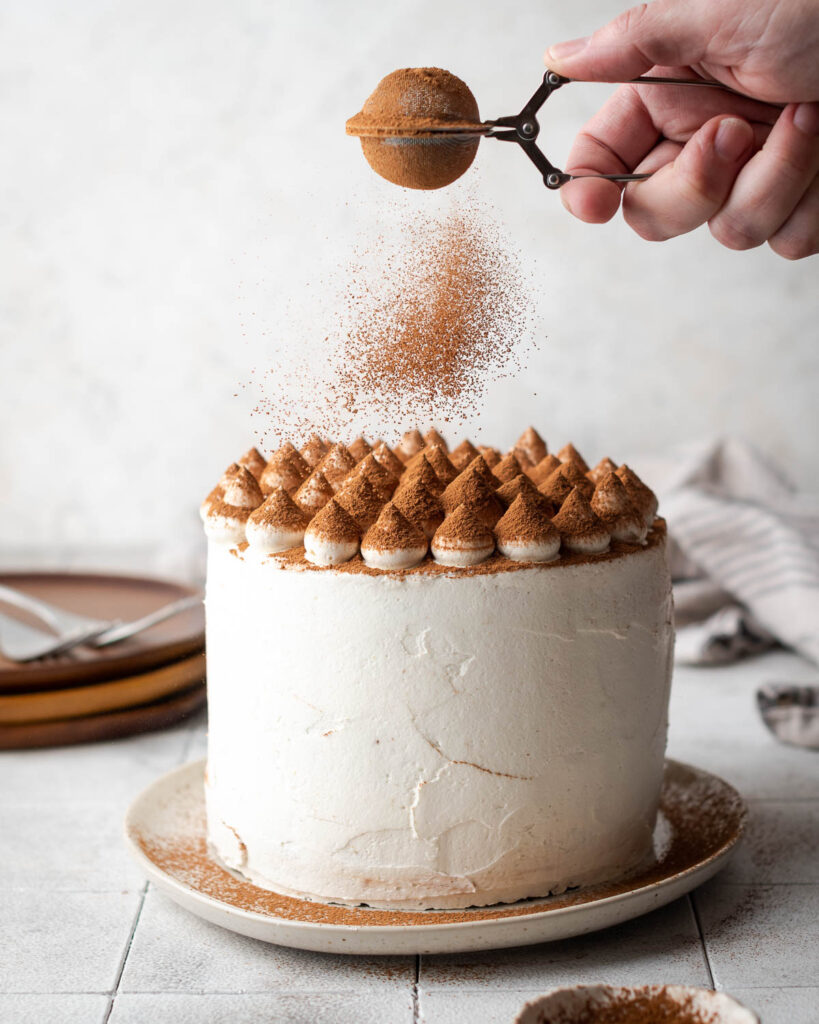
- Sprinkle the outside with cocoa powder and serve!

How to Store Gluten Free Tiramisu Cake
Keep leftover cake in an airtight container in the refrigerator for up to 3 days. I find the flavors of this cake actually improve over time and the moistness of the cake remains thanks to the coffee soak.
If you love hazelnuts, check out these great recipes!
If you try this recipe, please leave a 🌟🌟🌟🌟🌟 star rating and let me know how you liked it in the comments below.
Recipe
Gluten Free Tiramisu Cake
Ingredients
For the cake
- 1 ½ Cup Gluten Free 1-to-1 Flour Blend (222g) I use Bob's Red Mill
- ⅓ Cup Hazelnut Flour
- 2 teaspoon Baking Powder
- ½ teaspoon Salt
- ½ Cup Olive Oil
- 1 ¼ Cup Sugar
- 4 Eggs room temperature
- 1 teaspoon Vanilla
- ½ Cup Non-Dairy Milk room temperature
For the coffee syrup
- ½ Cup Water
- ½ Cup Sugar
- 1 Tablespoon Espresso Powder
For the frosting
- 8 ounces Vegan Cream Cheese cold
- ½ Cup Vegan butter cold and cut into cubes
- ¼ Cup Coconut Cream see note below
- 2 Cup Powdered Sugar sifted
- 2 Tablespoon Unsweetened Cocoa Powder for dusting the top of the cake
Instructions
For the cake
- Grease 3 x 6-inch cake rounds and then line with parchment paper. Set aside.
- Combine gluten free flour, hazelnut flour, baking powder and salt in a medium sized bowl. Whisk together.
- In the bowl of a stand mixer, combine oil and sugar. Beat on medium speed for 3 minutes. Scrape down bowl.
- Add the vanilla and beat for 60 seconds.
- Add the eggs, one at a time beating for about 60 seconds between each addition. Scrape down the bowl, ensuring all ingredients have been combined.
- Turn the mixer to the lowest speed. Add half of the flour mixture. Once it is nearly incorporated, add half of the milk. Repeat with the remaining flour and then the remaining milk.
- Give your bowl a scrape to make sure everything has been mixed in.
- Divide the batter between 3 x 6-inch cake rounds. Let batter rest while you preheat the oven.
- Preheat oven to 350 degrees.
- Once oven is preheated, bake the cake layers for 28-30 minutes, until they begin to pull away from the sides and the tops spring back when gently poked.
- Remove from oven and cool 15 minutes in the pan. Then turn out onto a wire rack to cool completely. If your cakes have domed on top, put the domed side down on the wire rack, they will flatten a little on their own while cooling.
For the coffee syrup
- While the cake is baking, prepare your coffee syrup. Combine the sugar and water in a small saucepan and place over medium high heat.
- Cook for about 5 minutes until the sugar is completely dissolved. Then stir in the espresso powder. Once dissolved, remove the syrup from the heat.
- Cool the syrup while the cake is cooling. Do not apply to the cake until both are completely cool or the cake will crumble.
For the frosting
- While your cake is cooling, prepare the frosting as follows
- Combine vegan butter, vegan cream cheese and coconut cream in the bowl of a stand mixer. Beat on medium speed until smooth, about 3 minutes. Scrape down the bowl.
- Add the sifted powdered sugar to the creamed butter mixture and mix on low until it's combined. Once all the dry ingredients have been incorporated, turn the mixer to high speed and beat for 5 minutes.
- Keep refrigerated until ready to assemble cake.
To assemble the cake
- Place a dab of frosting at the center of your cake plate to hold the cake in place. Then put the first layer of cake on top of it.
- Soak the cake with ⅓ cup of the coffee syrup, giving it time to soak in. You can cover the same area multiple times until your portion of syrup is used up.
- Add ⅓C of the frosting on top of the soaked cake layer. Spread the frosting to the edge of the round.
- Repeat the steps above for the 2nd and 3rd layers of the cake.
- If your frosting becomes too soft at any time or your cake begins to squish around, place both in the refrigerator for about 30 minutes before proceeding further.
- Use a portion of the remaining frosting to coat the sides of the cake. And then if you wish to decorate the top with dollops as shown in the photo, place the remaining frosting in a piping bag fitted with a 2A tip and create dollops by squeezing a larger blob of frosting and then pulling up to create a small pointy tip.
- Dust the top of the cake with cocoa powder.
- Serve immediately or store in the refrigerator.
Notes

Tiffany is the recipe developer, stylist and food photographer behind Well Fed Baker. As a lifelong baker who had to go gluten free and dairy free in 2016, Tiffany strives to share allergen friendly recipes that never feel like they are free from anything.
Alana says
How well do egg substitutions work with this cake??
I haven't tried this recipe with any egg substitutions. Since it calls for 4 eggs, it would be tricky to replace. My first try would be a combination of a baking soda+vinegar egg and some applesauce. I'd also suggest using soy milk as the non-dairy milk since it has the most protein.