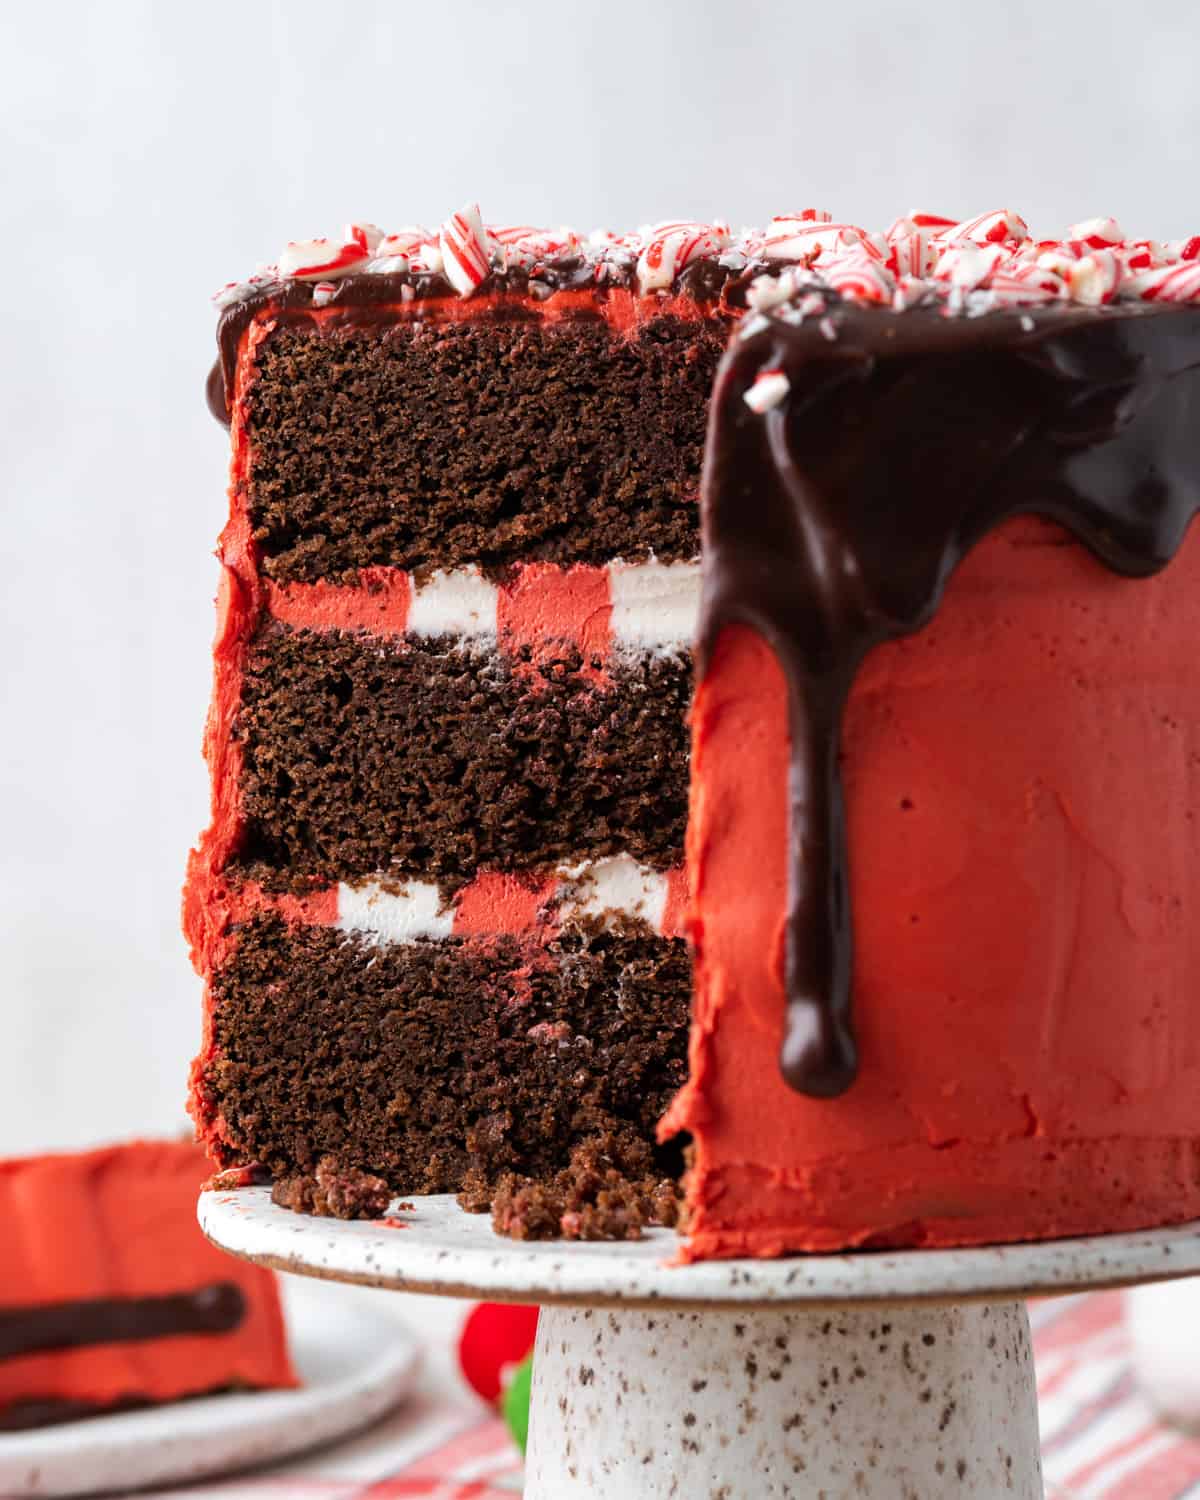
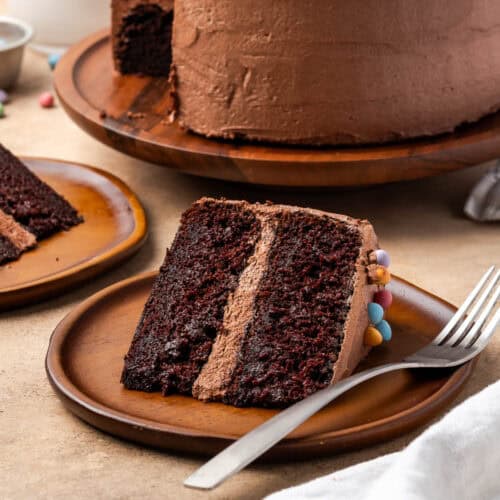
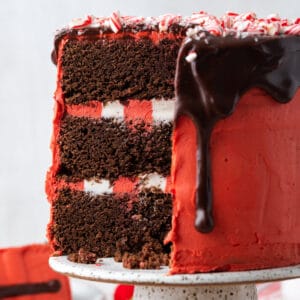
This delicious chocolate peppermint cake is the perfect dessert for your holiday gathering. It's a rich chocolate layer cake topped with creamy peppermint frosting, dark chocolate ganache and peppermint candy. The red and white stripe frosting will wow your friends and family and every bite tastes like Christmas!
Is there anything more perfect for the holiday season than chocolate and peppermint? It might be my favorite flavor combo for the holidays. I even add crushed candy canes to my hot chocolate. If you're the same, you're going to love this recipe!
If you're looking for more delicious cake ideas for your holiday table, check out my Italian cream cake or this amazing gluten free carrot cake.
Jump to:
Ingredient Notes
This peppermint chocolate cake recipe uses common ingredients, which should be available at most grocery stores.
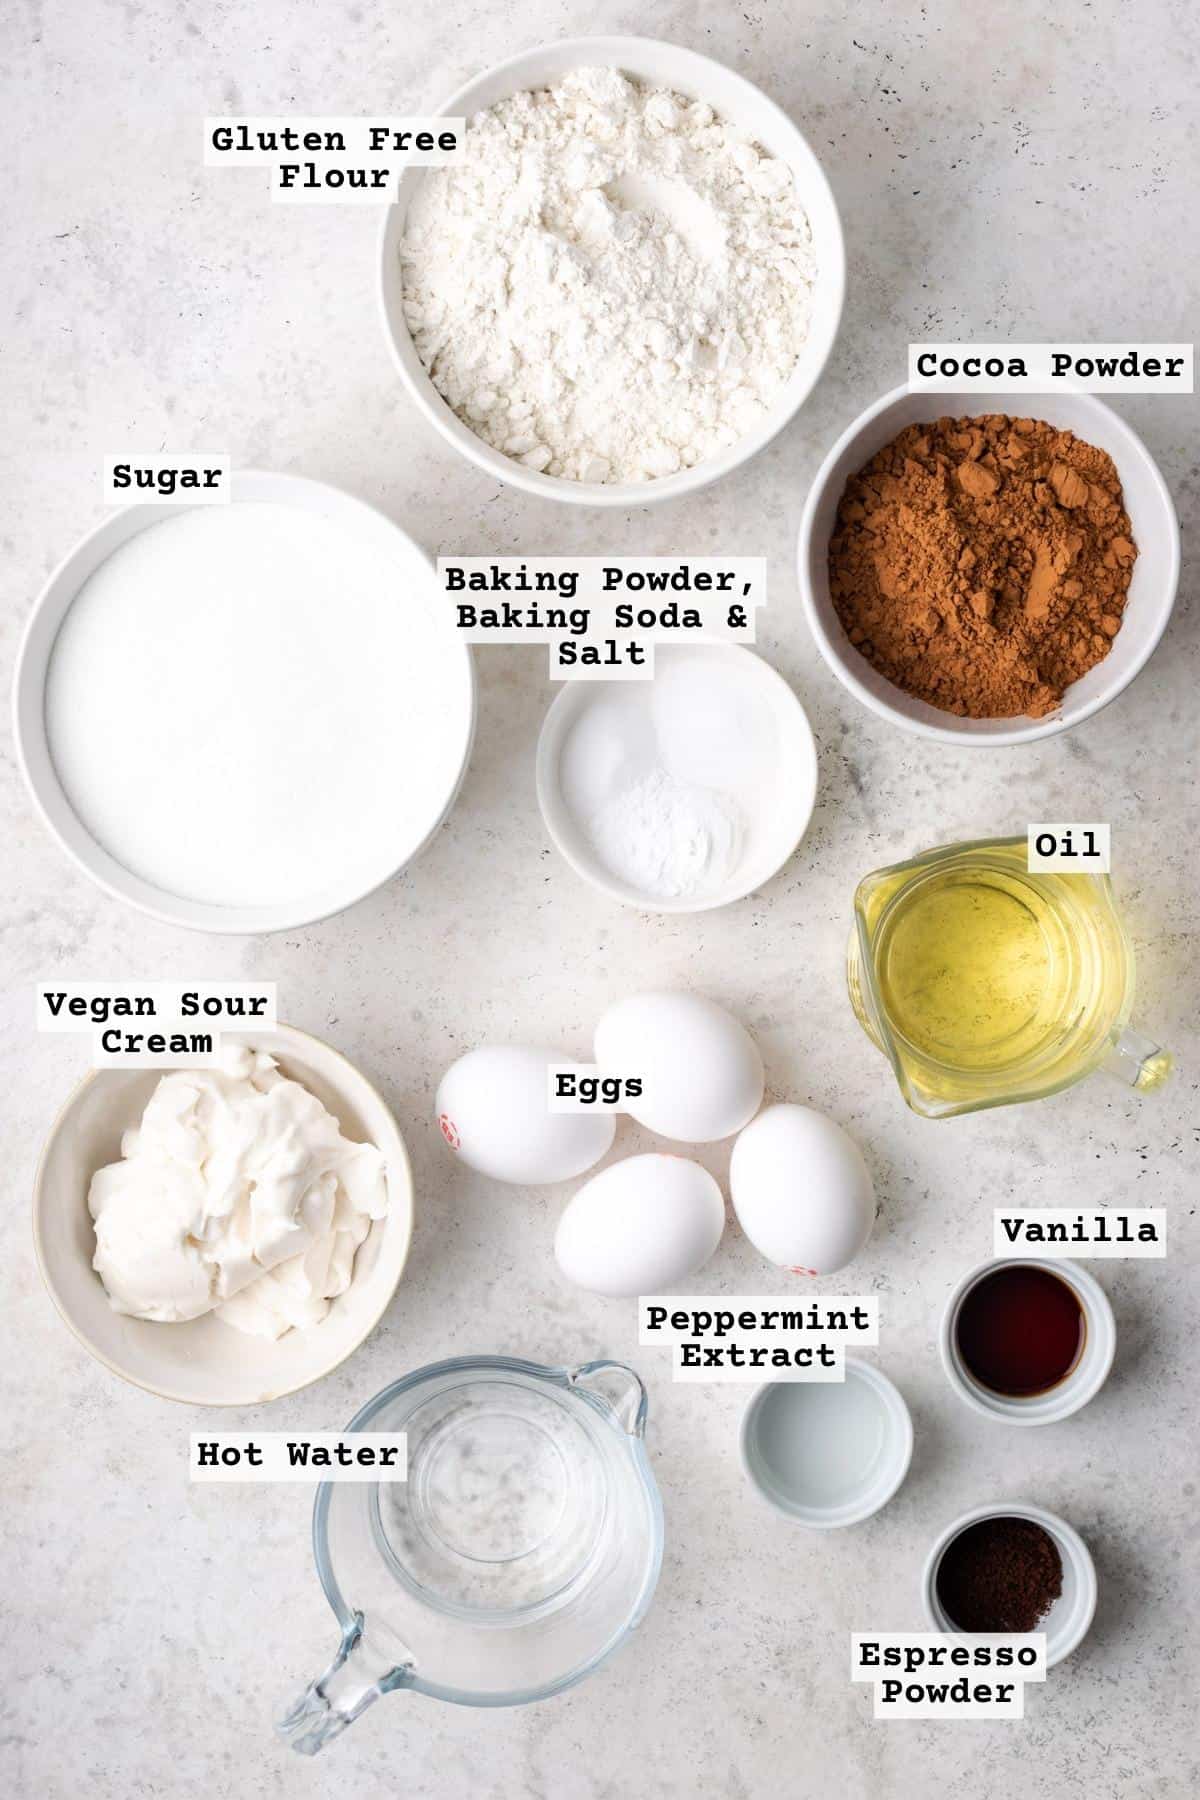
- Gluten-Free Flour Blend - I use Bob's Red Mill 1 to 1 gluten free flour in all of my recipes. You can use the brand of your choice, but ensure that it has xanthan gum or you will need to add it. If you use another brand of flour, your results may vary.
- Cocoa Powder - I normally use Hershey's Cocoa Powder, which is easily found in most stores and gluten free. If you use another brand, make sure it is not dutch process cocoa.
- Sugar - White sugar is used to sweeten this cake. If you prefer coconut sugar, you can substitute it in the same measure.
- Baking Soda & Baking Powder - I am using a combination of leavening agents to help the cake rise and remain soft.
- Salt - A tiny bit of salt is added to compliment the sweet flavors of this cake. Don't be tempted to skip it.
- Oil - I normally use olive oil, but any light flavor cooking oil will work. I've also made this cake with melted coconut oil and it was delicious. Don't be tempted to use butter as the cake needs the oil to work.
- Eggs - Since this cake requires four eggs, I don't recommend an egg replacer here. If you need a vegan or egg free cake, you can find many chocolate cake recipes online and use the frosting and decorating tips in this post.
- Vegan Sour Cream - I like Forager brand or Follow Your Heart brands of vegan sour cream. At my stores, they are usually found in the produce section rather than the dairy aisle. If you're not dairy free, feel free to use dairy sour cream in the same measure.
- Hot Water - Hot water helps to activate the cocoa powder to create a rich chocolate flavor.
- Vanilla Extract & Peppermint Extract - For that Christmas flavor, make sure you're using peppermint extract, which tastes like candy canes. Mint extract is typically more of a spearmint flavor, like gum.
- Espresso Powder - Coffee helps bring out the chocolate flavor. I promise the cake won't taste like coffee. If you don't have espresso powder, you can use 1 cup of hot brewed coffee in place of the water & espresso in the recipe.
For the peppermint buttercream frosting, chocolate ganache and decorations you will need powdered sugar, vegan butter, allergen friendly chocolate chips, non-dairy heavy cream, corn syrup and candy canes or peppermint candies.
See recipe card for complete ingredient list with quantities.
Substitutions & Variations
- Not Dairy Free - Use dairy sour cream, butter and heavy cream in place of the vegan ingredients.
How to Make a Chocolate Peppermint Cake
This moist chocolate cake is very easy to make and doesn't even require a mixer. It's a fudge-y chocolate cake thanks to the addition of sour cream.

STEP 1: Sift together the gluten free flour, cocoa powder, baking powder, baking soda and salt.
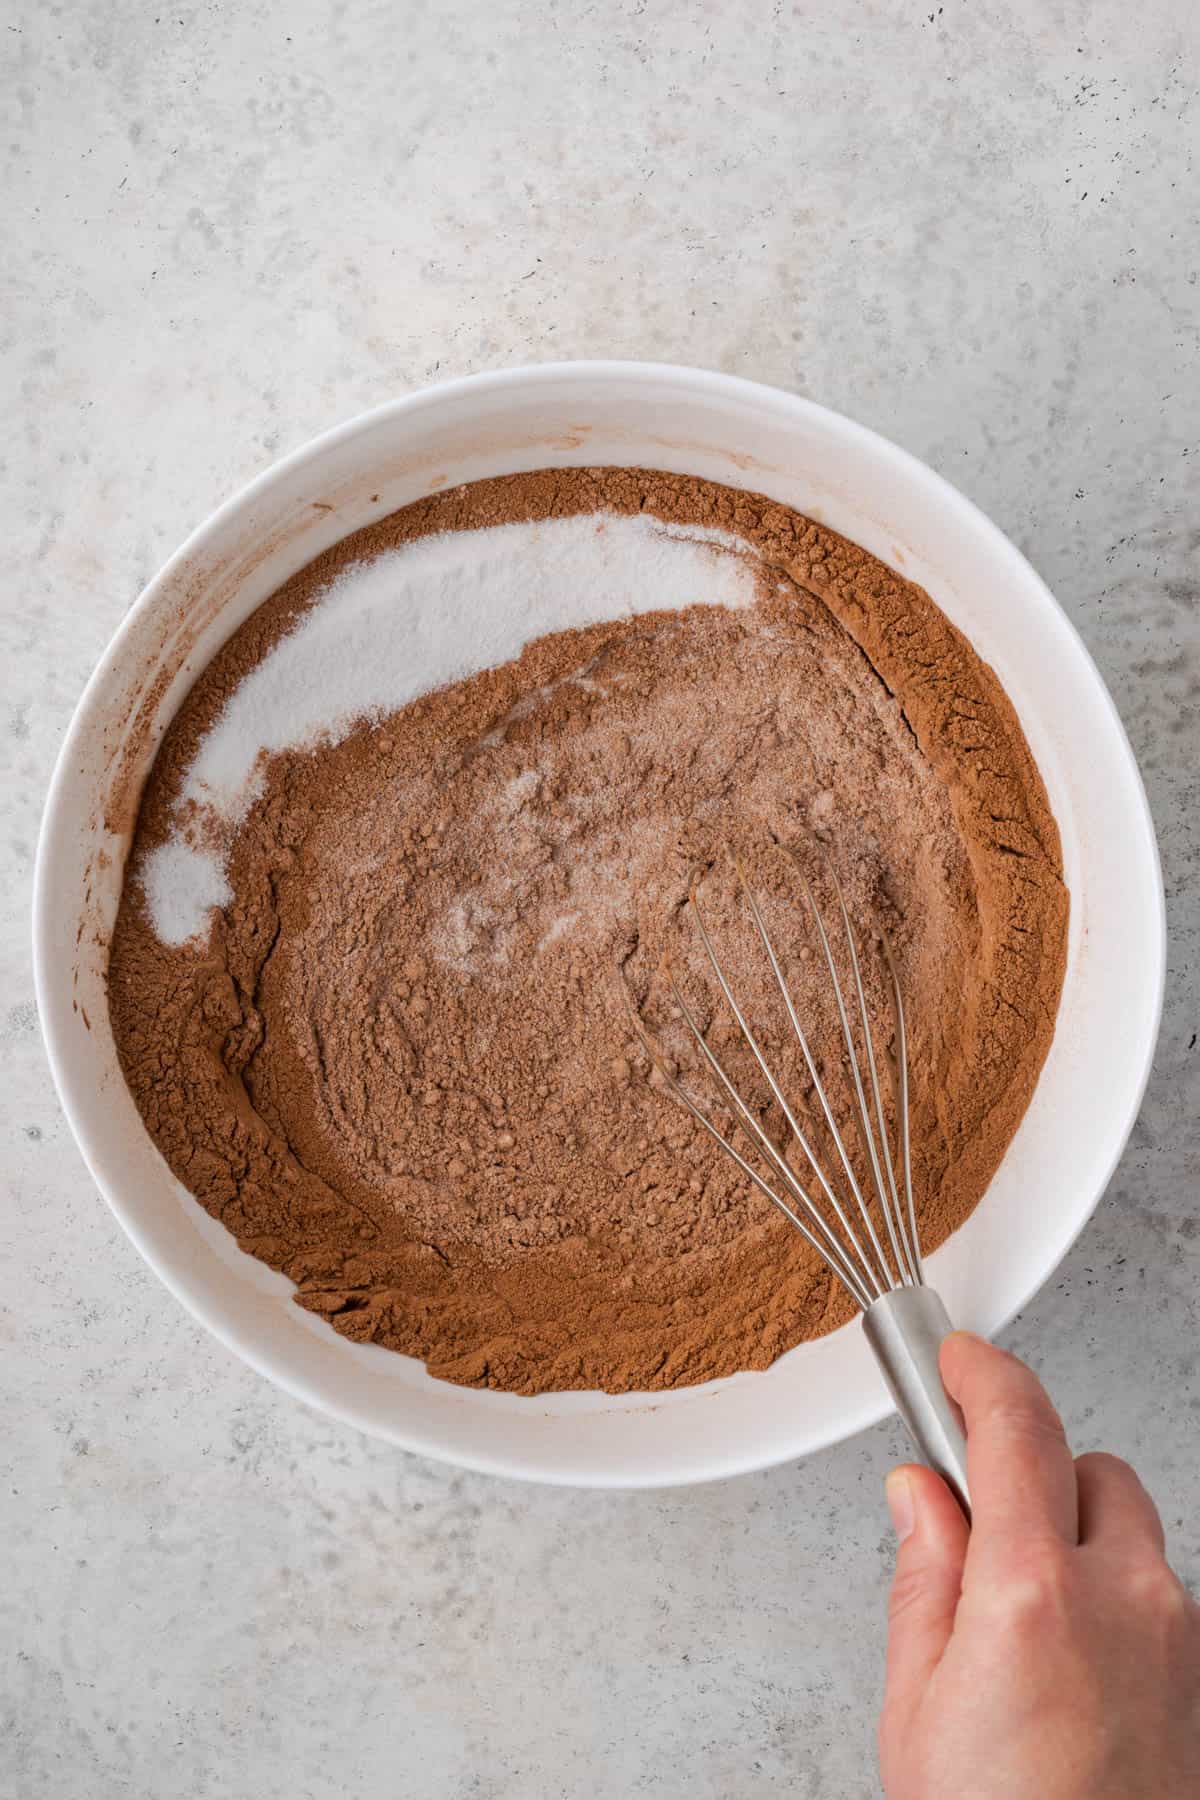
STEP 2: Add the sugar and espresso powder to the cocoa powder mixture and whisk it together until well combined.
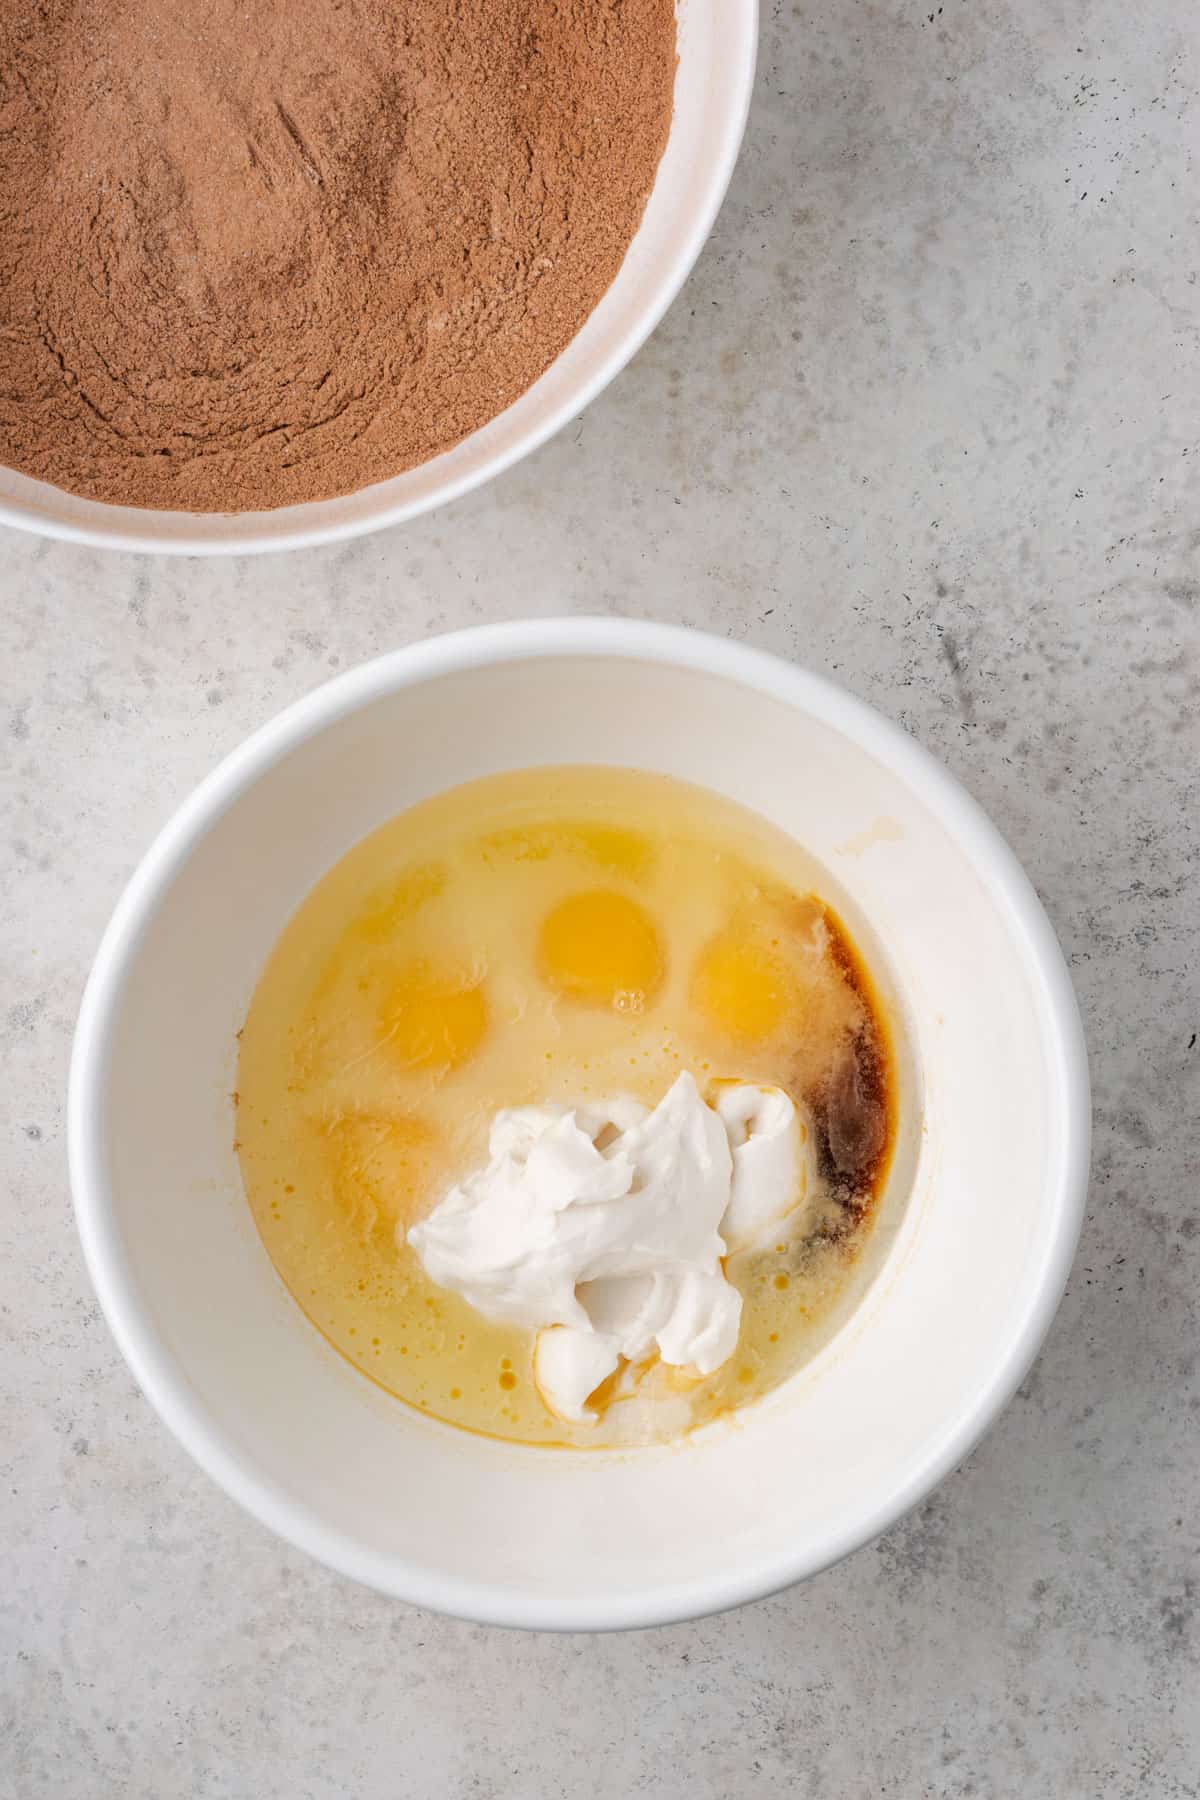
STEP 3: Add the oil, eggs, sour cream, vanilla and peppermint extract to a large bowl. Whisk until smooth.
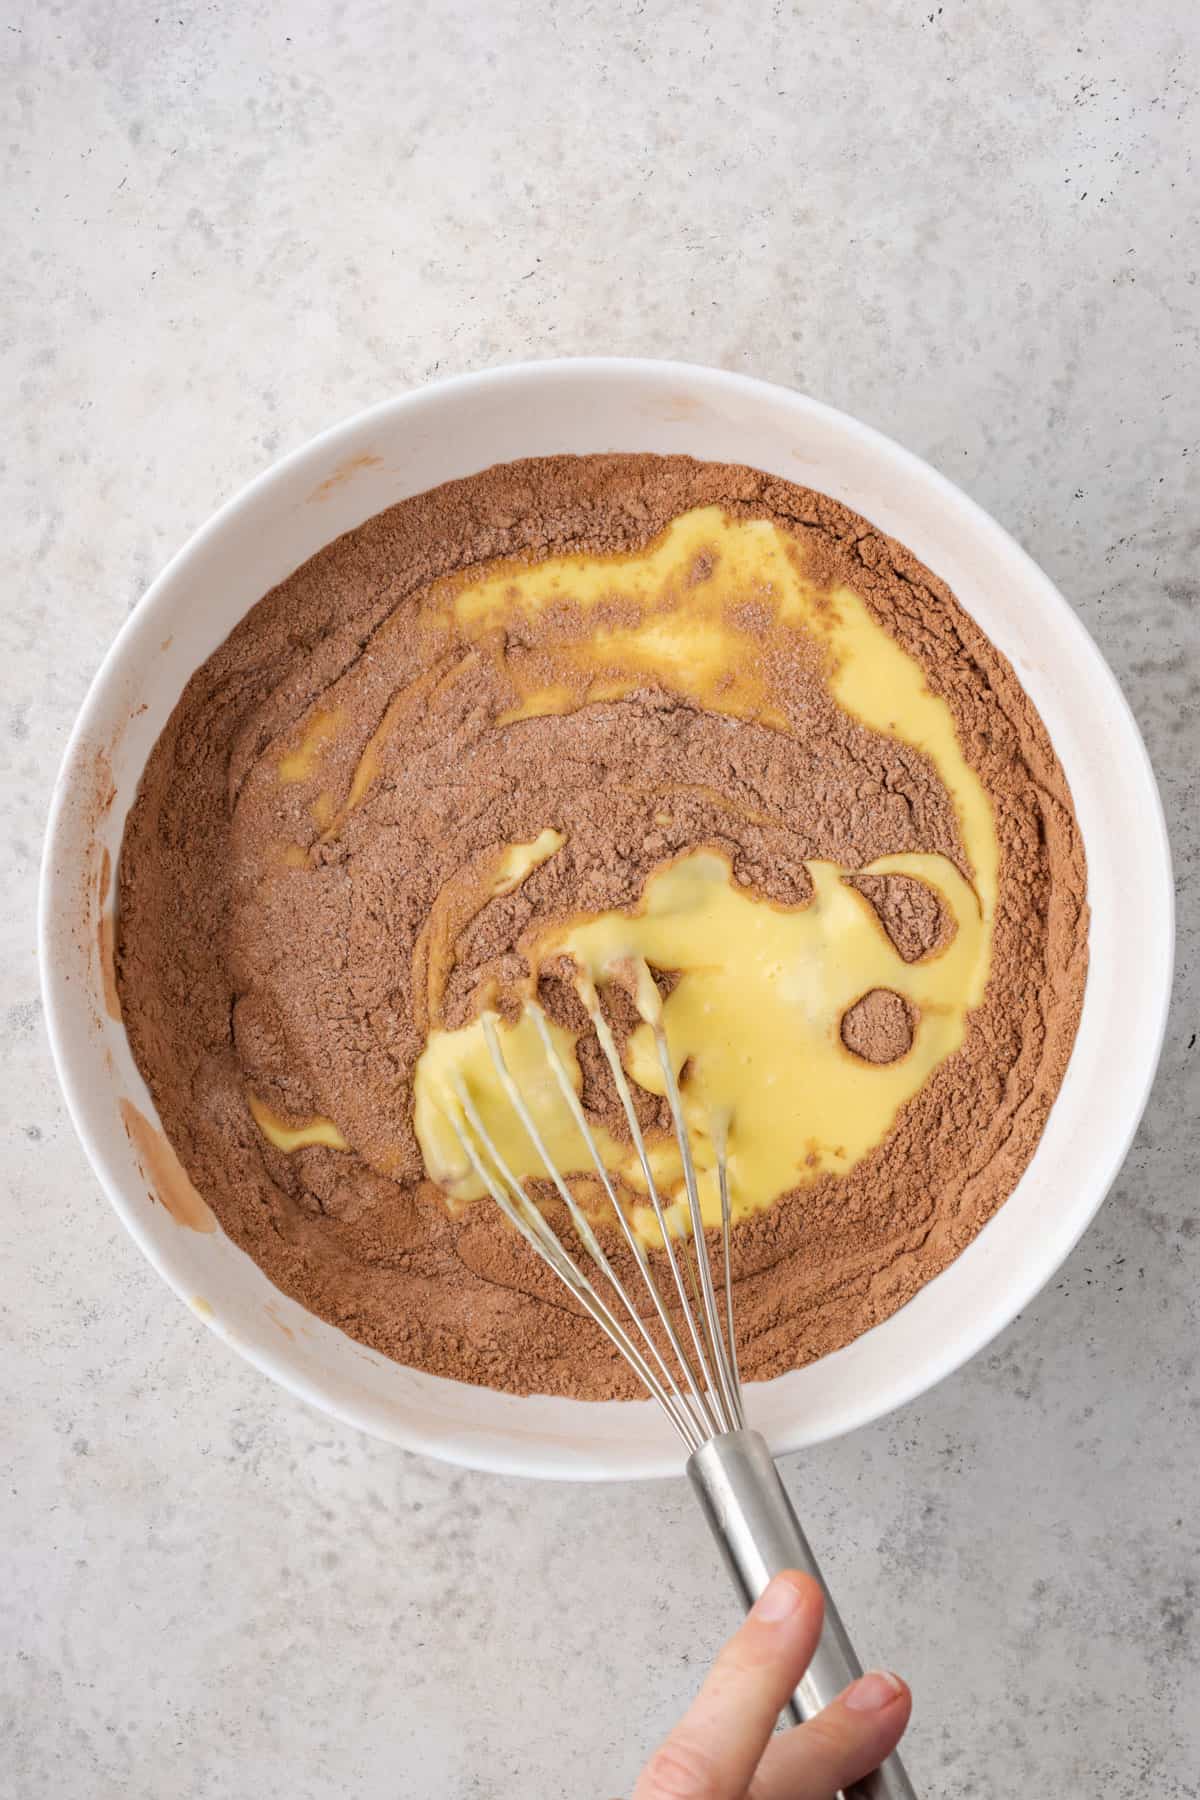
STEP 4: Pour the wet ingredients into the dry and begin to whisk together. It will be very thick, you only need to partially mix it.

STEP 5: Pour the hot water over the partially mixed cake batter.

STEP 6: Fold the batter together until it is all mixed. It will be a thick cake batter.
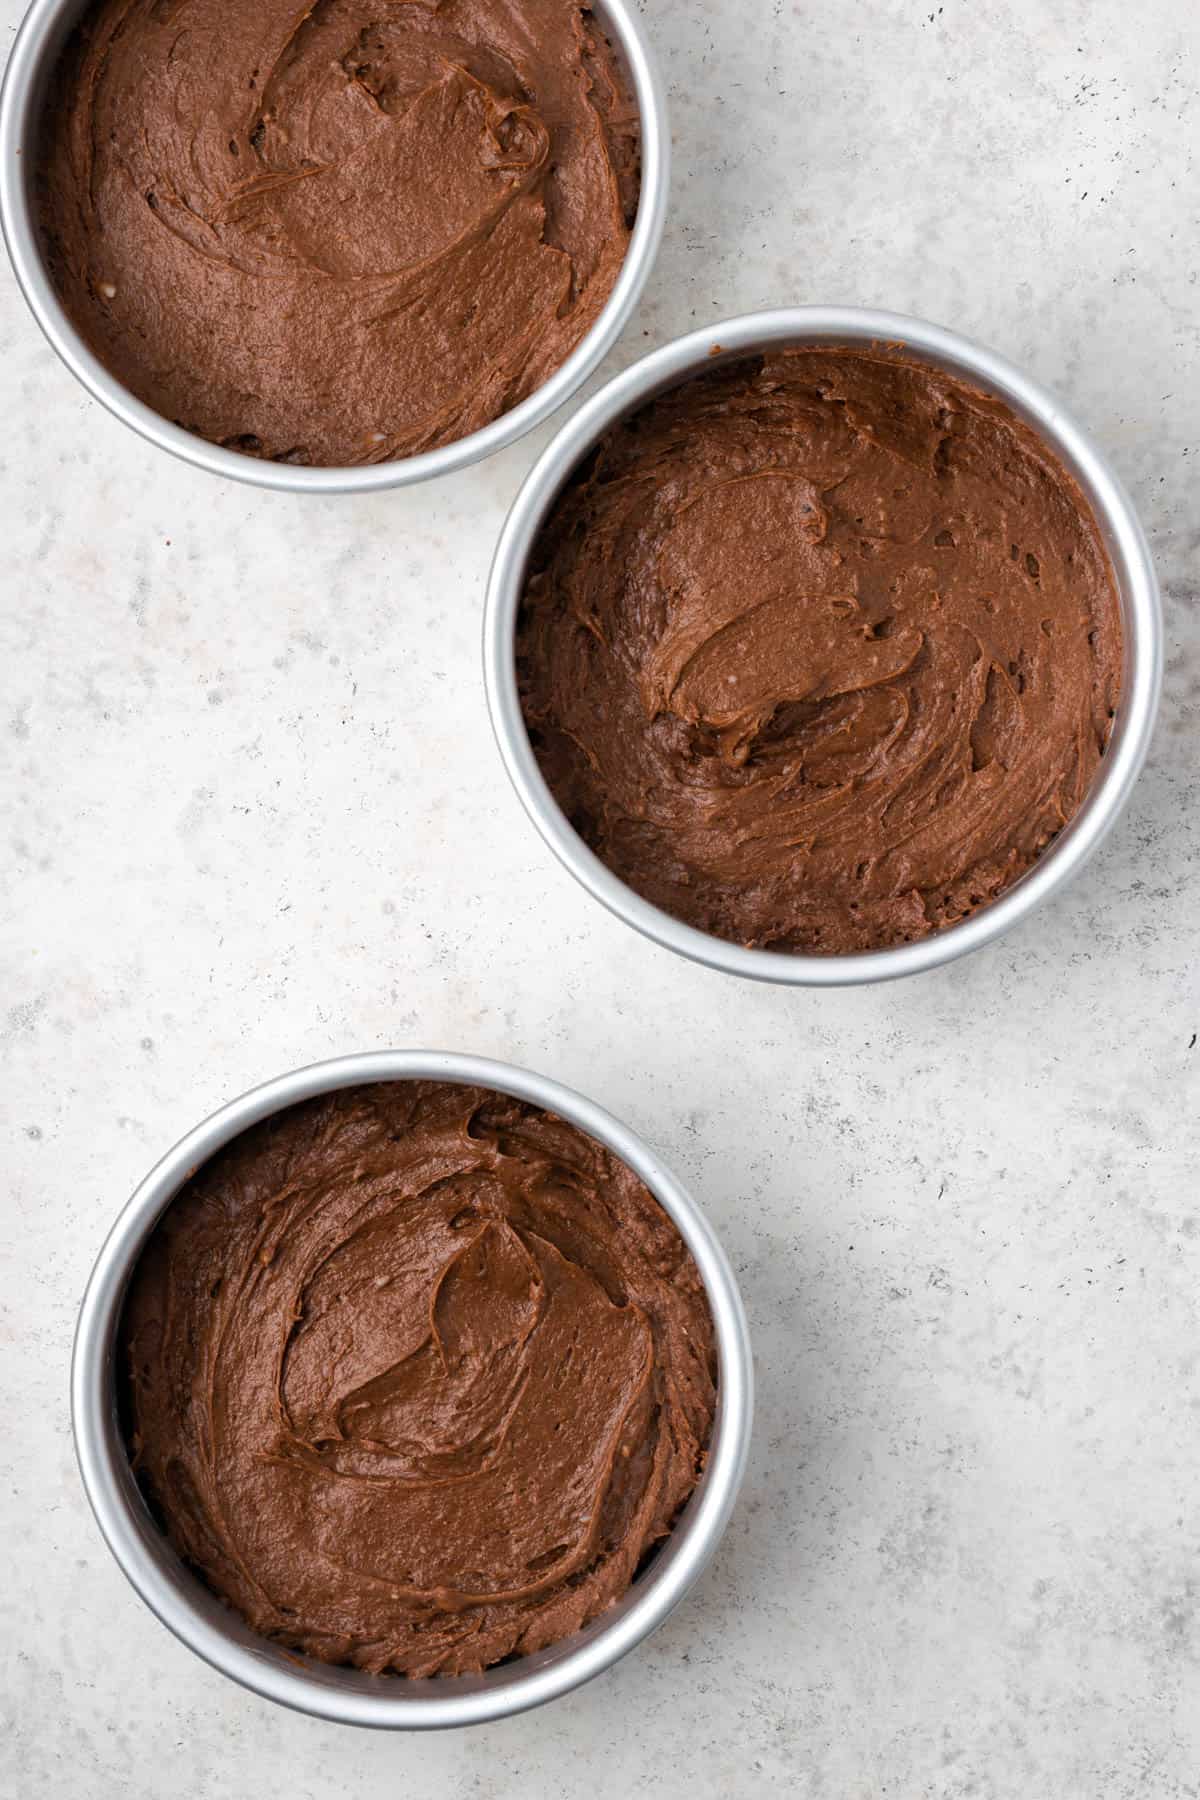
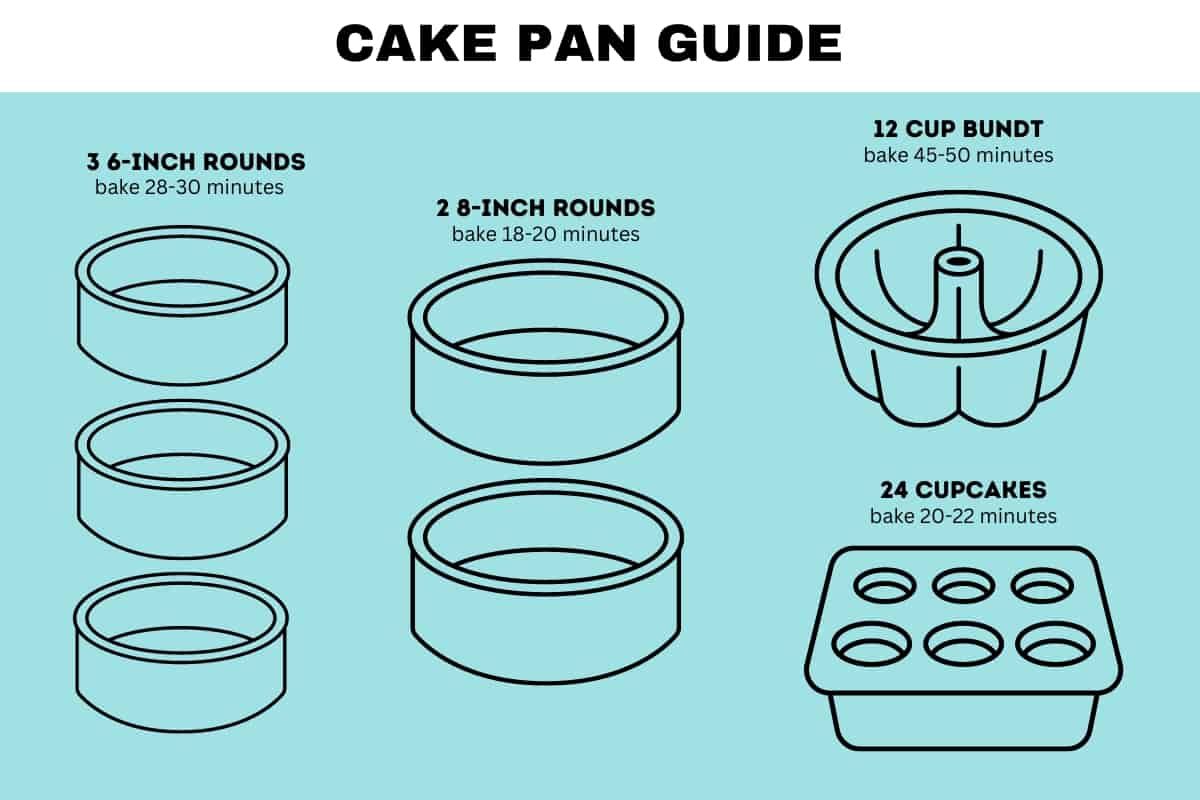
Divide the batter into your cake pans. This cake pan guide shows you how you can prepare this recipe:
How to Make Candy Cane Frosting Stripes
The red and white stripes in the frosting look impressive but are actually very easy to achieve. Once you've mixed up the peppermint buttercream frosting, remove ¼ of the white frosting and place it in a piping bag. If you don't have a piping bag, use a ziploc bag with the corner cut off.
Use gel food coloring to color the remaining frosting red. Place a similar amount of red frosting in a second piping bag. Put down the first layer of cake, then create circles beginning with the red on the outside edge of the cake. It should look like a bulls eye when you're done. Repeat with the remaining cake layers.
Use the remaining red frosting to cover the outside of the cake.

Storage
Store the leftover cake in an airtight container at room temperature for up to 3 days. You can get an extra day of storage if you keep the cake refrigerated, but you will want to bring it to room temperature before serving.
This cake will freeze well. But do not add the crushed candy canes if you plan to freeze it. Either freeze the entire uncut cake or individual slices. Make sure the cake is well wrapped in plastic wrap and stored in an airtight freezer container. Freeze for up to 3 months. Bring cake to room temperature before serving.

Recipe FAQs
Oil is the key to a moist cake. It allows the batter to emulsify which in turn allows it to hold more moisture. In this chocolate cake, I've also used sour cream which increases the fat content making the overall feel richer and more moist.
Most candy canes do not contain gluten ingredients, but many brands are produced in shared facilities. My favorite gluten free brand is Spangler. There are several other brands that are made in dedicated gf facilities, so just check your packaging for details.
More great gluten free cakes:

If you try this recipe, please leave a 🌟🌟🌟🌟🌟 star rating and let me know how you liked it in the comments below.
Recipe
Chocolate Peppermint Cake
Ingredients
For the cake
- 1 ¾ Cup Gluten Free 1-to-1 Flour Blend
- ¾ Cup Unsweetened Cocoa Powder
- 1 ¾ Cup Sugar
- ½ teaspoon Baking Soda
- 1 ½ teaspoon Baking Powder
- 1 teaspoon Salt
- 1 teaspoon Espresso Powder
- ¾ Cup Oil
- 4 Eggs
- ¾ Cup Vegan Sour Cream
- 2 teaspoon Vanilla
- 1 teaspoon Peppermint Extract
- ⅓ Cup Hot Water
For the frosting
- ¾ Cup Vegan Butter
- 3 Cups Powdered Sugar sifted
- 1 Tablespoon Non Dairy Milk
- 1 teaspoon Vanilla
- ½ teaspoon Peppermint Extract
- 8 drops Red Gel Food Coloring
For the ganache
- ½ Cup Allergen Free Chocolate Chips
- ¼ Cup Plant Based Cream
- 1 Tablespoon Light Corn Syrup optional
- Candy Canes for decoration
Instructions
For the cake
- Preheat the oven to 350 degrees. Prepare your cake pans by greasing them and lining with a circle of parchment paper. Use 3 x 6-inch pans, 2 x 8-inch pans, 1 x 9x13 pan, or 24 cupcakes.
- Sift the cocoa powder, flour, baking powder, baking soda, salt and espresso powder into a large bowl.1 ¾ Cup Gluten Free 1-to-1 Flour Blend, ¾ Cup Unsweetened Cocoa Powder, ½ teaspoon Baking Soda, 1 ½ teaspoon Baking Powder, 1 teaspoon Salt, 1 teaspoon Espresso Powder
- Add the sugar to the cocoa powder and whisk together until combined.1 ¾ Cup Sugar
- In a second bowl, add the oil, eggs, vegan sour cream, vanilla and peppermint extract. Whisk until smooth, it will be thick.¾ Cup Oil, 4 Eggs, ¾ Cup Vegan Sour Cream, 2 teaspoon Vanilla, 1 teaspoon Peppermint Extract
- Pour the wet ingredients into the dry and begin to mix together. Pour the hot water over the mixture and continue to fold until all of the dry ingredients are incorporated. It will be a stiff mixture, like the consistency of frosting.⅓ Cup Hot Water
- Divide the batter evenly between your cake pans.
- Bake in the preheated oven for 28-30 minutes for 6-inch rounds. For cupcakes reduce the time to 20-22 minutes. Cake will be done when the center springs back when gently poked.
- Remove from oven and cool in the pan for 15 minutes. Then turn out onto a cooling rack and cool completely before frosting.
For the frosting
- Cut the vegan butter into cubes and place it into the bowl of an electric mixer. Beat on medium speed until the butter is soft and smooth. Scrape down the bowl.¾ Cup Vegan Butter
- Add the sifted powdered sugar and beat on the lowest speed until it is incorporated. It will look like thick paste.3 Cups Powdered Sugar
- Add the vanilla, peppermint extract and milk. Beat on medium-low speed until the milk is incorporated. Then turn the mixer to high speed and beat for about 4-5 minutes until it is light in color and has increase in volume.1 Tablespoon Non Dairy Milk, 1 teaspoon Vanilla, ½ teaspoon Peppermint Extract
- Use a spatula to spread the buttercream in the bowl repeatedly to remove air bubbles.
- Divide out ¼ of the white buttercream and place it into a piping bag.
- Add about 8 drops of super red gel food coloring to the remaining buttercream and mix until the color is even with no white streaks remaining.8 drops Red Gel Food Coloring
- Place an equal amount of red frosting into a second piping bag.
- Place one layer of cake on your plate with the flat side up. Beginning with the red frosting, pipe a circle around the outer edge of the cake. Then pipe a circle of white frosting inside. Repeat until the cake layer is covered with frosting, resembling a bullseye. If there are small gaps between the colors, its OK because they will press together when the cake is assembled.
- Repeat with the second layer of cake.
- Place the final cake layer on top and chill the cake for 15 minutes in the refrigerator.
- Remove the chilled cake. Using about ½ of the remaining red icing, apply a crumb coat to the cake. Make the frosting as smooth as possible. Refrigerate the cake for another 15 minutes until the frosting is set.
- Apply the remaining frosting to the outside of the cake, making the outside as smooth as possible. Refrigerator the cake for another 15 minutes to set the frosting.
For the ganache
- Add the chocolate chips to a heat proof bowl.½ Cup Allergen Free Chocolate Chips
- Heat the heavy cream in a microwave safe container for about 30 seconds.¼ Cup Plant Based Cream
- Pour the hot cream over the chocolate chips and let them sit for about 5 minutes. Add the corn syrup, if using, and whisk until smooth.1 Tablespoon Light Corn Syrup
- Pour the ganache slowly over the top of the cake and use an offset spatula to spread it to the edge to allow it to drip down the sides.
- Sprinkle the top with crushed peppermint candies.Candy Canes
Notes

Tiffany is the recipe developer, stylist and food photographer behind Well Fed Baker. As a lifelong baker who had to go gluten free and dairy free in 2016, Tiffany strives to share allergen friendly recipes that never feel like they are free from anything.
Barbara says
Can this be made with regular flour?
I've never made it with all purpose flour, but if you want to try I would increase the flour to 2 cups.