Every year, one of our favorite holiday traditions is making homemade gingerbread houses. We do it every Christmas (and have made them for Valentine's Day and Halloween, too) with family and friends and it is a great time! Since this is a long-standing tradition in our house, about 7 years ago I worked out the perfect gluten free gingerbread house recipe to make construction grade dough. This is the recipe I use every single year and although it seems unusual when you're preparing it, it bakes up perfectly flat and hard and it assembles beautifully.
I live in the same town as the National Gingerbread House competition, so naturally I started competing around 20 years ago. The first year I entered on a whim just two weeks before the deadline. After seeing the winning entries, I knew it was going to take a lot more than 2 weeks to create an entry worthy of this competition. The second year, I spent eight months working on my house. Yes, my house smelled like Christmas for basically the entire year.
After all those months of work, I realized making beautifully crafted gingerbread houses was not nearly as much fun as sitting around the table with my family, a truckload of candy and Christmas music on the radio making holiday memories. I hope your family enjoys it as much as we do! Happy holidays!

Why You 'll Love This Recipe
- ALLERGEN FREE - This house recipe is gluten free, dairy free, vegan (with a substitution for the icing) and free of peanuts and tree nuts so it's great for those with food allergies. Note: It does contain corn syrup, so not suitable for corn allergy.
- CONSTRUCTION GRADE - I have tons of experience building stable houses. While everything in this recipe is edible, it is not meant for eating. These house pieces come out hard and flat. They smell good, but the taste is not like a delicious cookie, so build with it don't eat it!
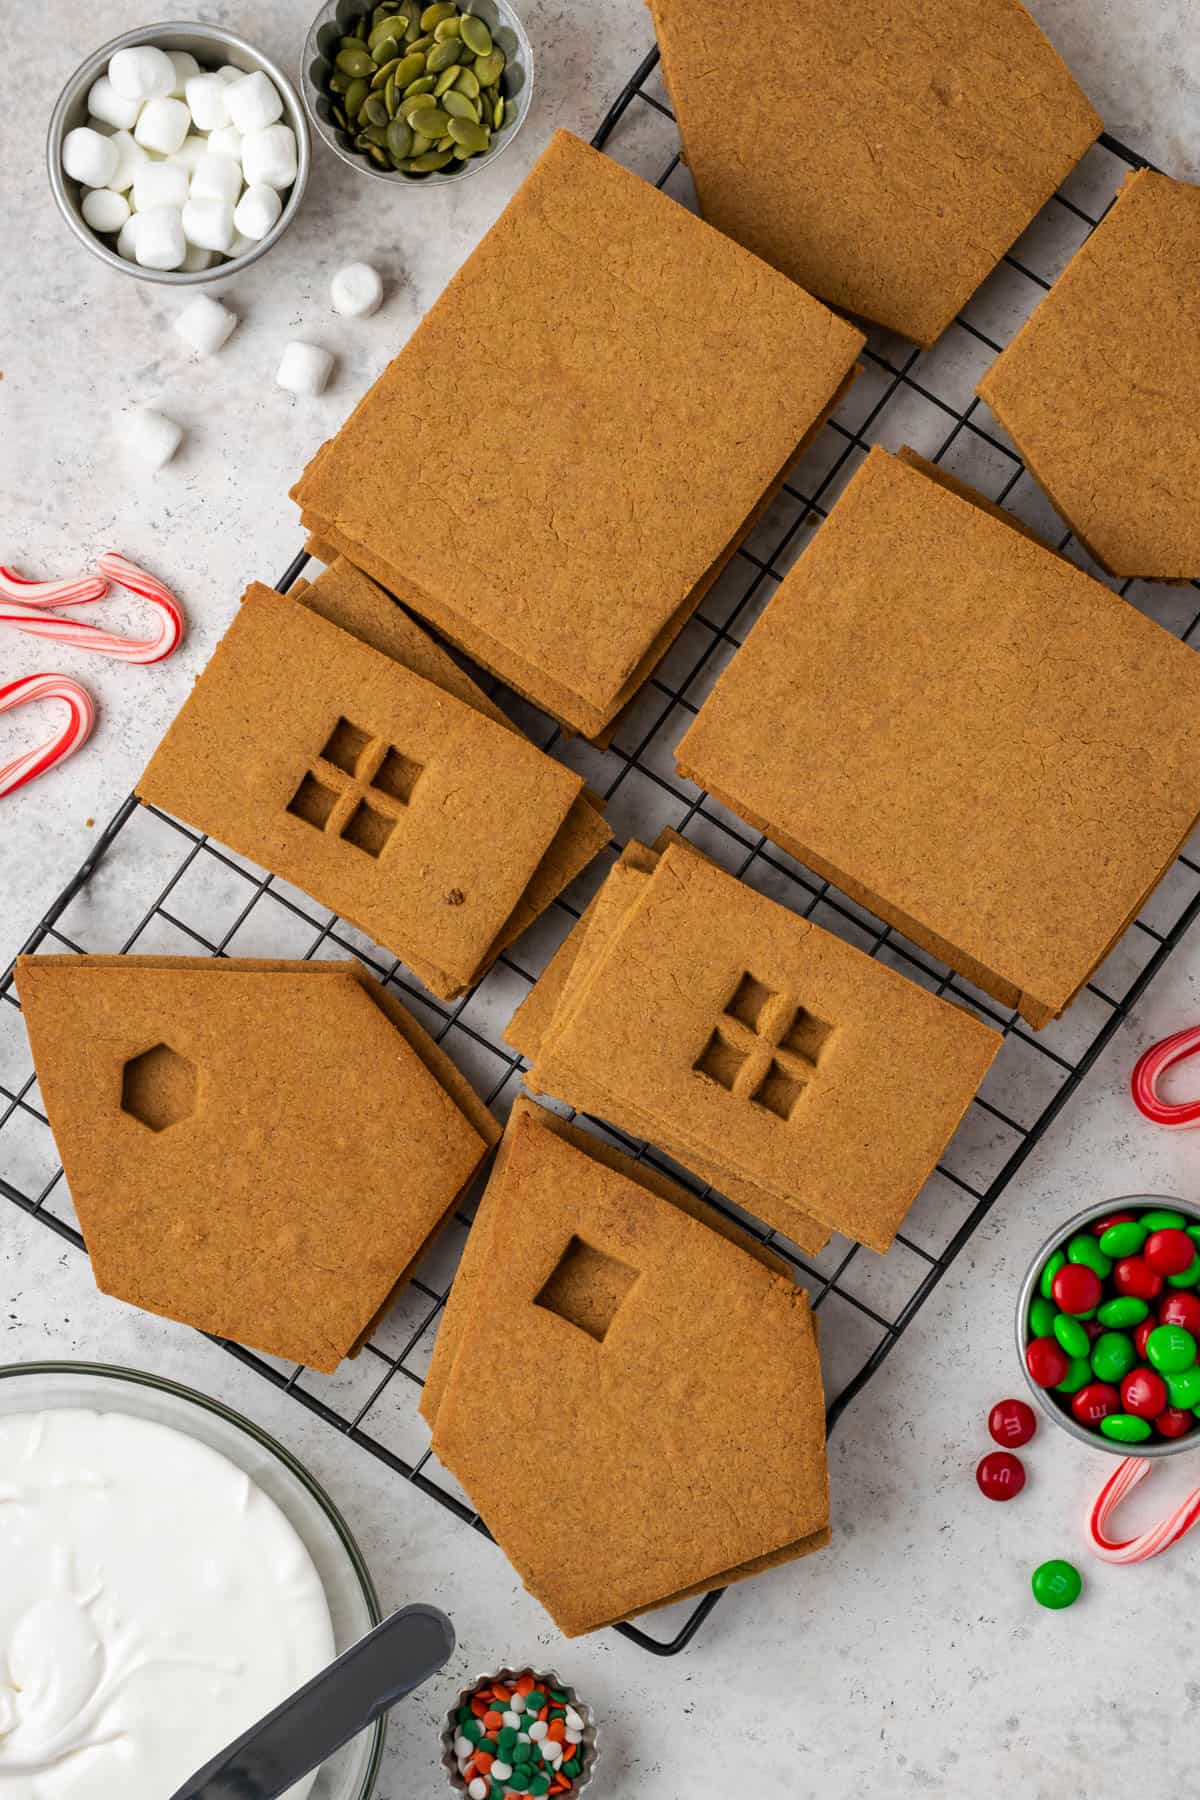
- HOUSE PLANS INCLUDED - Grab a copy of my free printable gingerbread house template. This recipe will make enough dough for at least 4 small houses using my plan, possibly five if you use every scrap of dough. I find this house size is just big enough to provide a couple of hours of entertainment without making it so large that kids get bored with the activity. With 5 houses you can make your own village of tiny gingerbread houses. 🙂
- COST EFFECTIVE - Have you seen the price of gluten-free gingerbread house kits? If you have a house full of kids or want to host a party, it is just not affordable for most people. This house & icing recipe will cost around $25 for 4-5 small houses (does not include cost of candy) - so the cost is about $6 per house which is very affordable. Even most wheat based gingerbread house kits cost more than $6.
Ingredient Notes
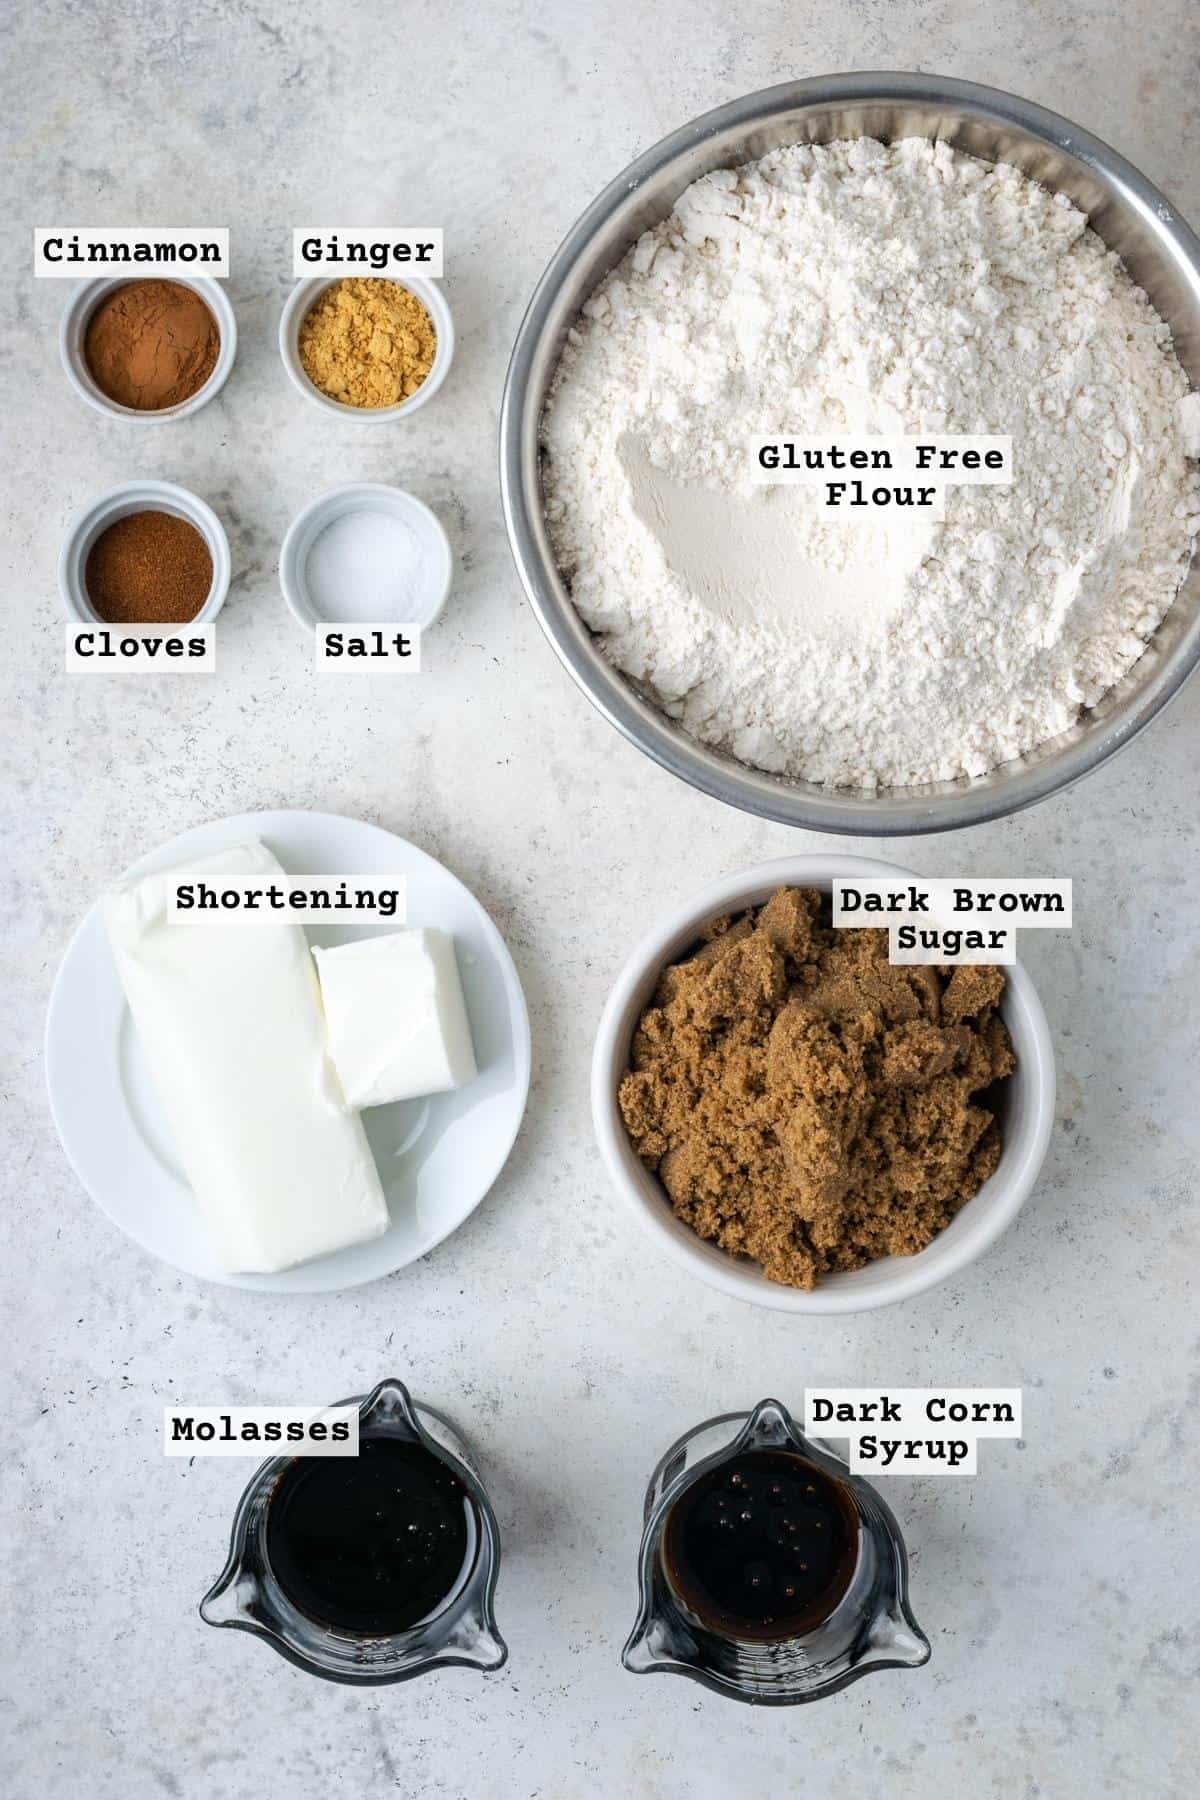
- Gluten Free Flour Blend - I used Bob's Red Mill 1-to1 flour for this recipe. You can use the gluten free flour blend you prefer, but ensure it contains xanthan gum or a similar binder. Using another brand of flour may result in a different outcome in your bake as all gluten free flour blends are a little different in their makeup.
- Cinnamon, Ginger and Cloves - All of these spices combine with molasses to make the traditional ginger bread smell. If you want a more cost effective solution, you can omit the spices entirely since this recipe isn't going to be eaten.
- Salt
- Shortening - While gingerbread cookies are typically made with butter, I've opted for vegetable shortening which is cheaper, dairy free and less prone to spreading in the oven.
- Dark Brown Sugar - Adds to the molasses smell and color of the house.
- Molasses - Provides the expected gingerbread smell along with the brown coloring. If you don't have molasses you can replace the full amount with dark corn syrup.
- Dark Corn Syrup - Adding corn syrup to this recipe is what makes it harden up nicely during baking. The only suitable replacements would be light corn syrup, brown rice syrup or golden syrup.
- Water - Added as needed to bring the dough together.
For the icing you will need powdered sugar, egg whites (or aquafaba) and cream of tartar.
See recipe card for full ingredient list and quantities.
Substitutions & Variations
- No Molasses - Replace with an equal measure of dark corn syrup.
- Make it Corn Free - Use brown rice syrup in place of the corn syrup.
- Make it Vegan - The house is dairy free & vegan as written. To make the royal icing vegan, replace the egg whites with aquafaba.
- Make a white house - replace the molasses and corn syrup with light corn syrup. Omit the spices. It will resemble a sugar cookie when baked.
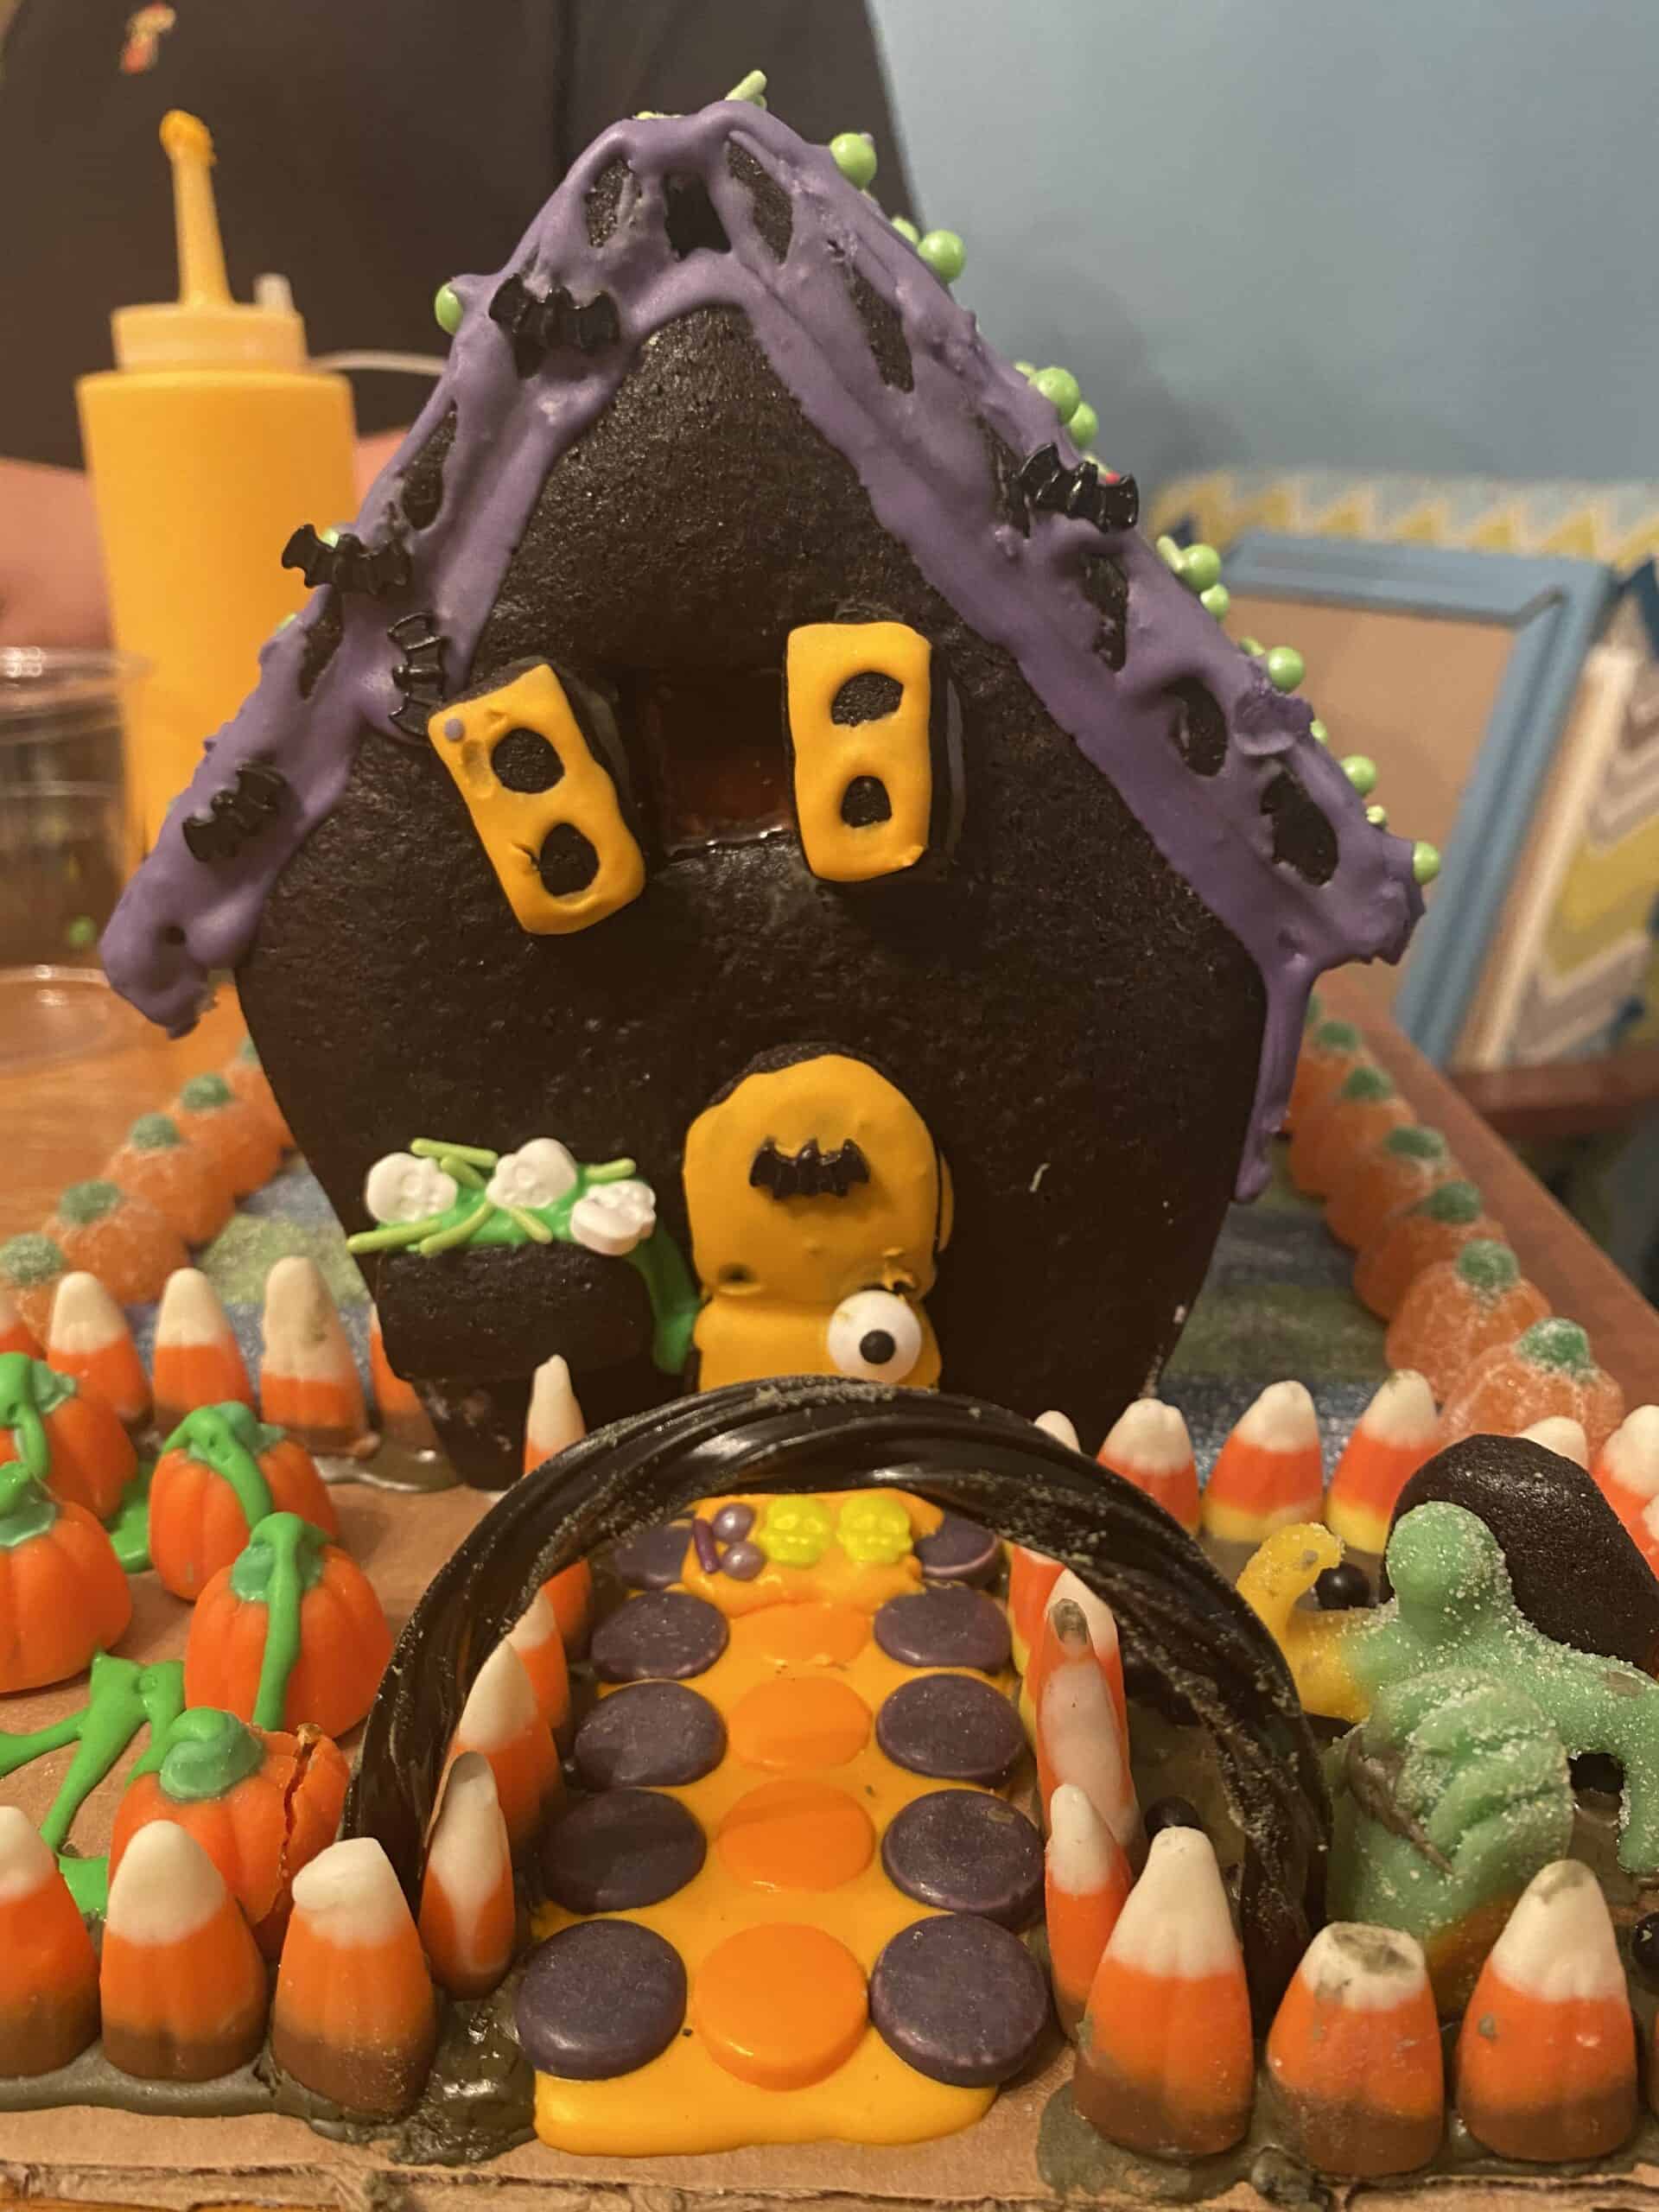
- Make a halloween house - similarly, you can replace 1 cup of the flour with black cocoa powder to create a black dough for a haunted gingerbread house.
How to make a Gluten-Free Gingerbread House
A stand mixer is a must for this recipe. If you don't own a stand mixer, I'd recommend doing only half the recipe at a time and trying to knead it on the table to mix it once the dough becomes thick. Line your baking sheets with a piece of parchment paper before beginning.
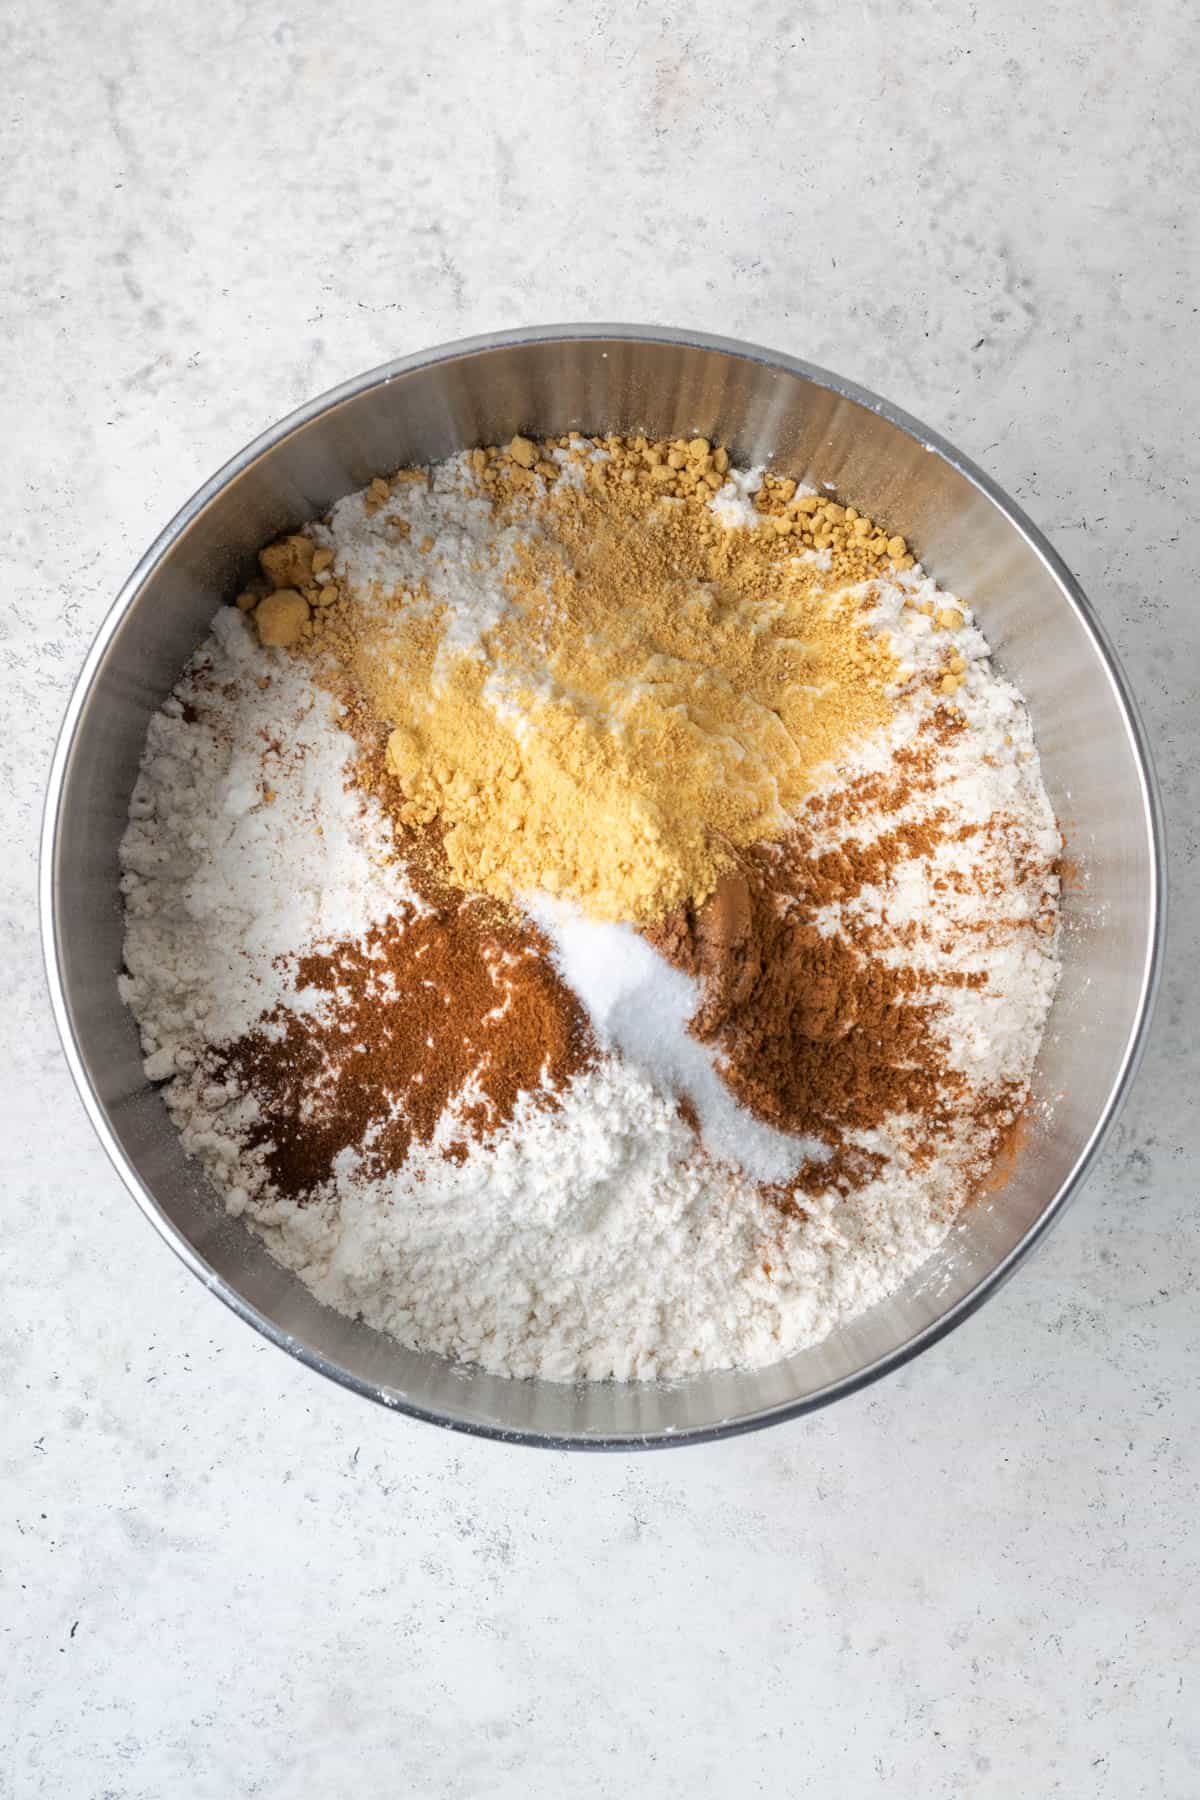
STEP 1: Combine the gluten free flour, cinnamon, ginger, cloves and salt in the bowl of your mixer. Use the paddle attachment to stir everything until it's well combined.
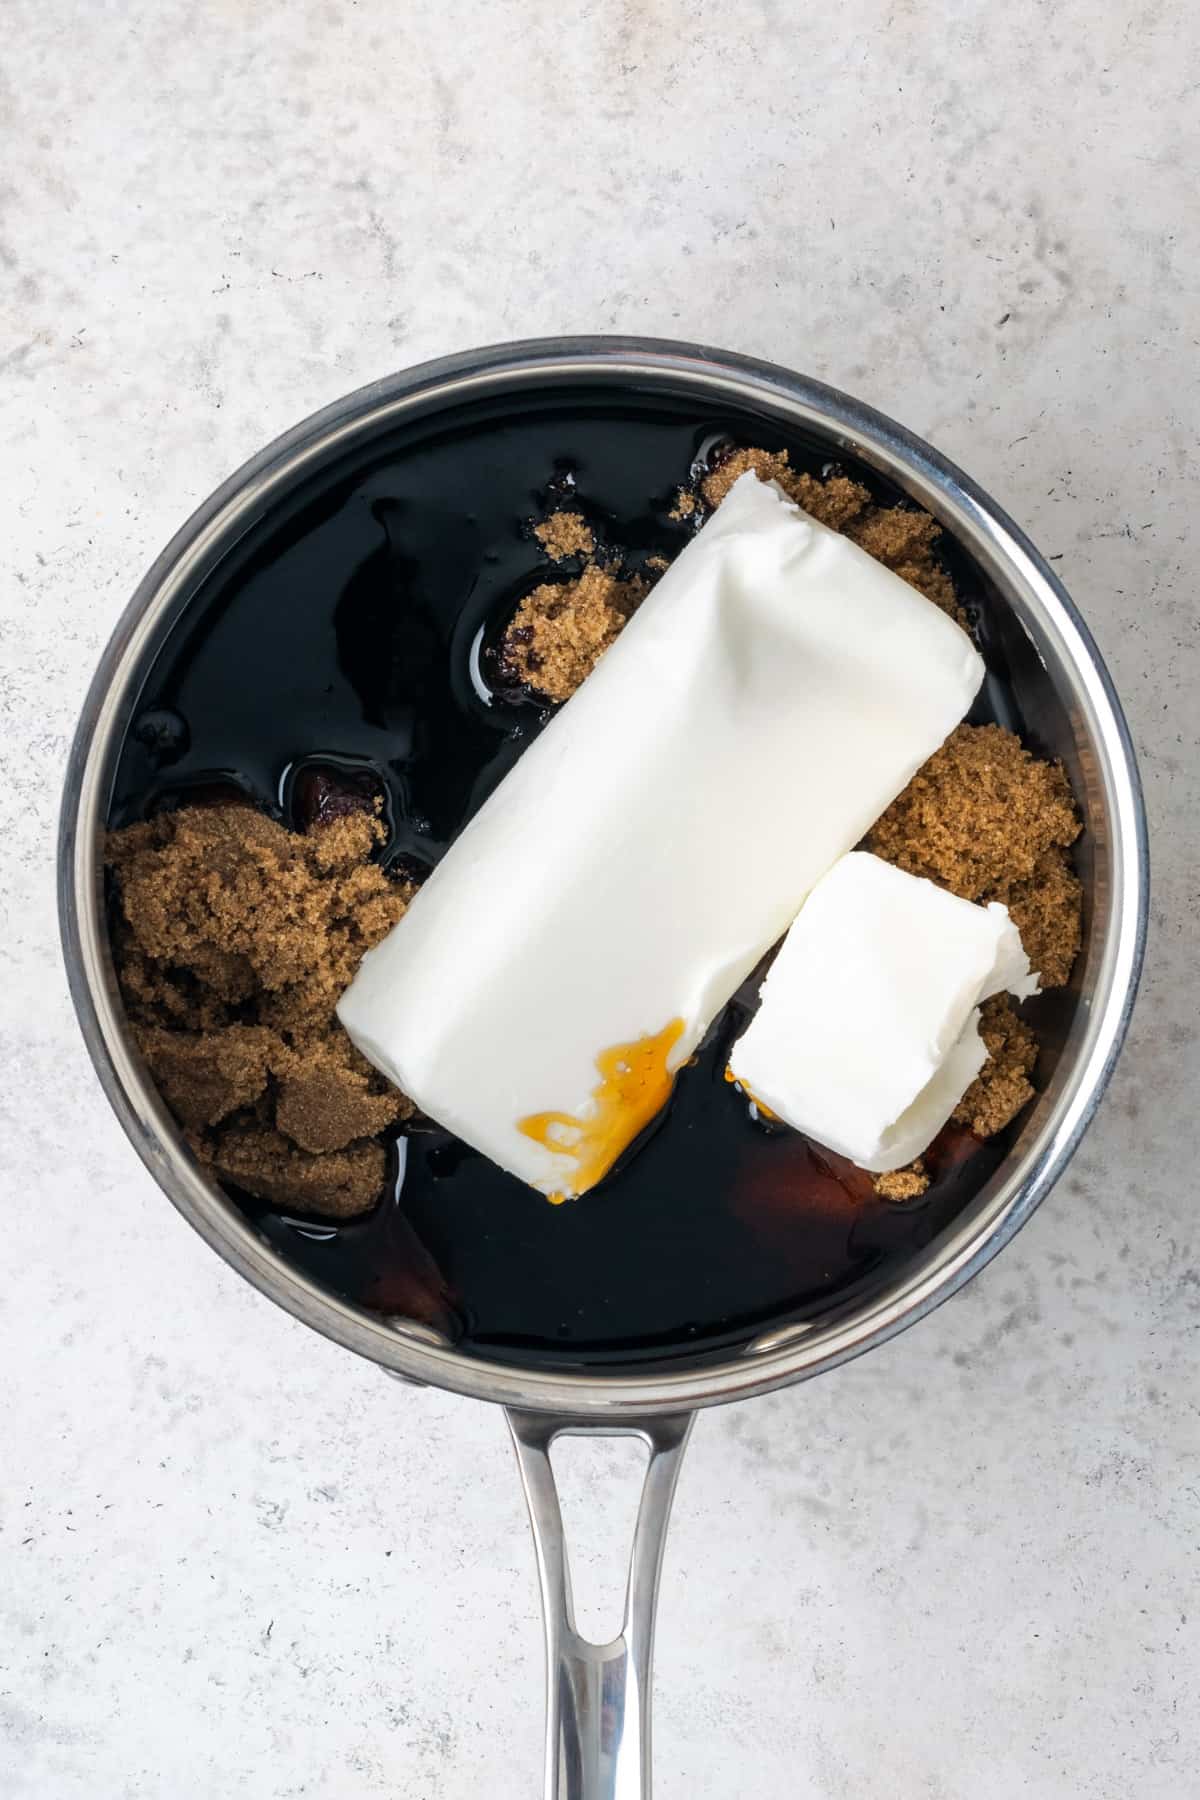
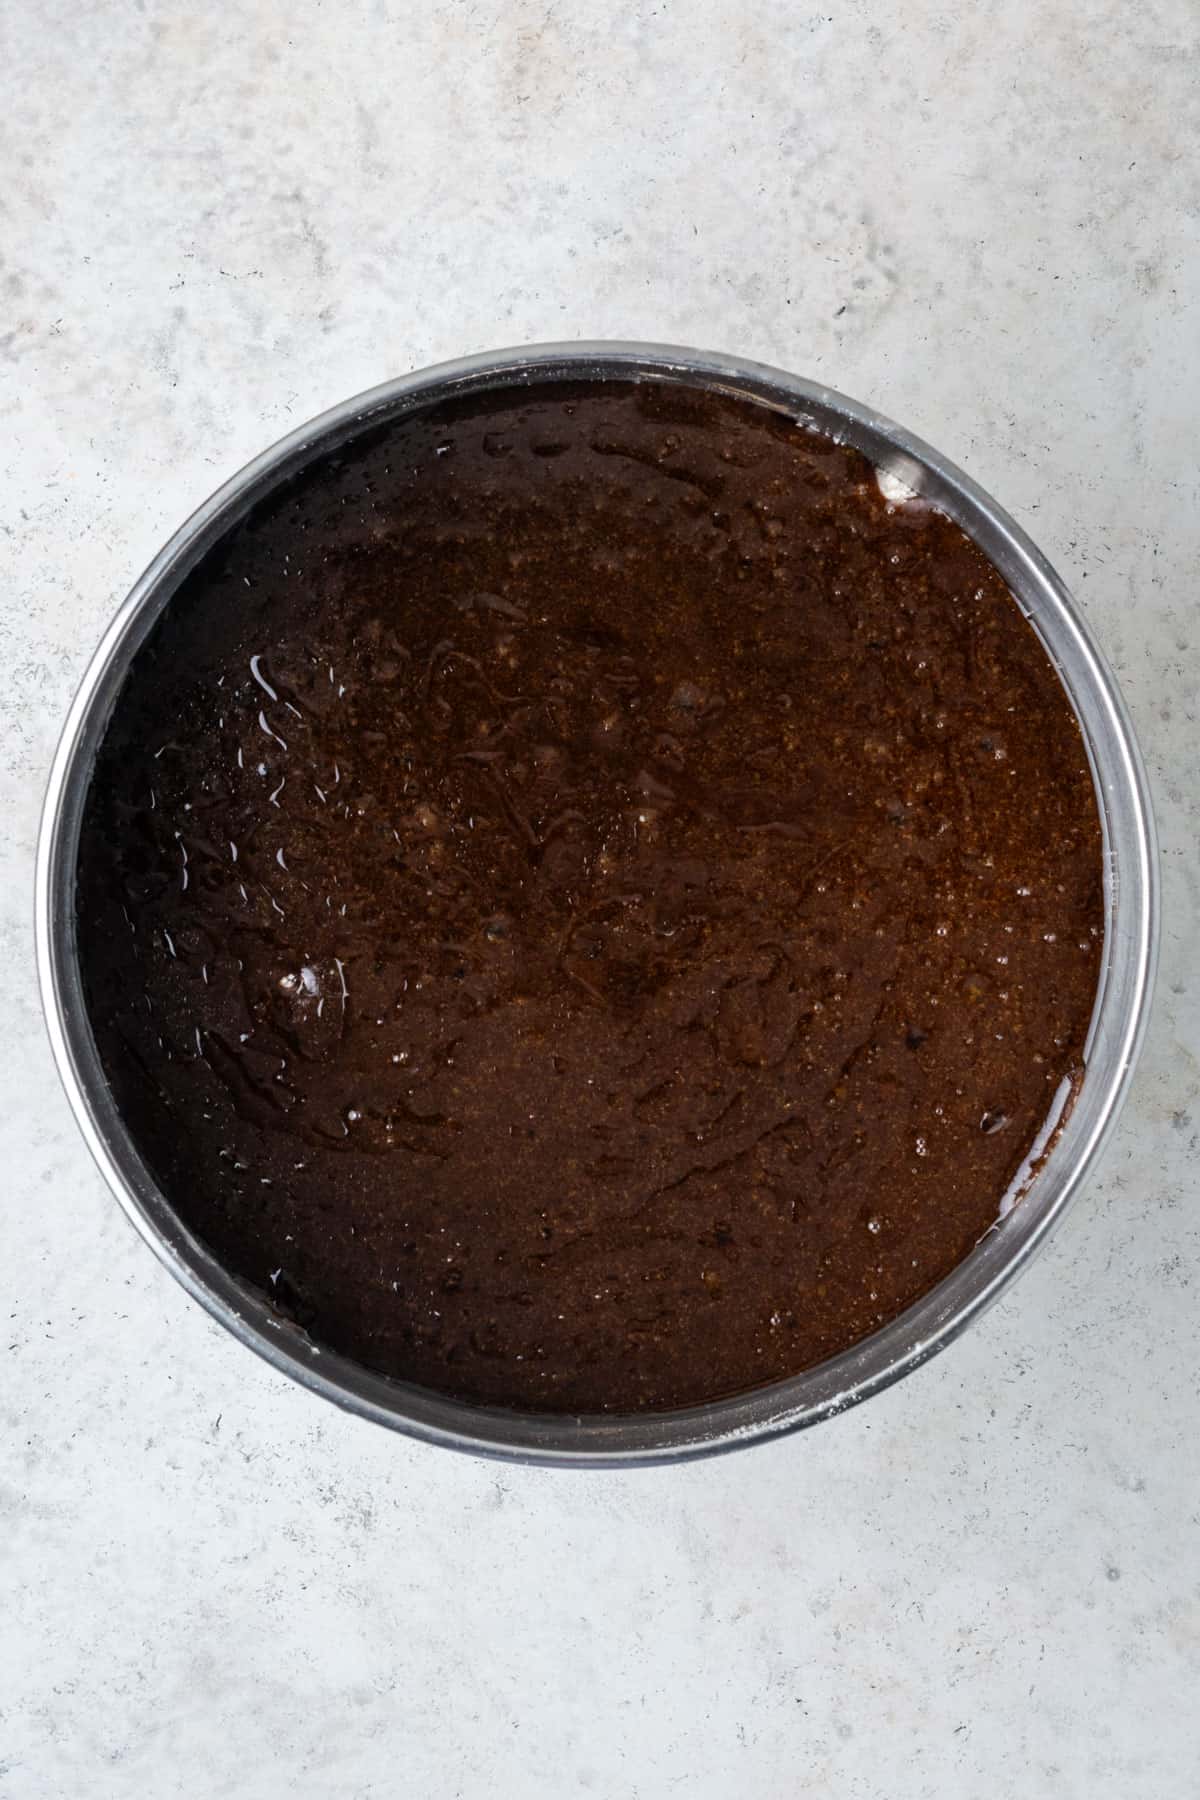
STEP 2: Add the dark brown sugar, molasses, corn syrup and shortening to a saucepan over medium heat. Cook, stirring occasionally, until the shortening and sugar are melted. It should take 7-10 minutes.
STEP 3: Pour the hot sugar mixture into the bowl with the flour. Stir it on the lowest speed until combined.
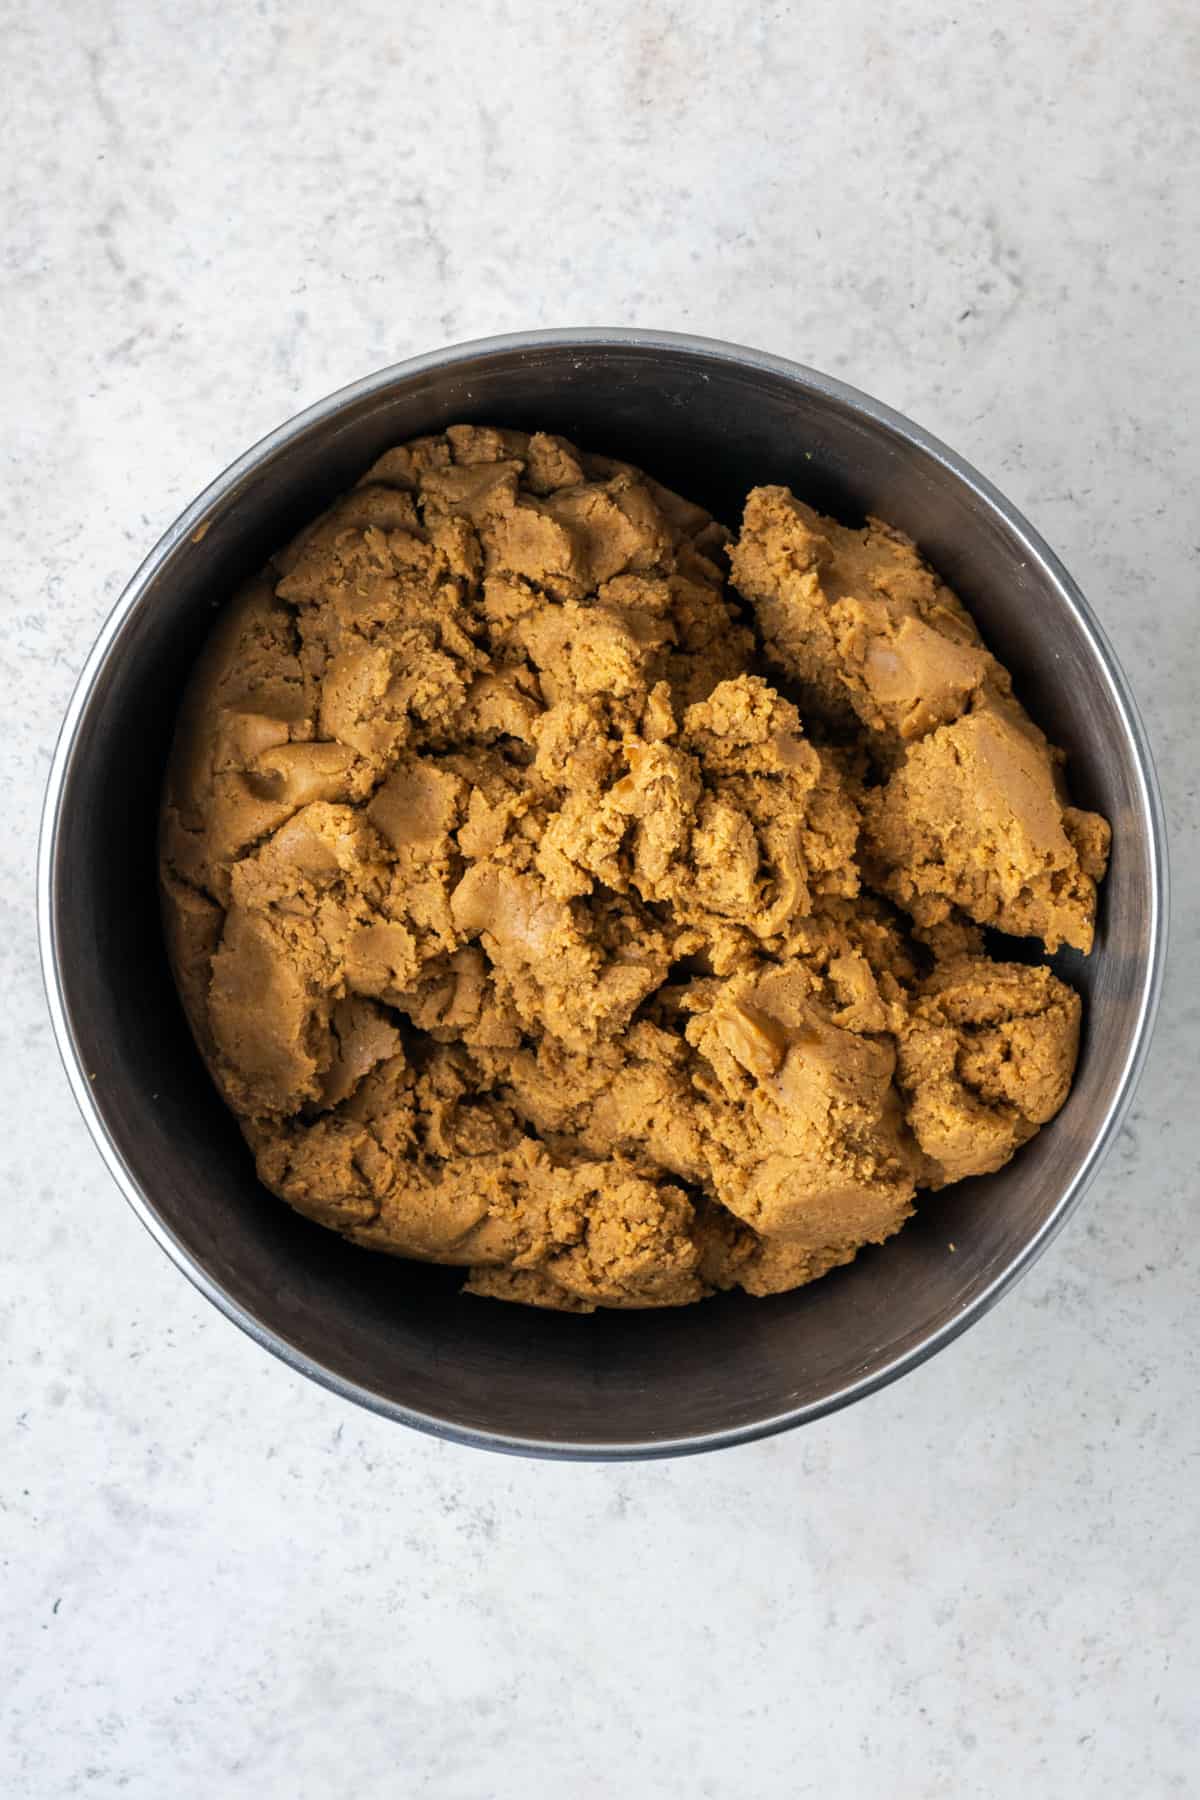
STEP 4: Add warm water a tablespoon at a time until the dough holds together. You may not need all of the water. You can add more water later if it becomes dry.
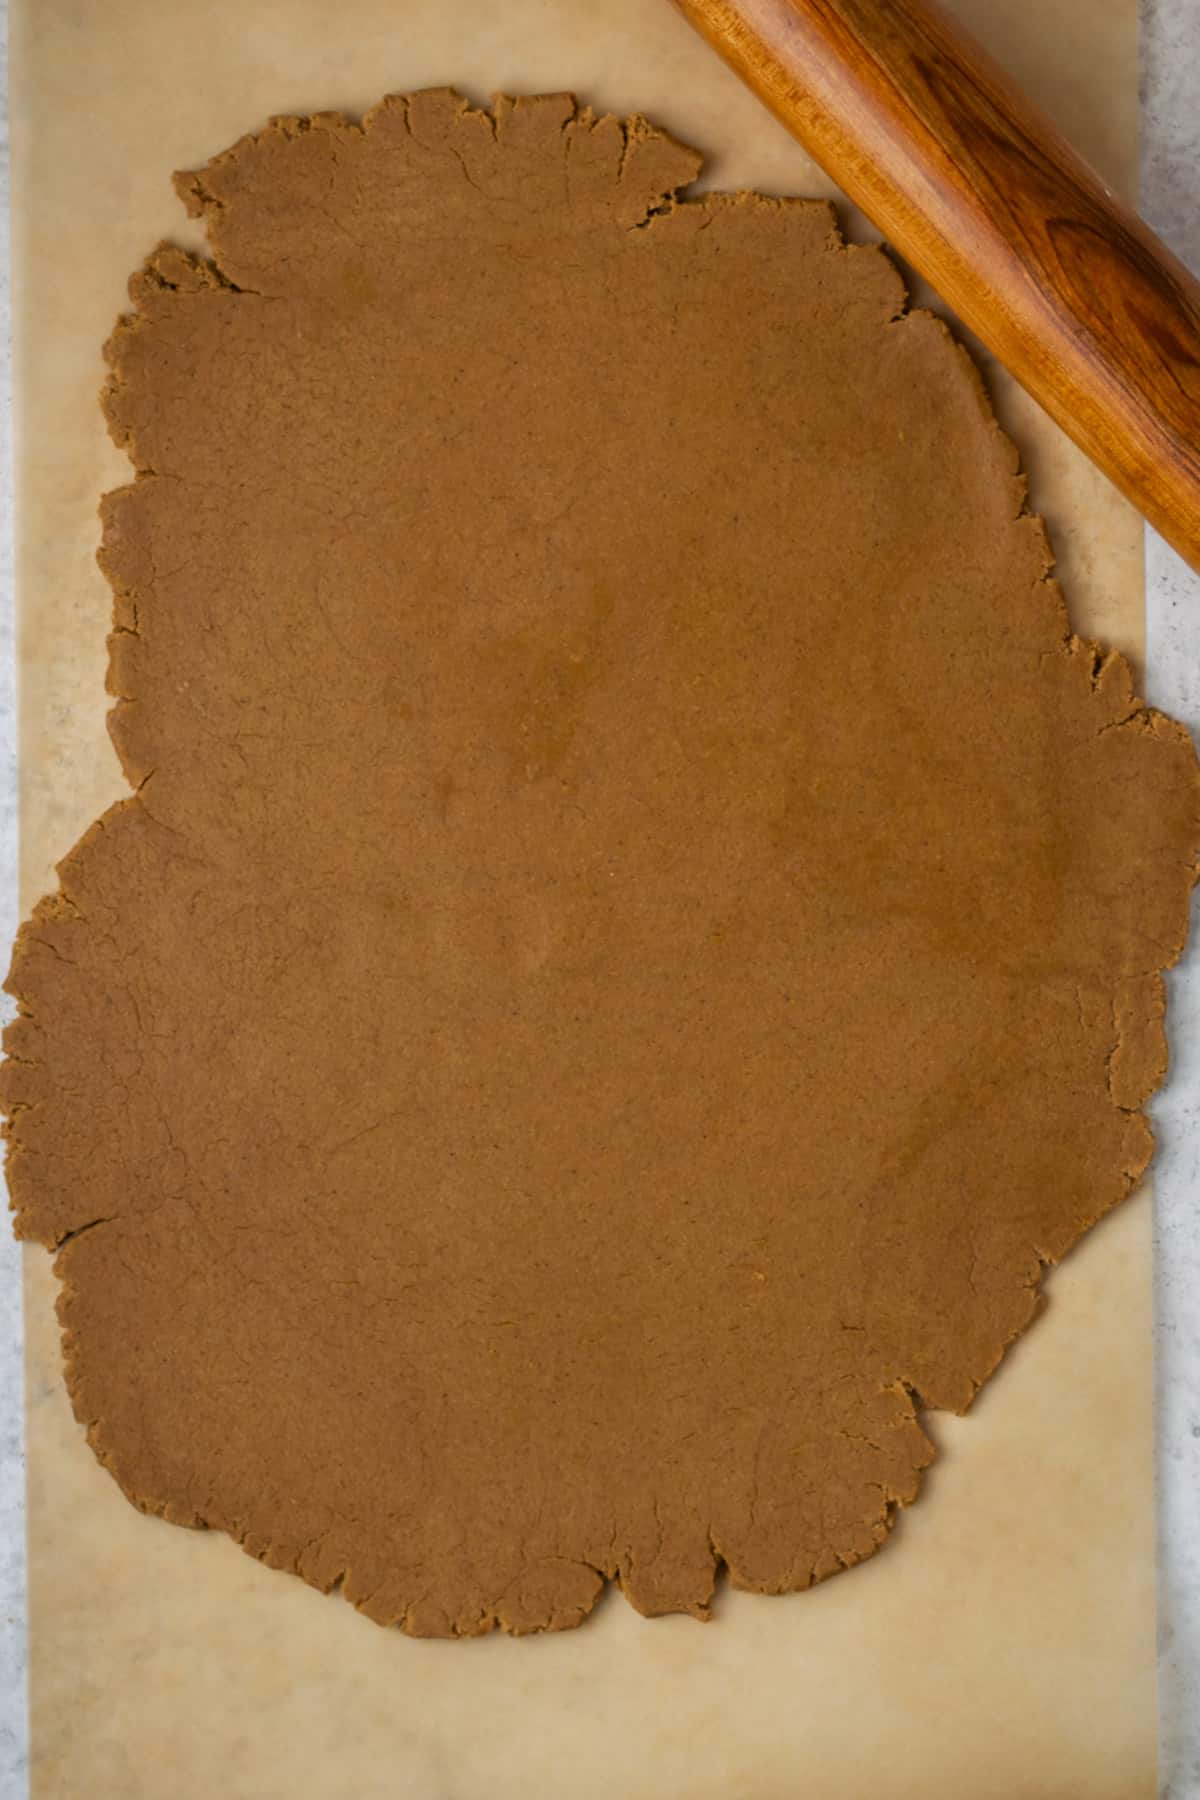
STEP 5: Grab about ¼ of the gingerbread dough and place it on a clean work surface. I always roll mine out on parchment paper. DO NOT dust with flour, the dough will not stick to the table. Roll out the dough to ¼" thick.
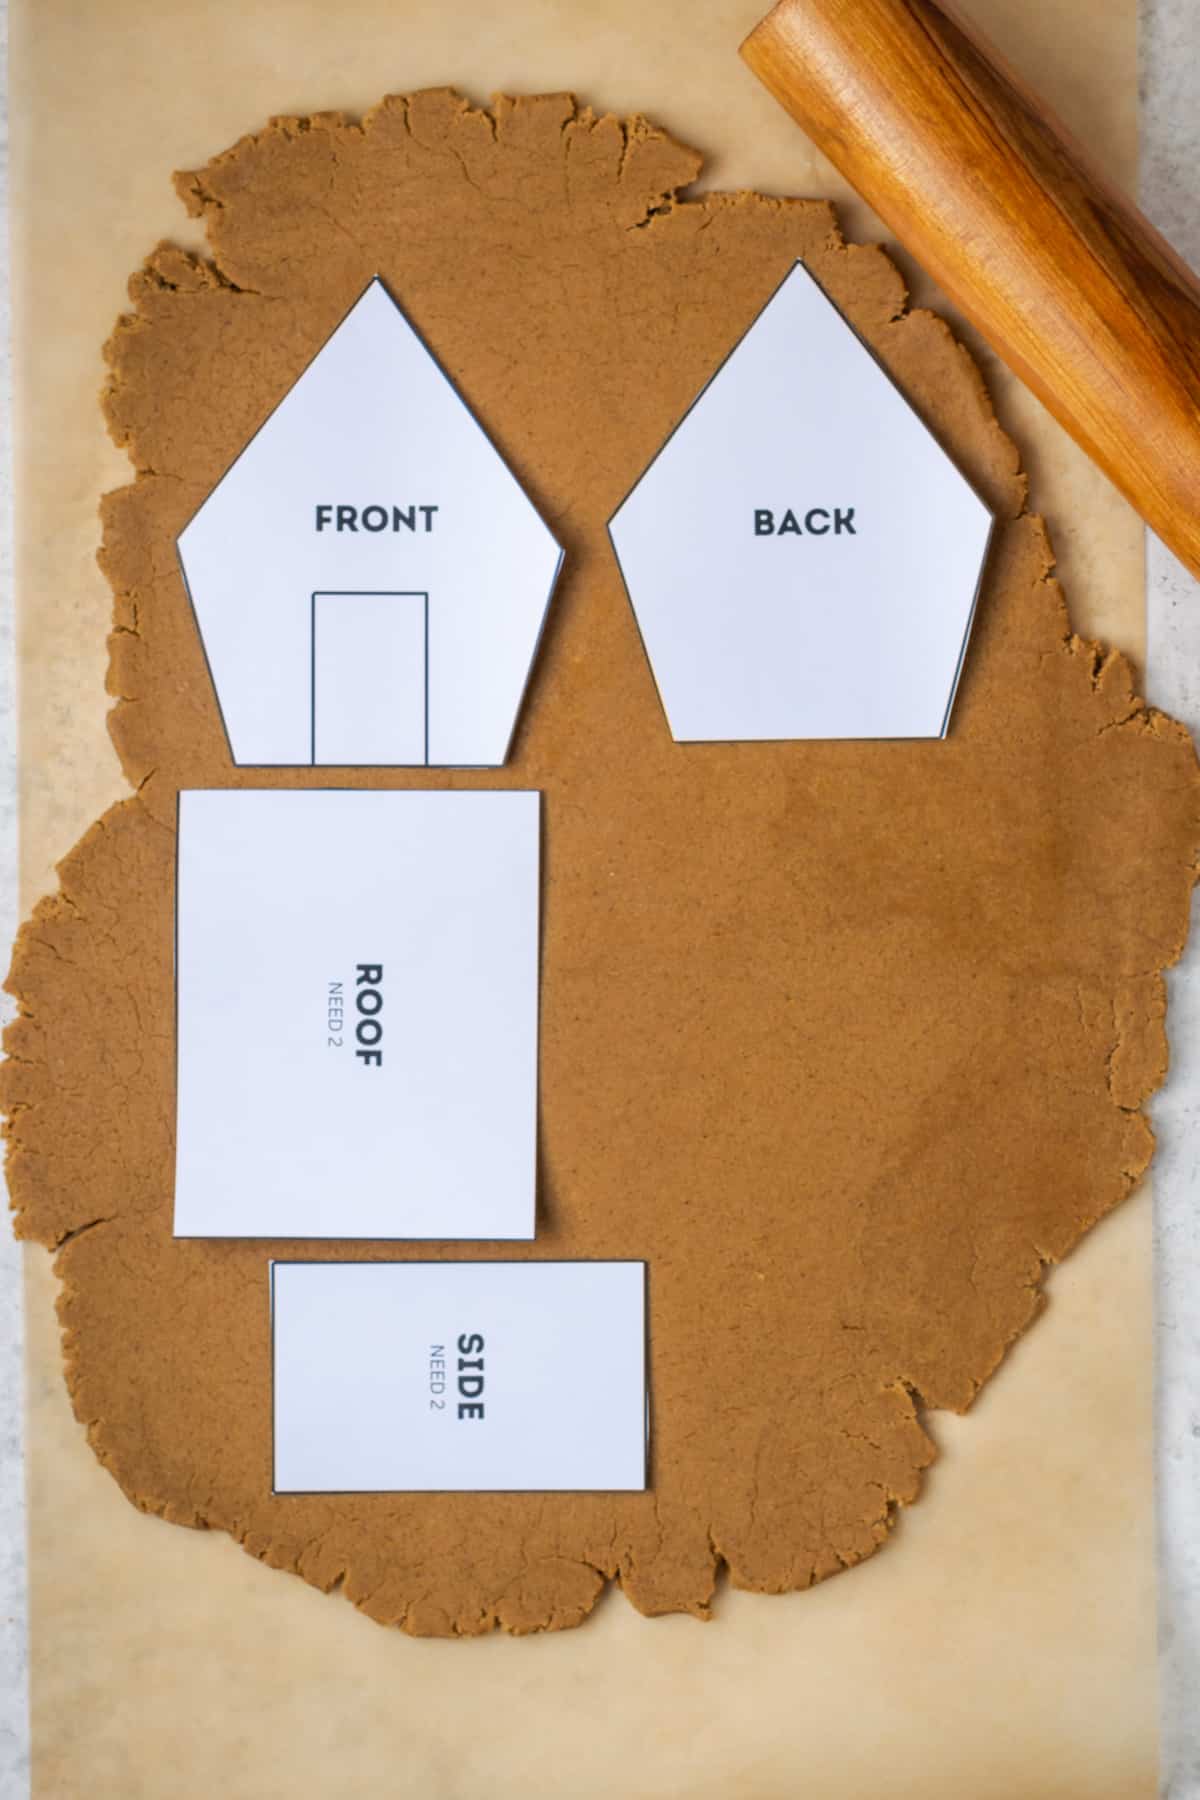
STEP 6: Lay out the gingerbread house pattern pieces on top of the dough and use a sharp knife to cut around the edges. Try to cut as carefully as possible, so the shapes are exactly the same each time. Re-roll any scraps until you've cut all the pieces you need. Lay the gingerbread pieces on a lined cookie sheet and bake according to the directions below.
Expert Tip
This dough will harden as it cools to room temperature. You may think the dough has dried out or is too tough to roll out. Simple grab a large chunk of dough and microwave it for about 30 seconds on high. The dough should re-soften and be able to roll out easily.
How to Assemble a Homemade Gingerbread House
Using the icing recipe below, assembly should be fairly easy. I usually do it alone, but it can be helpful to have a second set of hands. Usually if I'm planning a decorating party, I will assemble the houses the day before so they can dry, but it's not necessary. The icing will dry quickly enough that the house will not slide apart during decorating.
Place your houses on a flat, disposable surface. I usually opt for a piece of cardboard. If you're planning to move it around, you might want something more sturdy, like foam board. If you use my free gingerbread house template, you will want a square about 12 inches by 12 inches to setup each house.
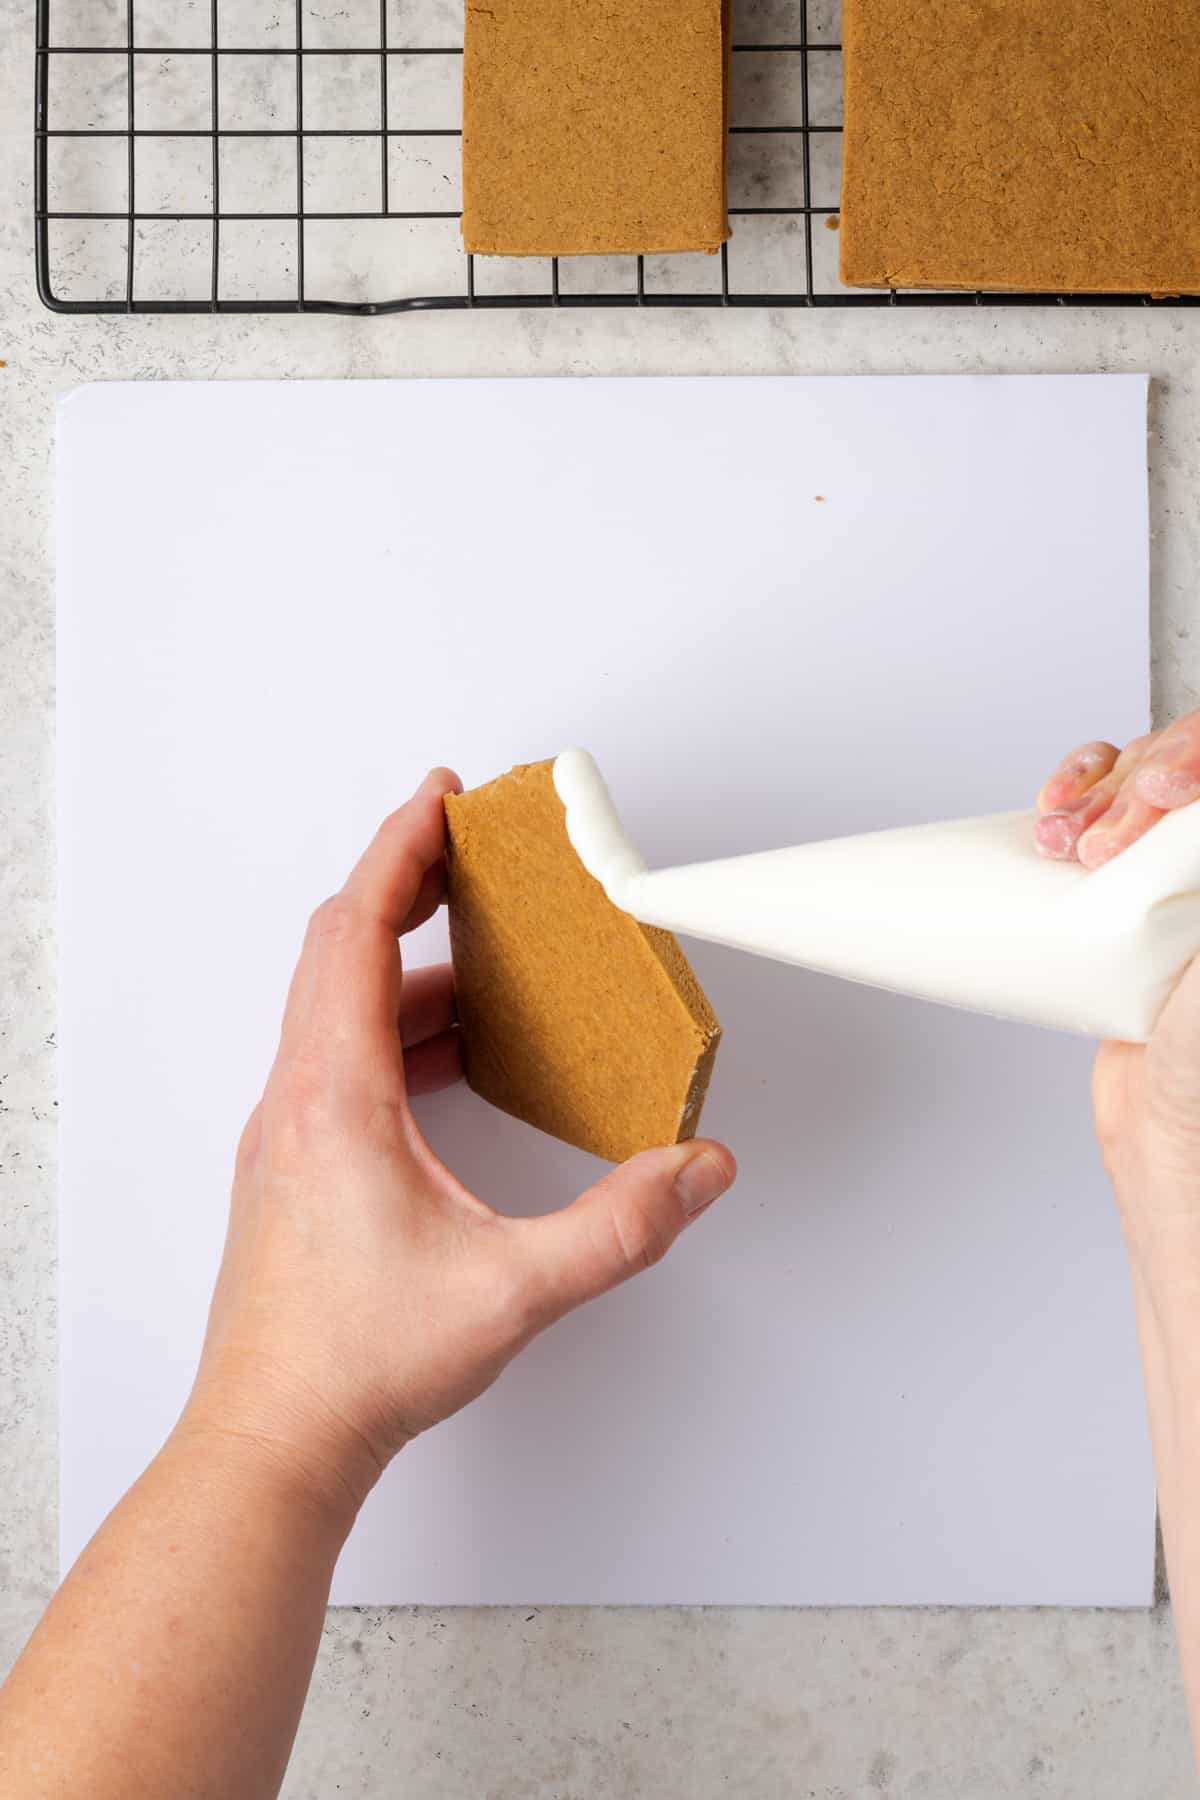
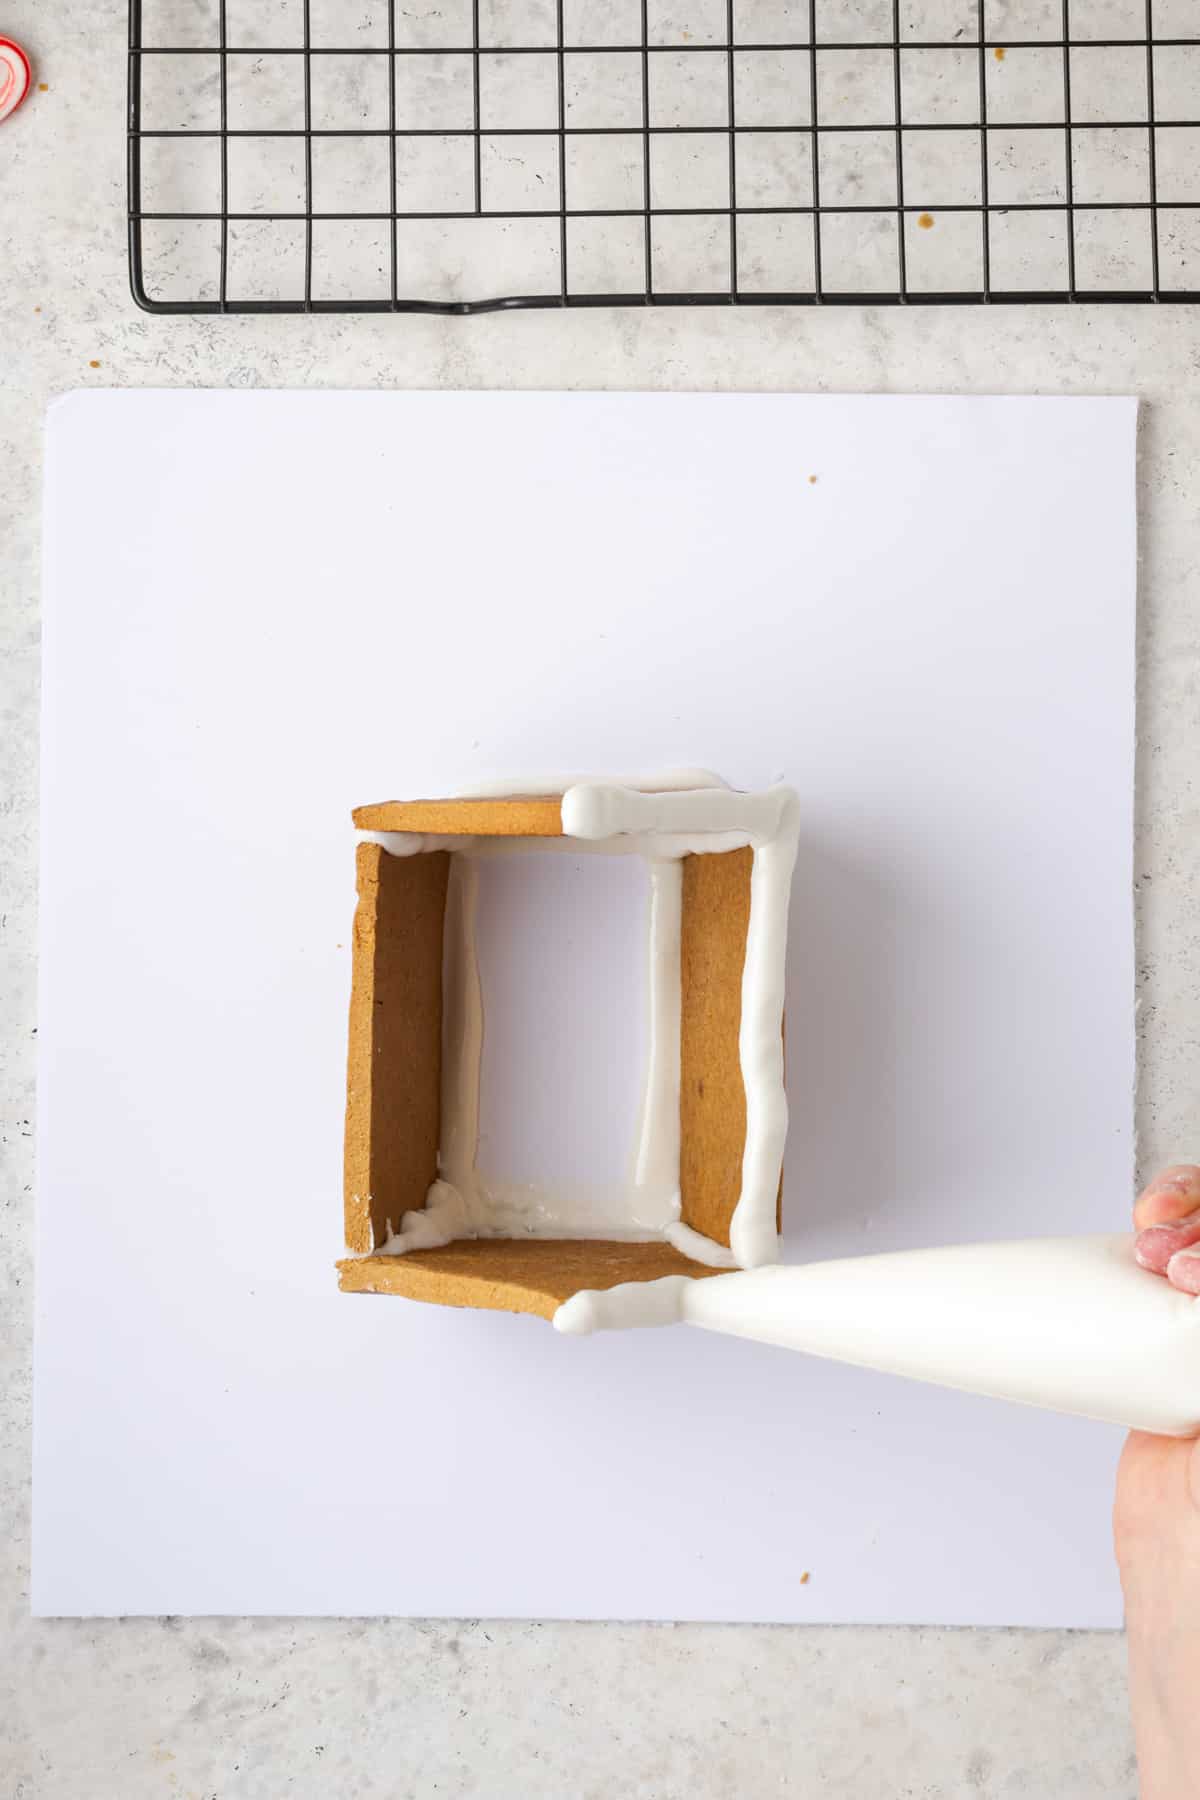
STEP 1: Begin with a front or back piece (they are the same unless you've added doors or windows). Use a piping bag to apply a thick line of icing on the bottom edge only. Then stand the piece up on your base plate.
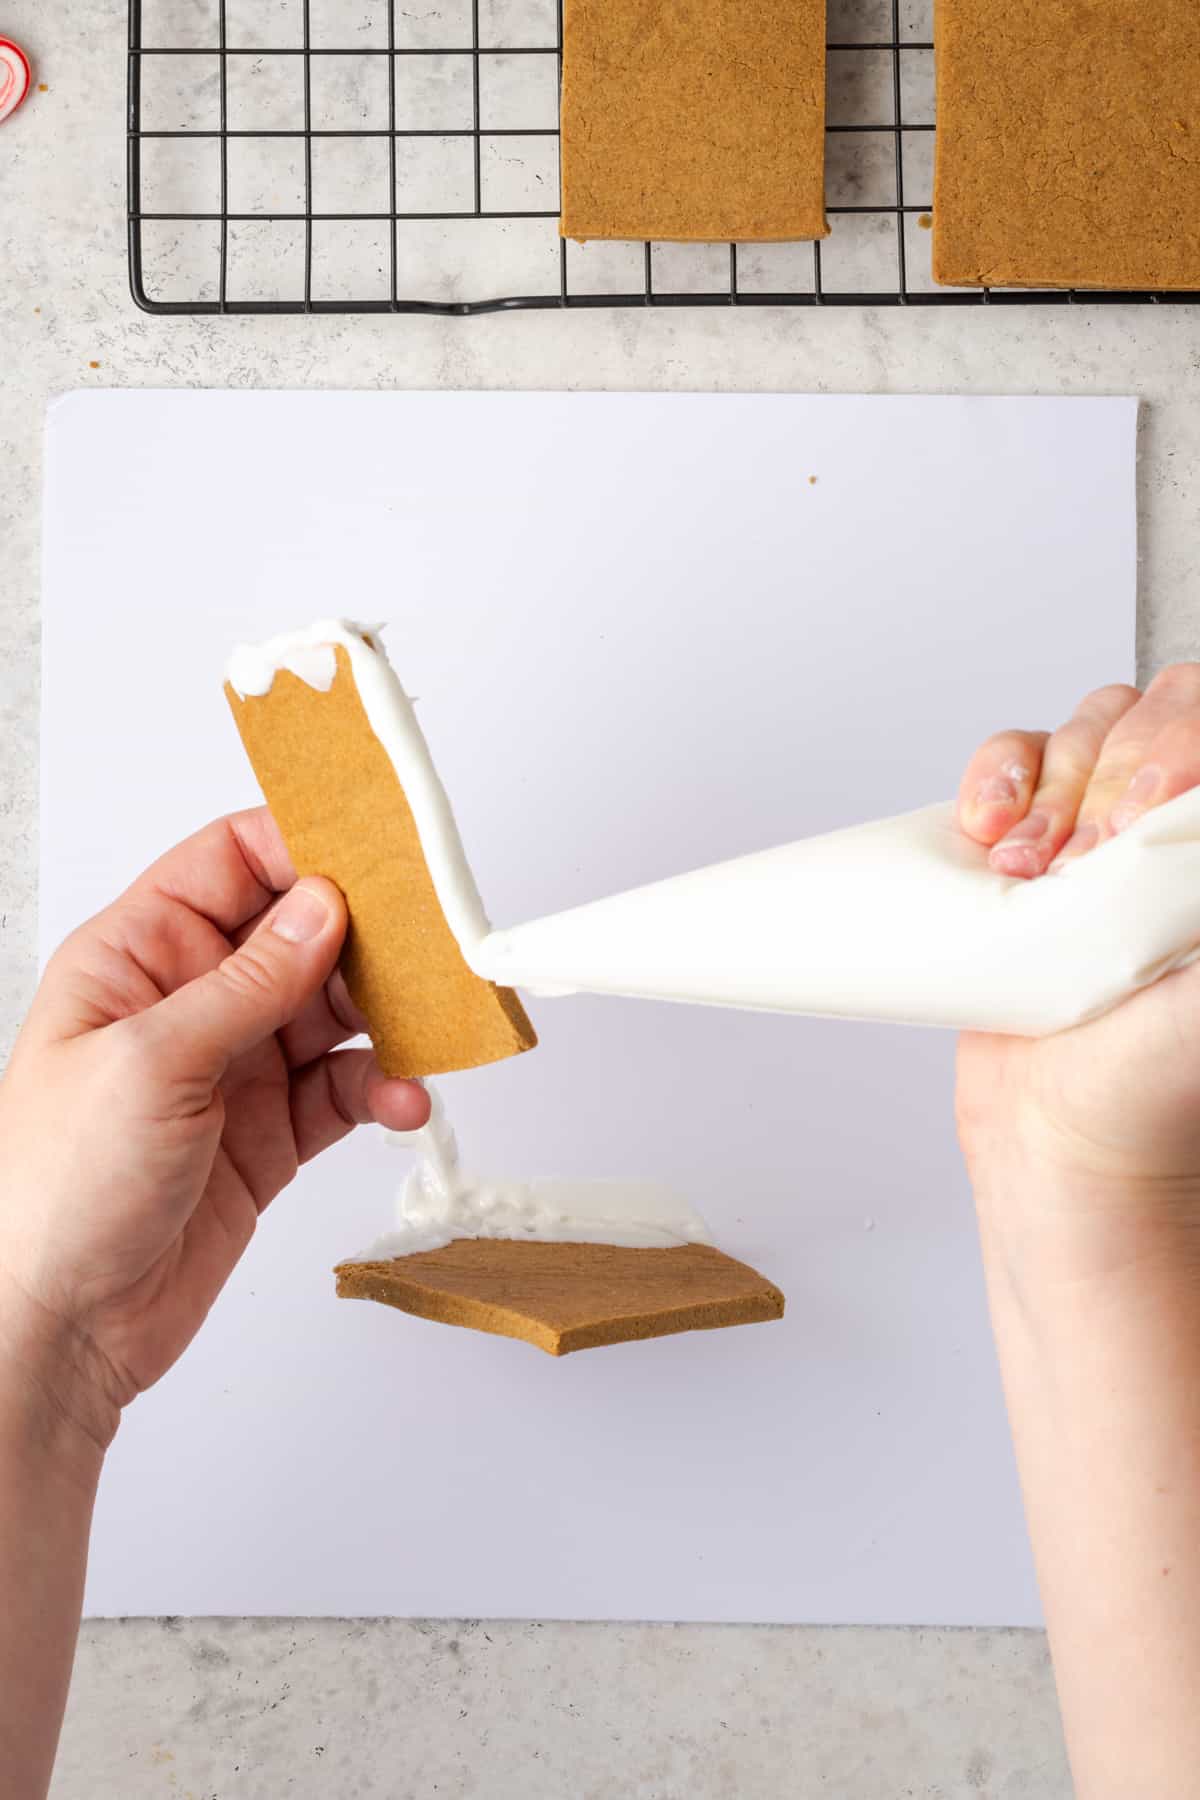
STEP 2: Next, add a side piece. Apple a thick line of icing to one bottom long edge and one side short edge. It should form an L in icing. Stick the short edge to the back of the first piece and the bottom edge to the base plate.
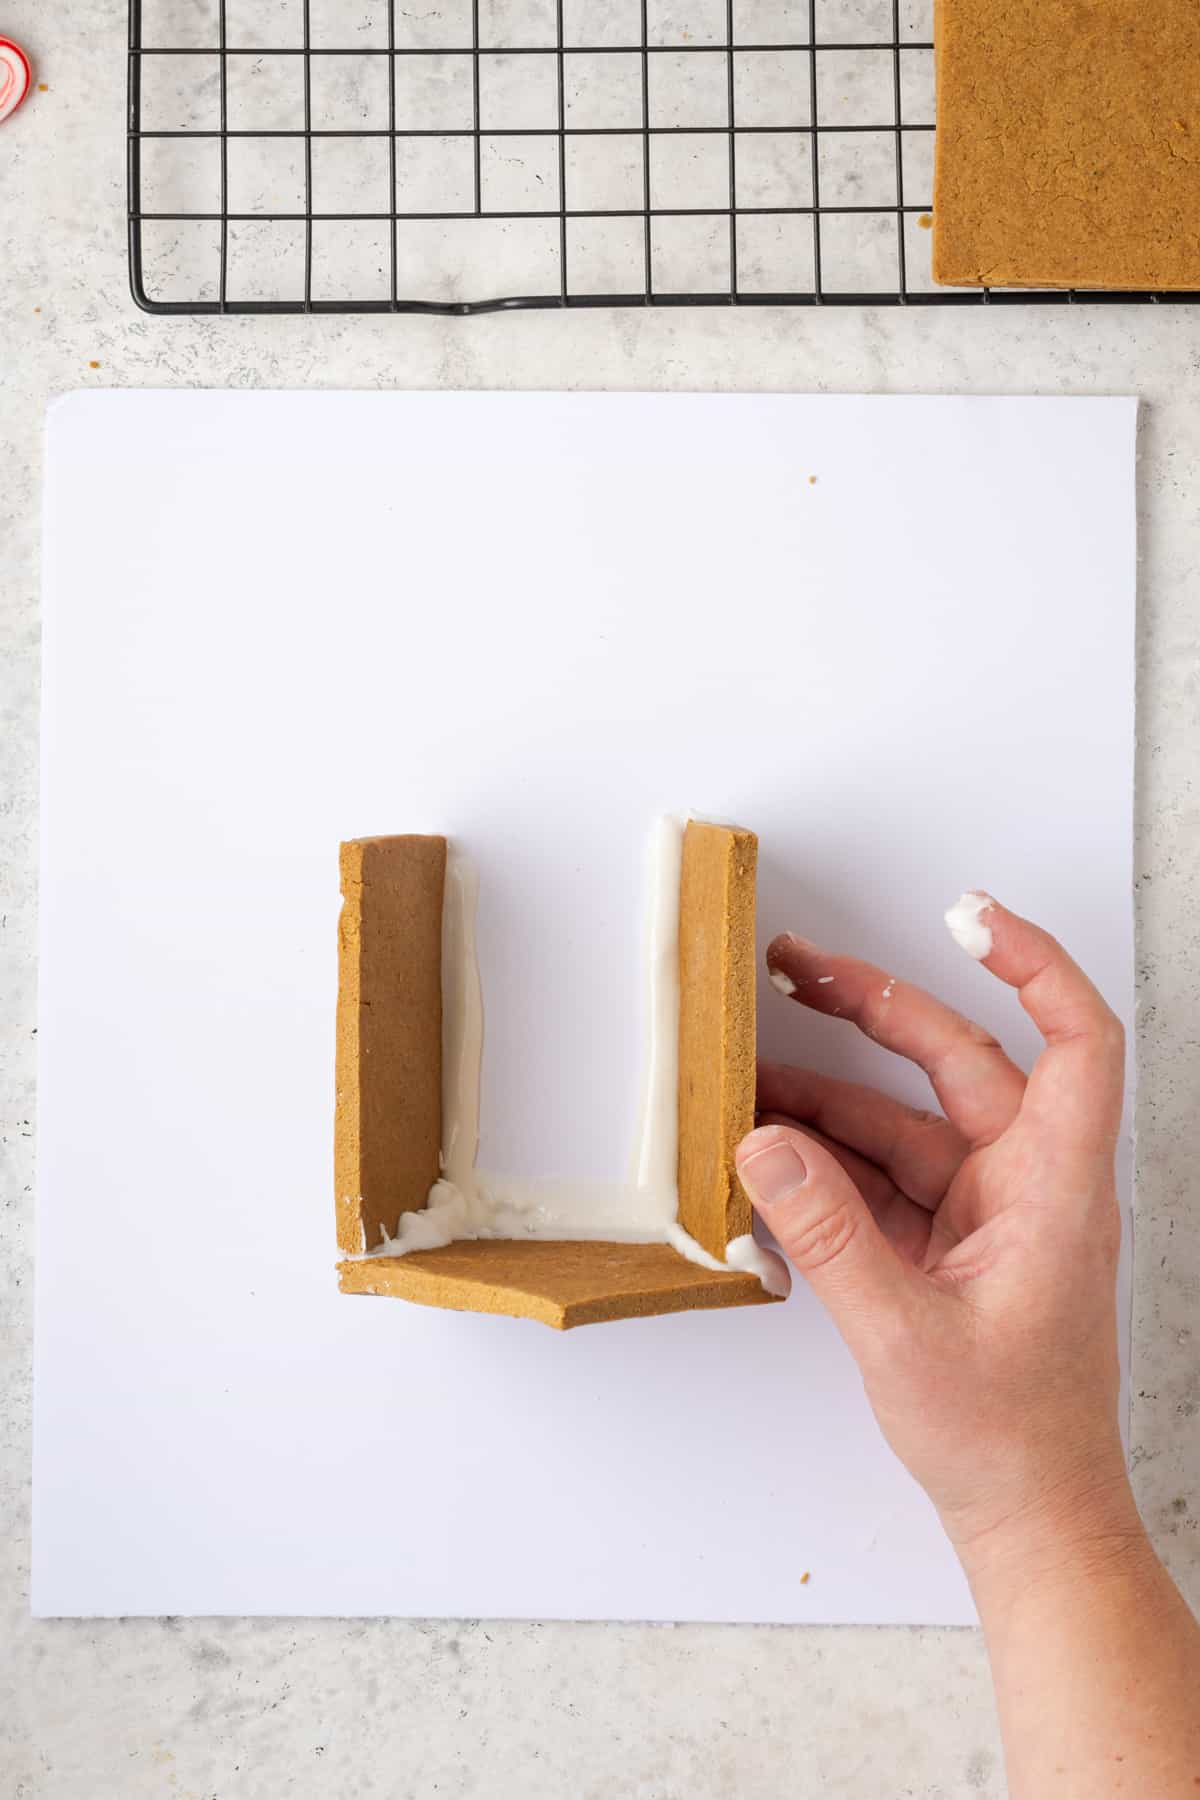
STEP 3: Repeat step 2 with the second side. Now your house should look like a U.

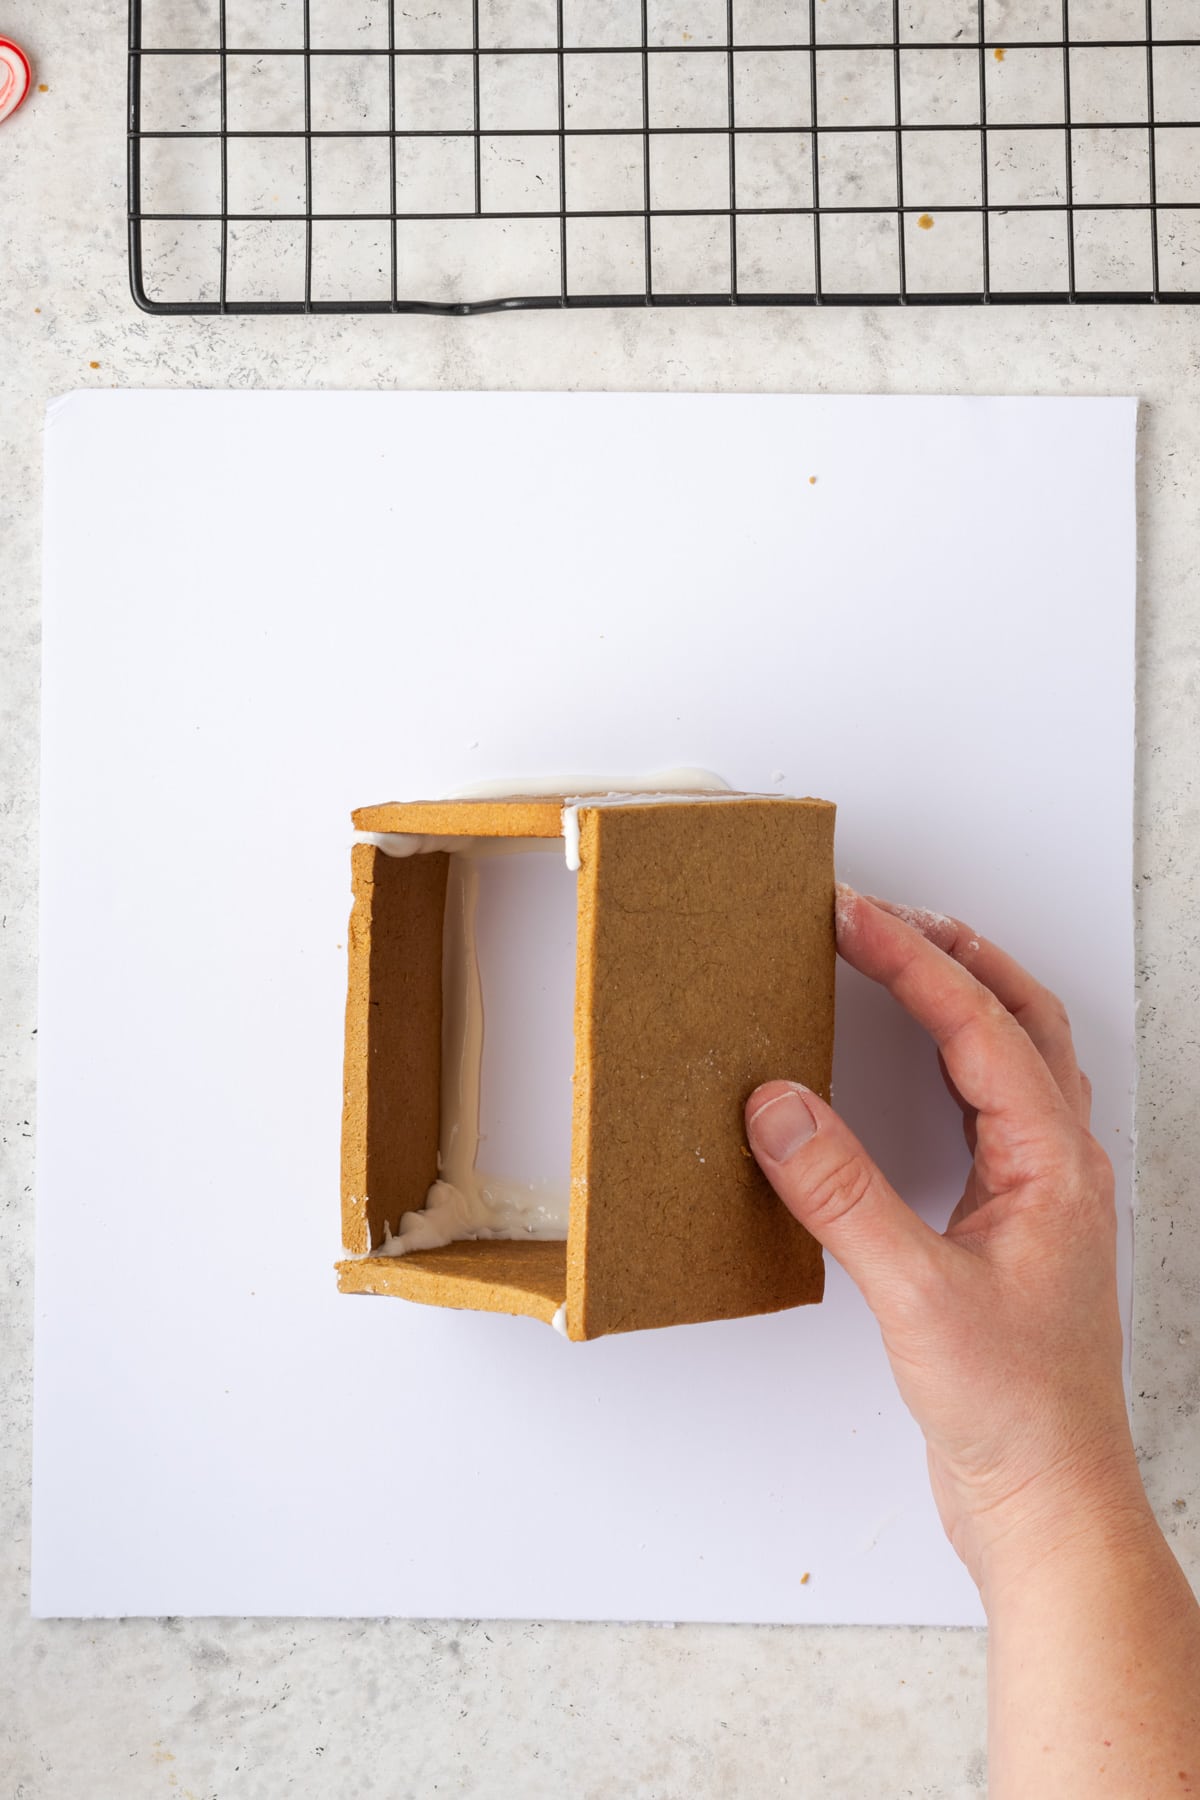
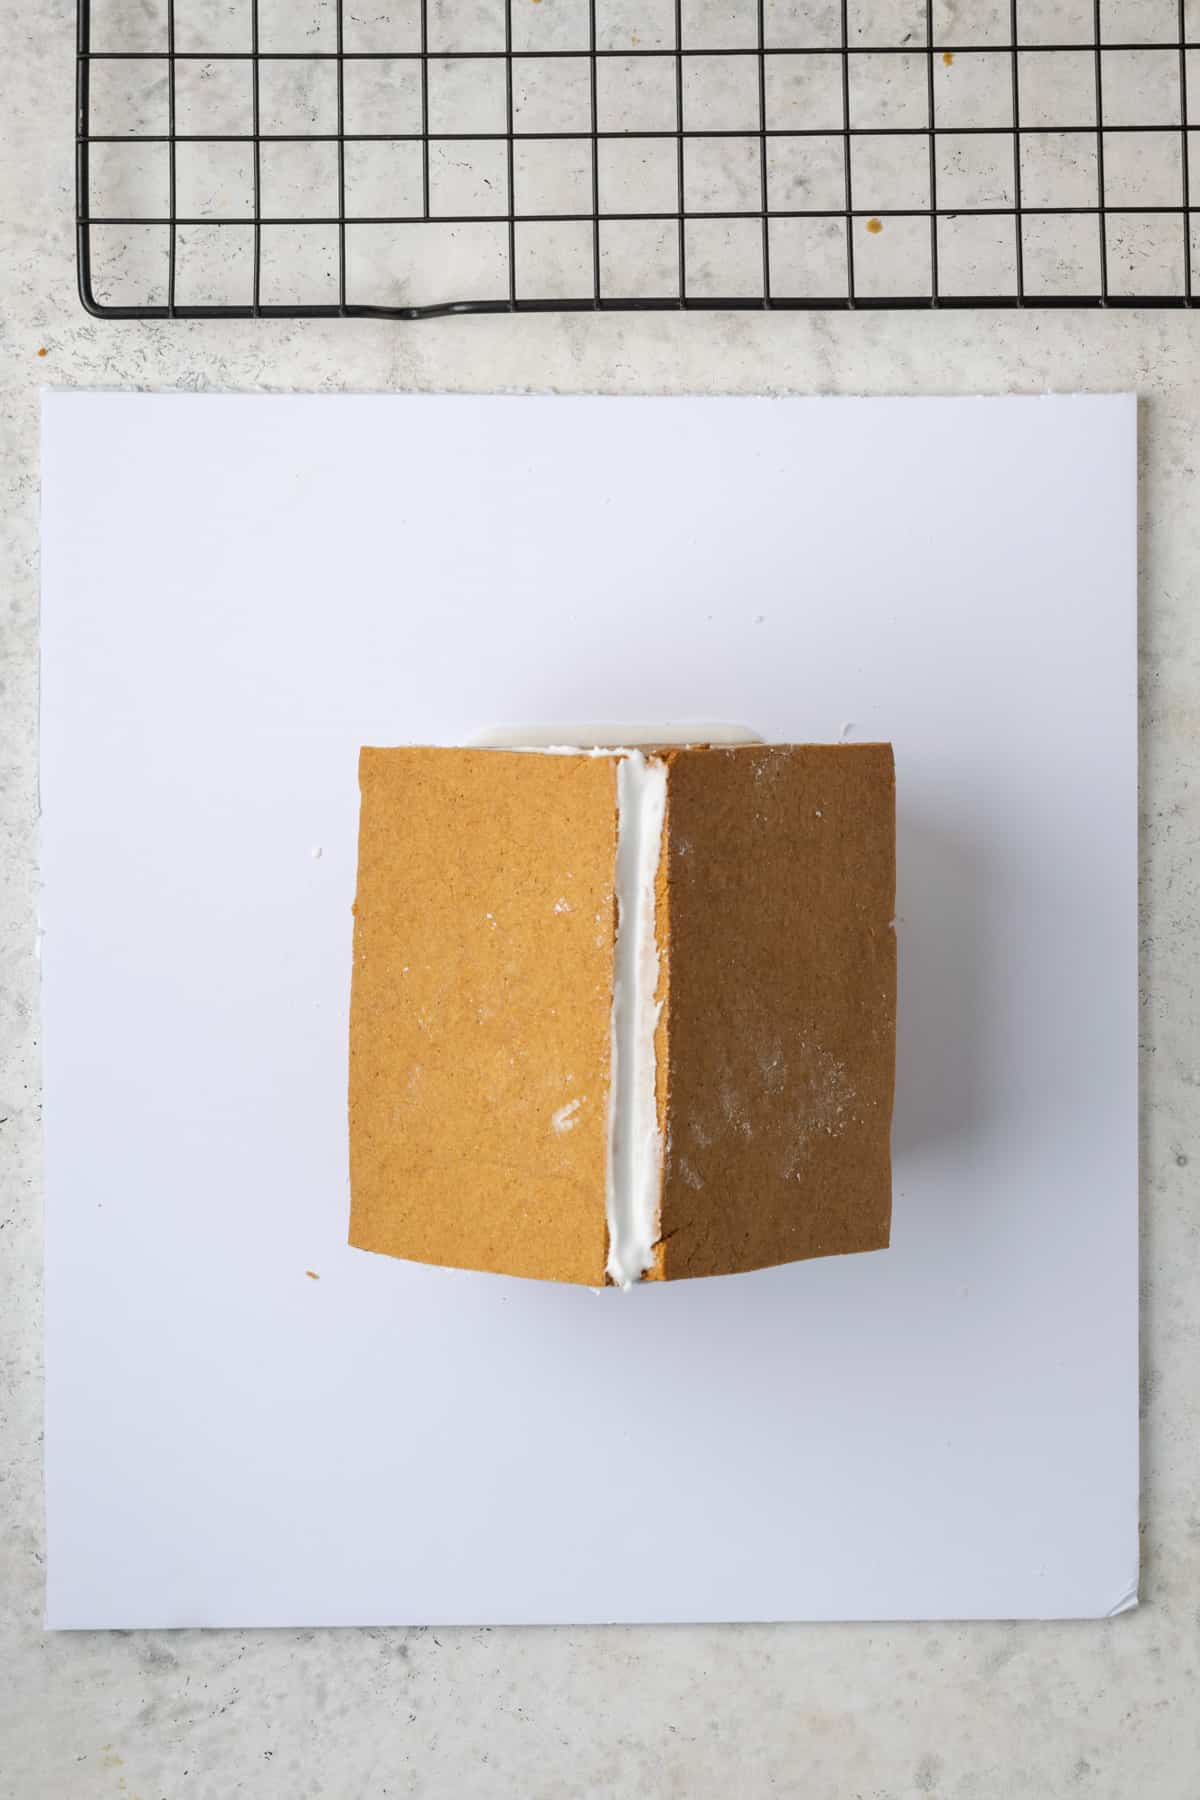
STEP 4: Next, grab your second front/back piece. Line the two inner edges with a thick line of icing - this is where it connects to the side pieces. You'll also line the bottom edge with icing. Then put it into place on the base plate and make any minor adjustments to have everything line up well.
STEP 5: Line one half of the roof line with a thick line of icing.
STEP 6: Place one of the roof pieces onto the house. Hold in place for about 60 seconds to set the icing.
STEP 7: Repeat steps 5 & 6 with the second roof piece. Once it's in place, run a line of icing down the center of the roof. Then allow the house to dry for at least 10 minutes before decorating (I prefer to let it dry overnight to be on the safe side).
Gingerbread House Decorating Ideas
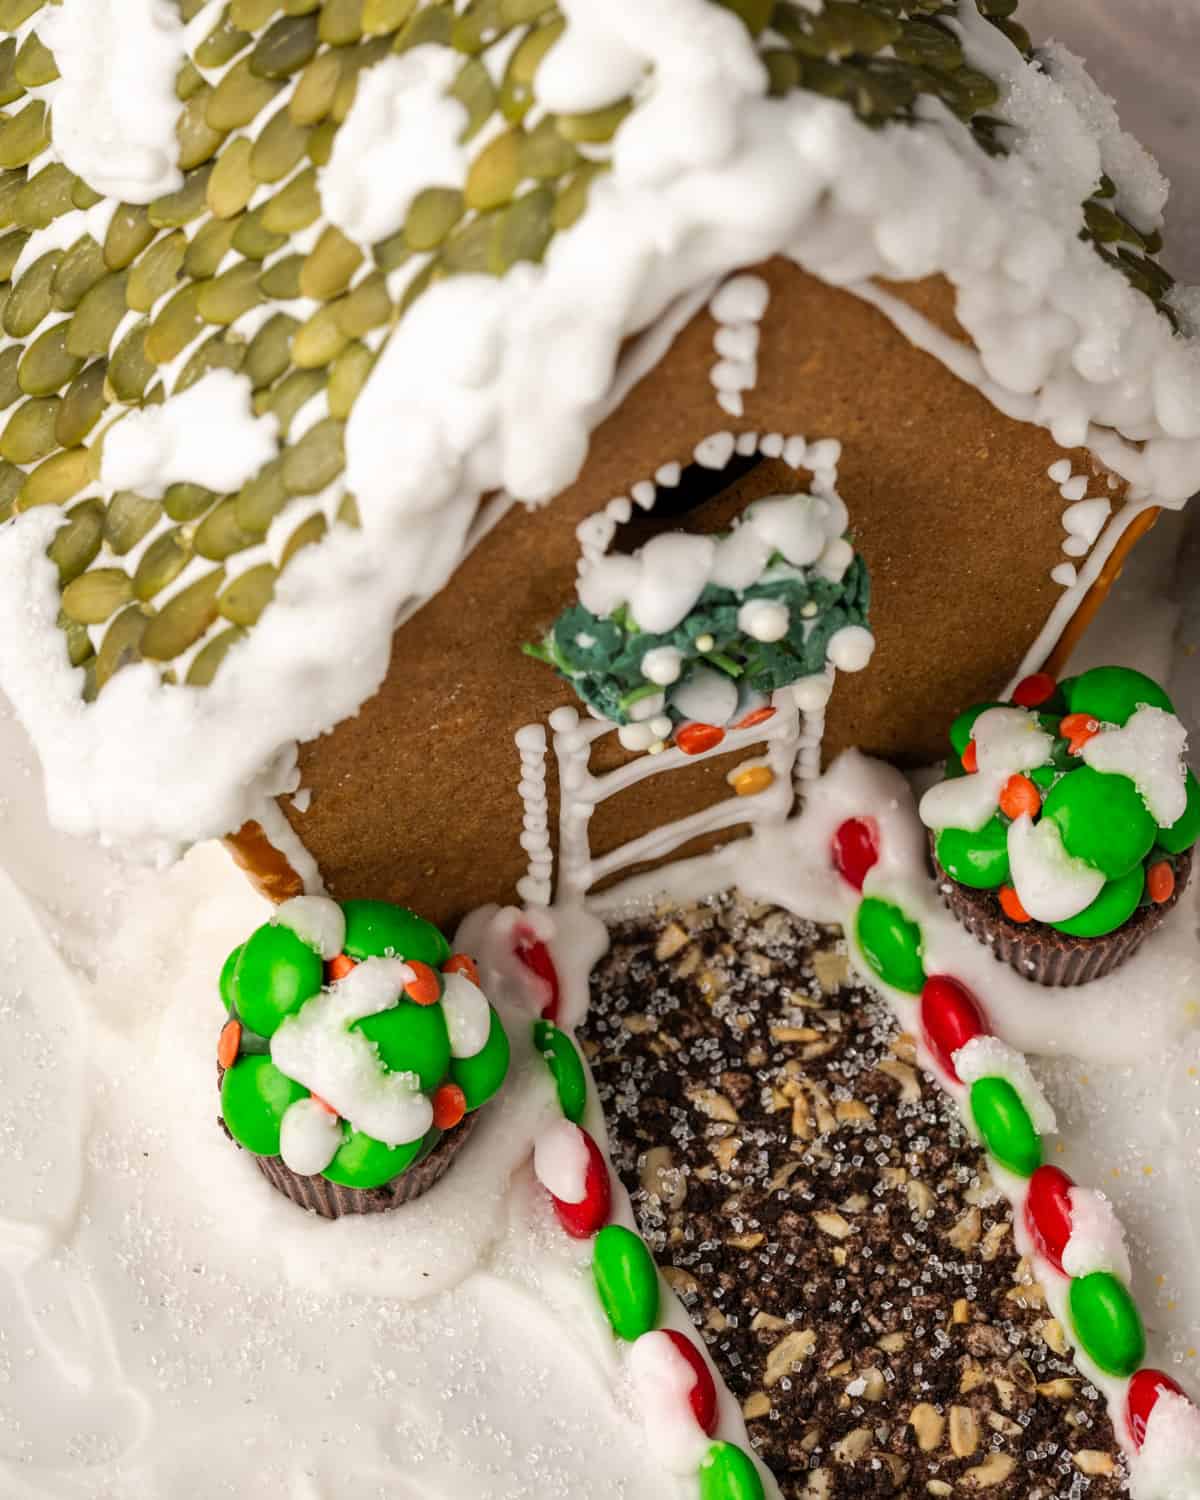
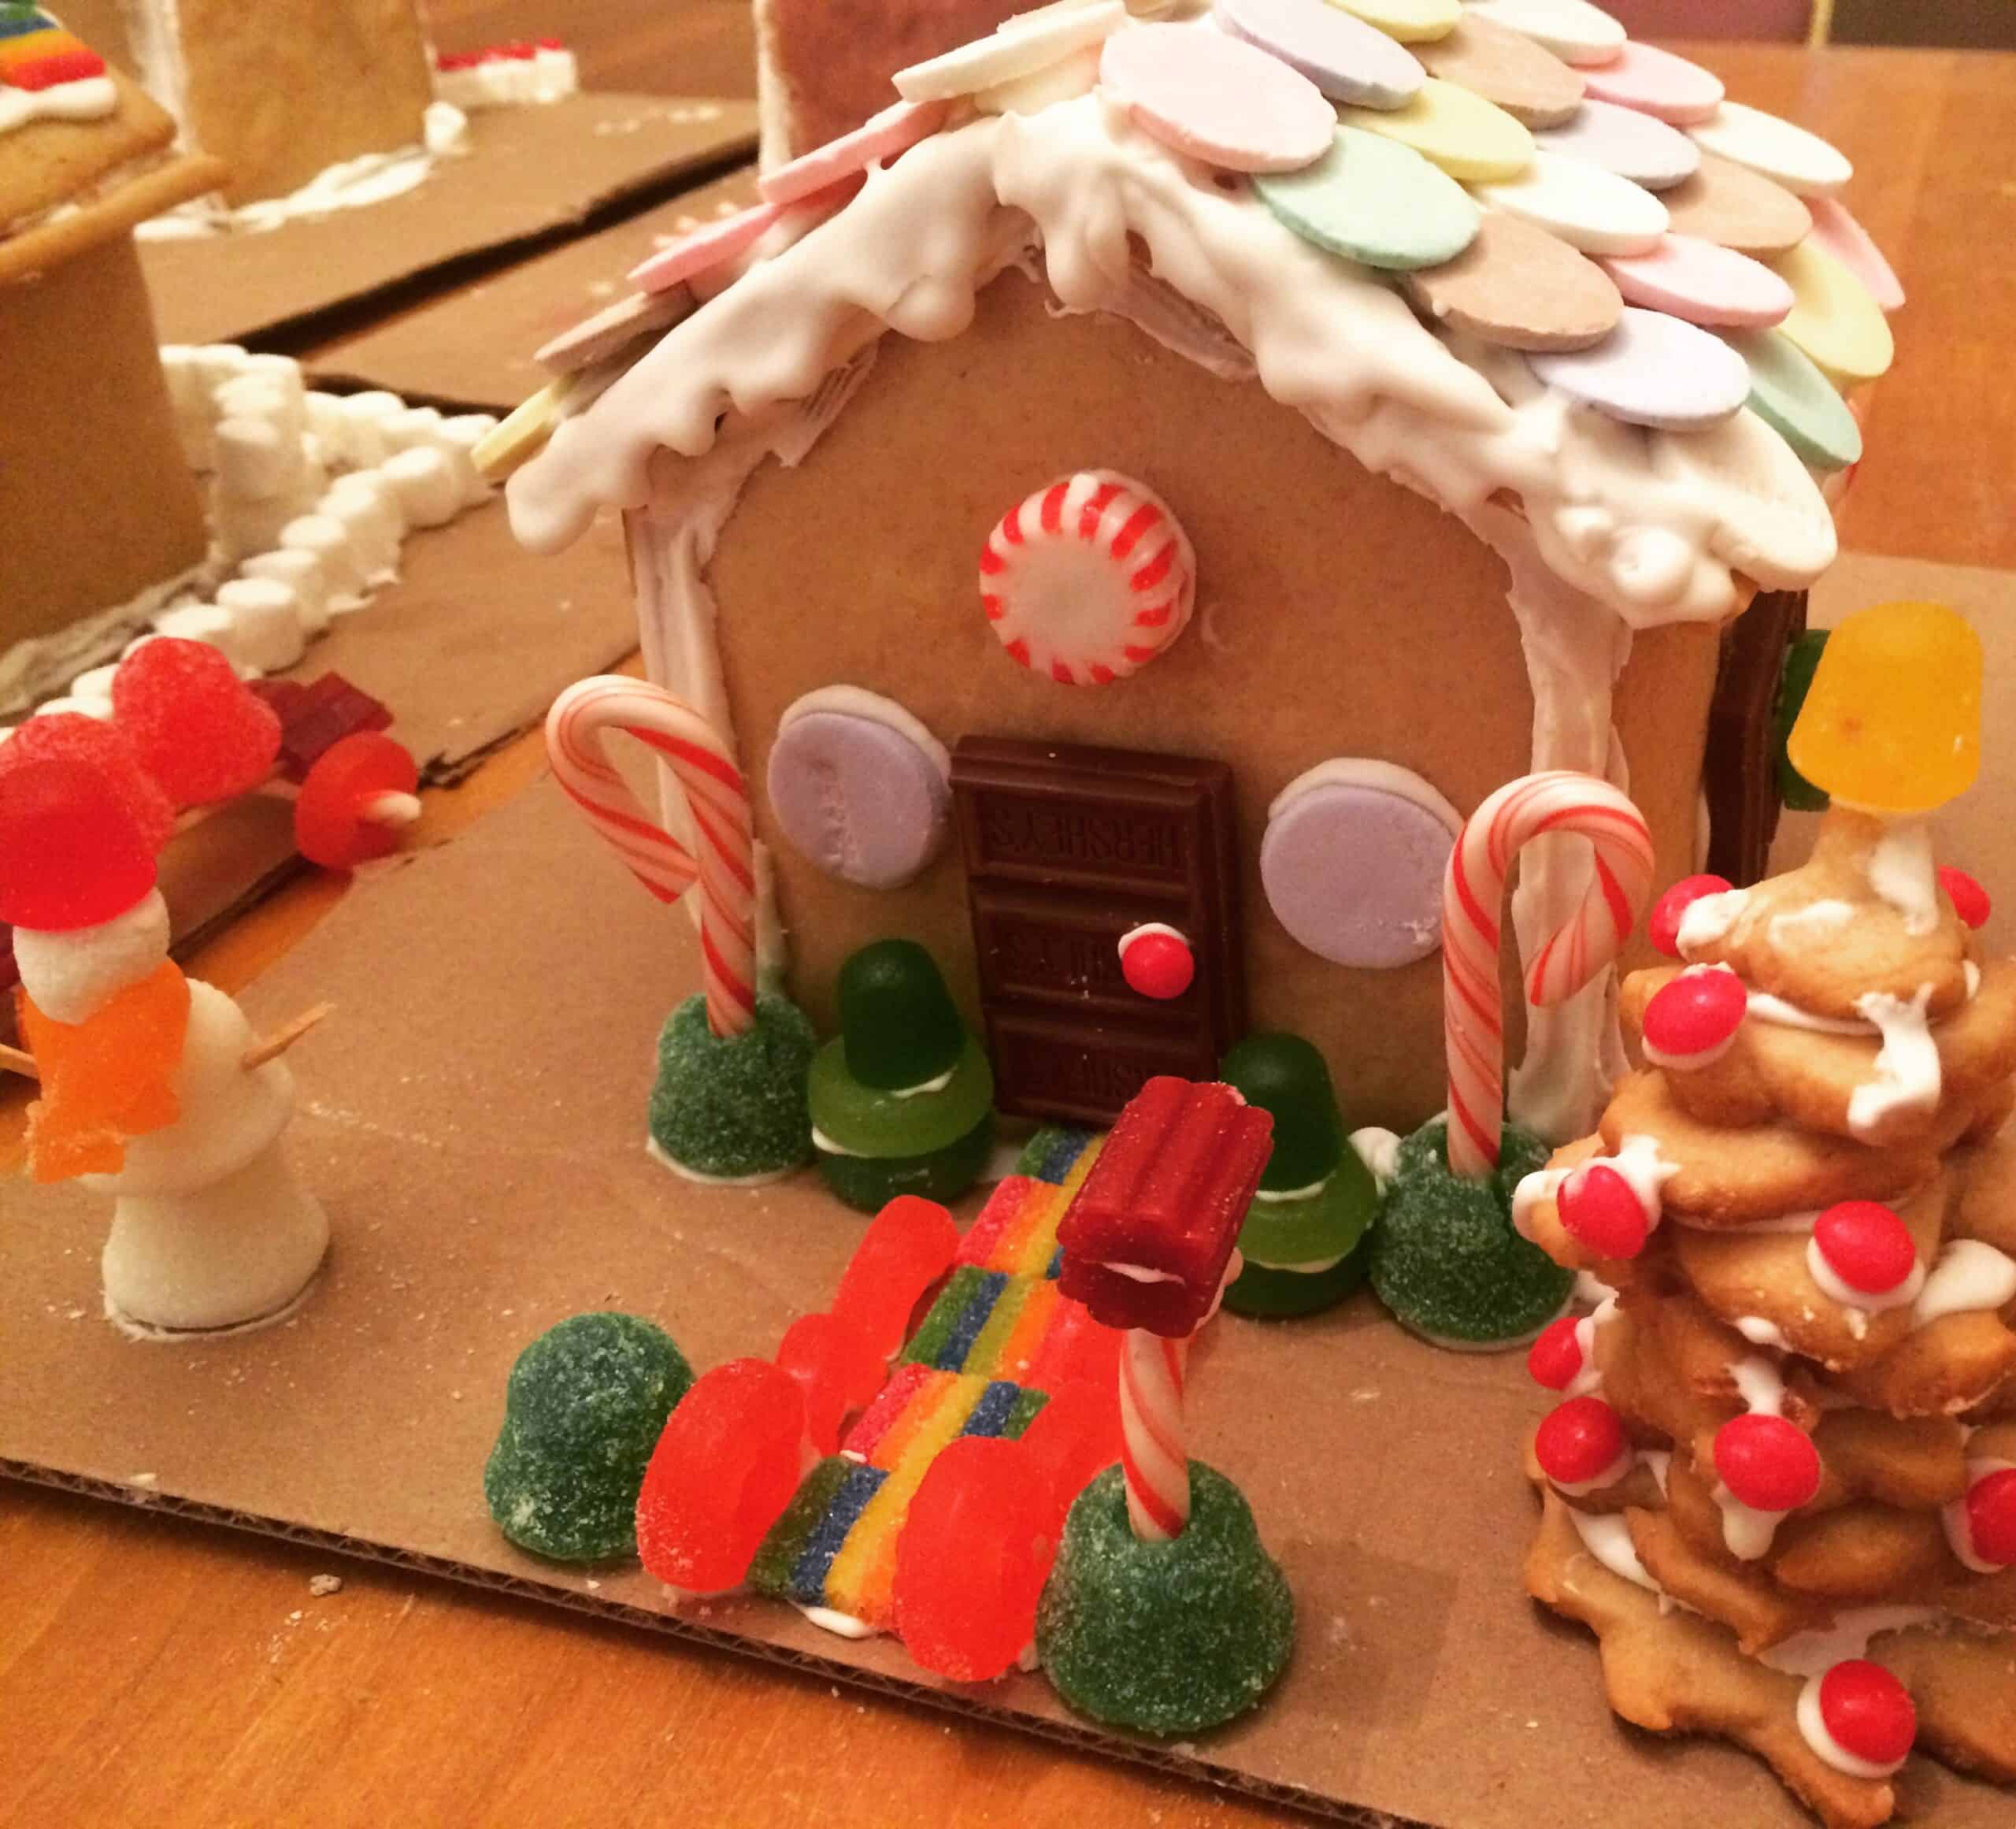
The only limit to decoration is your imagination! I love to challenge myself to use things around the house. The gingerbread house shown here used pumpkin seeds for the roof, gluten free sprinkles stuck to a circle of gingerbread for the wreath, M&Ms for the bushes and path edge, peanut butter cups for the planters, GF Oreos and sunflower seeds for the walkway and candy canes for the fence. Gluten free ice cream cones make great Christmas trees. If you're looking for gluten free candy ideas, check out this list.
Tips for Success
I have had many, many experiences making gingerbread houses with both young and old, here are my tips for success:
- I find it works best to transfer the template pieces to thick paper or poster-board if you're cutting out a lot of houses. Regular paper tends to get wet from touching the dough.
- Use mini cookie cutters to add windows or other openings to your house.
- Crush up hard candies, like jolly ranchers, and dump them in your window openings before baking to create "glass".
- Match your pieces up before assembling. Sometimes small variations occur when cutting that make things go off-kilter. Matching the pieces will give you a better fit during assembly.
- Divide your icing up into condiment bottles, which are easier for kids to use than piping bags. Having several bottles lets everyone work at the same time.
- Dump all the candy into bowls in the middle of the table. I usually pick up candy at the dollar store to save money.
- Make a thick and thinner icing (sometimes I do thick, medium, and thin). Each one has an ideal use. Icing can be easily thinned by adding small amounts of water. Thick icing works for building the house and standing things up, like fence posts. It's also important for sticking candy to vertical surfaces. Medium icing works well for creating thick drips of snow, doing line decorations and sticking things to horizontal surfaces. Thin icing is ideal for covering large areas of ground, like making a snowy yard.
- If you get a smear of icing on the brown part of the house, simply wipe it away with a damp paper towel or Q-tip.
- Color icing with gel food coloring for best results. Liquid food coloring will water down the icing making it too thin.
- Any problems with construction can be hidden with icing and candy. 🙂
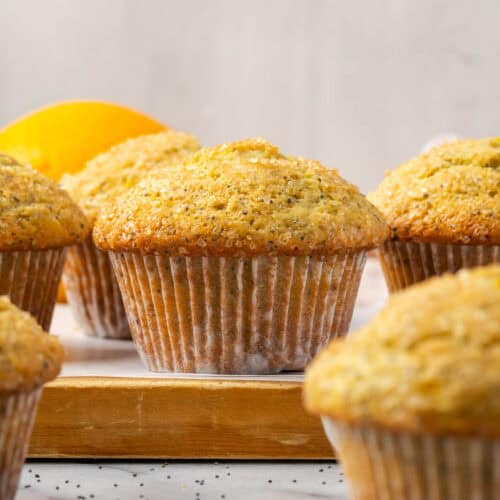
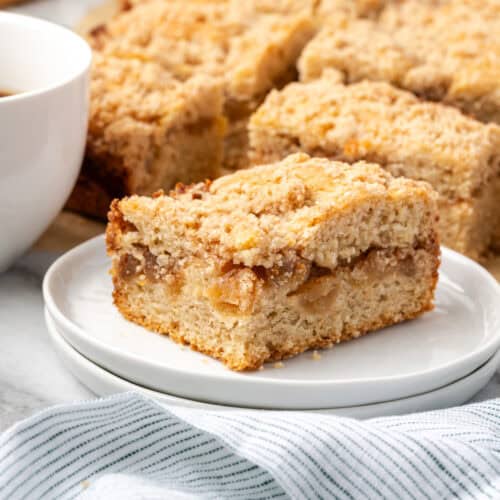
Other holiday recipes to consider:

If you try this recipe, please leave a 🌟🌟🌟🌟🌟 star rating and let me know how you liked it in the comments below.
Recipe

Gluten Free Gingerbread House
Equipment
- Rolling Pin
Ingredients
- 8 ½ Cups Gluten Free 1-to-1 Flour Blend I use Bob's Red Mill - measure carefully!
- 1 Tablespoon Cinnamon
- 1 Tablespoon Ground Ginger
- 1 teaspoon Cloves
- ½ teaspoon Salt
- 1 ¼ Cup Shortening
- 1 ½ Cups Dark Brown Sugar
- ¾ Cup Molasses
- ½ Cup Dark Corn Syrup
- ½ Cup Warm Water see instructions
For the icing
- 2 pounds Powdered Sugar
- 4 Egg Whites buy the carton kind, see note for egg free
- 2 teaspoons Cream of Tartar
Instructions
- Preheat the oven to 350 degrees. Line 2-3 baking sheets with parchment paper and set aside.
- Add the gluten free flour, cinnamon, ginger, cloves and salt to the bowl of a stand mixer. Using the paddle attachment, stir the ingredients until they are well mixed.8 ½ Cups Gluten Free 1-to-1 Flour Blend, 1 Tablespoon Cinnamon, 1 Tablespoon Ground Ginger, 1 teaspoon Cloves, ½ teaspoon Salt
- Add the shortening, dark brown sugar, molasses and corn syrup to a saucepan over medium heat. Cook and stir occasionally until the shortening and sugar have melted. It will take about 7-10 minutes.1 ¼ Cup Shortening, 1 ½ Cups Dark Brown Sugar, ¾ Cup Molasses, ½ Cup Dark Corn Syrup
- Pour the hot sugar mixture into the dry ingredients. Stir on the lowest speed until the dry ingredients are incorporated. It will be a very heavy dough.
- Add the warm water 1 tablespoon at a time until the dough sticks together but it's soft or wet. You may not need to use all of the water.½ Cup Warm Water
- Pull about ¼ of the dough from the bowl and roll it out on a clean work surface. Do not flour the work surface or the rolling pin, the dough will not stick. Roll out to ¼" thick, then place the template pieces on the dough and cut carefully around the edges with a sharp knife. Repeat with the scraps and remaining dough. If the dough starts to feel hard/dry, place a chunk of dough on a plate in the microwave for 30 seconds to soften it.
- Transfer the cut out pieces to your baking sheets. You will only need to space them about ½ inch apart, they will not spread.
- Bake for 20 minutes, rotating the baking sheet halfway through. You can bake multiple sheets at a time.
- Remove the baked pieces from the oven and cool them for at least 20 minutes on the baking sheet. They should be very flat and hard with crisp edges. Once completely cool, prepare the icing and assemble.
To make the icing
- Combine all of the ingredients in the bowl of a stand mixer. Mix on the lowest speed until it forms an icing that is similar to a thick paste.2 pounds Powdered Sugar, 4 Egg Whites, 2 teaspoons Cream of Tartar
- Use the thick icing to construct your house. Afterwards, you can thin the icing for decorating by adding 1-2 tablespoons of water. Do not make it too watery.
Notes

Tiffany is the recipe developer, stylist and food photographer behind Well Fed Baker. As a lifelong baker who had to go gluten free and dairy free in 2016, Tiffany strives to share allergen friendly recipes that never feel like they are free from anything.
Leave a Comment