Rolled and decorated sugar cookies are a classic of the holiday season. These gluten free cut out sugar cookies will definitely not disappoint. Not only is it gluten free, it's also dairy free. Plus it stays soft in the middle while being sturdy enough to hold it's shape during baking and travel. I've been enjoying these for over 20 years and I hope you will too!

For more holiday baking, check out all of my favorite gluten free Christmas cookies.
Jump to:
Want to save this recipe?
Enter your email below and we will send it straight to your inbox!
You will also be added to our weekly email list.
Why You'll Love These Gluten Free Cut Out Cookies
- SOFT: If you love soft sugar cookies, these are for you! As long as you don't overbake these cookies they will stay soft and chewy for days.
- HOLDS THE SHAPE: There is nothing as frustrating as cut out cookies that turn into blobs in the oven. Follow my chilling instructions and these cookies will hold their shapes perfectly.
- TESTED RECIPE: I've been making this recipe for more than 20 years, so I know it works every time.
- ALLERGEN FRIENDLY: This sugar cookie recipe is gluten free, nut free, and dairy free as written.
Ingredient List
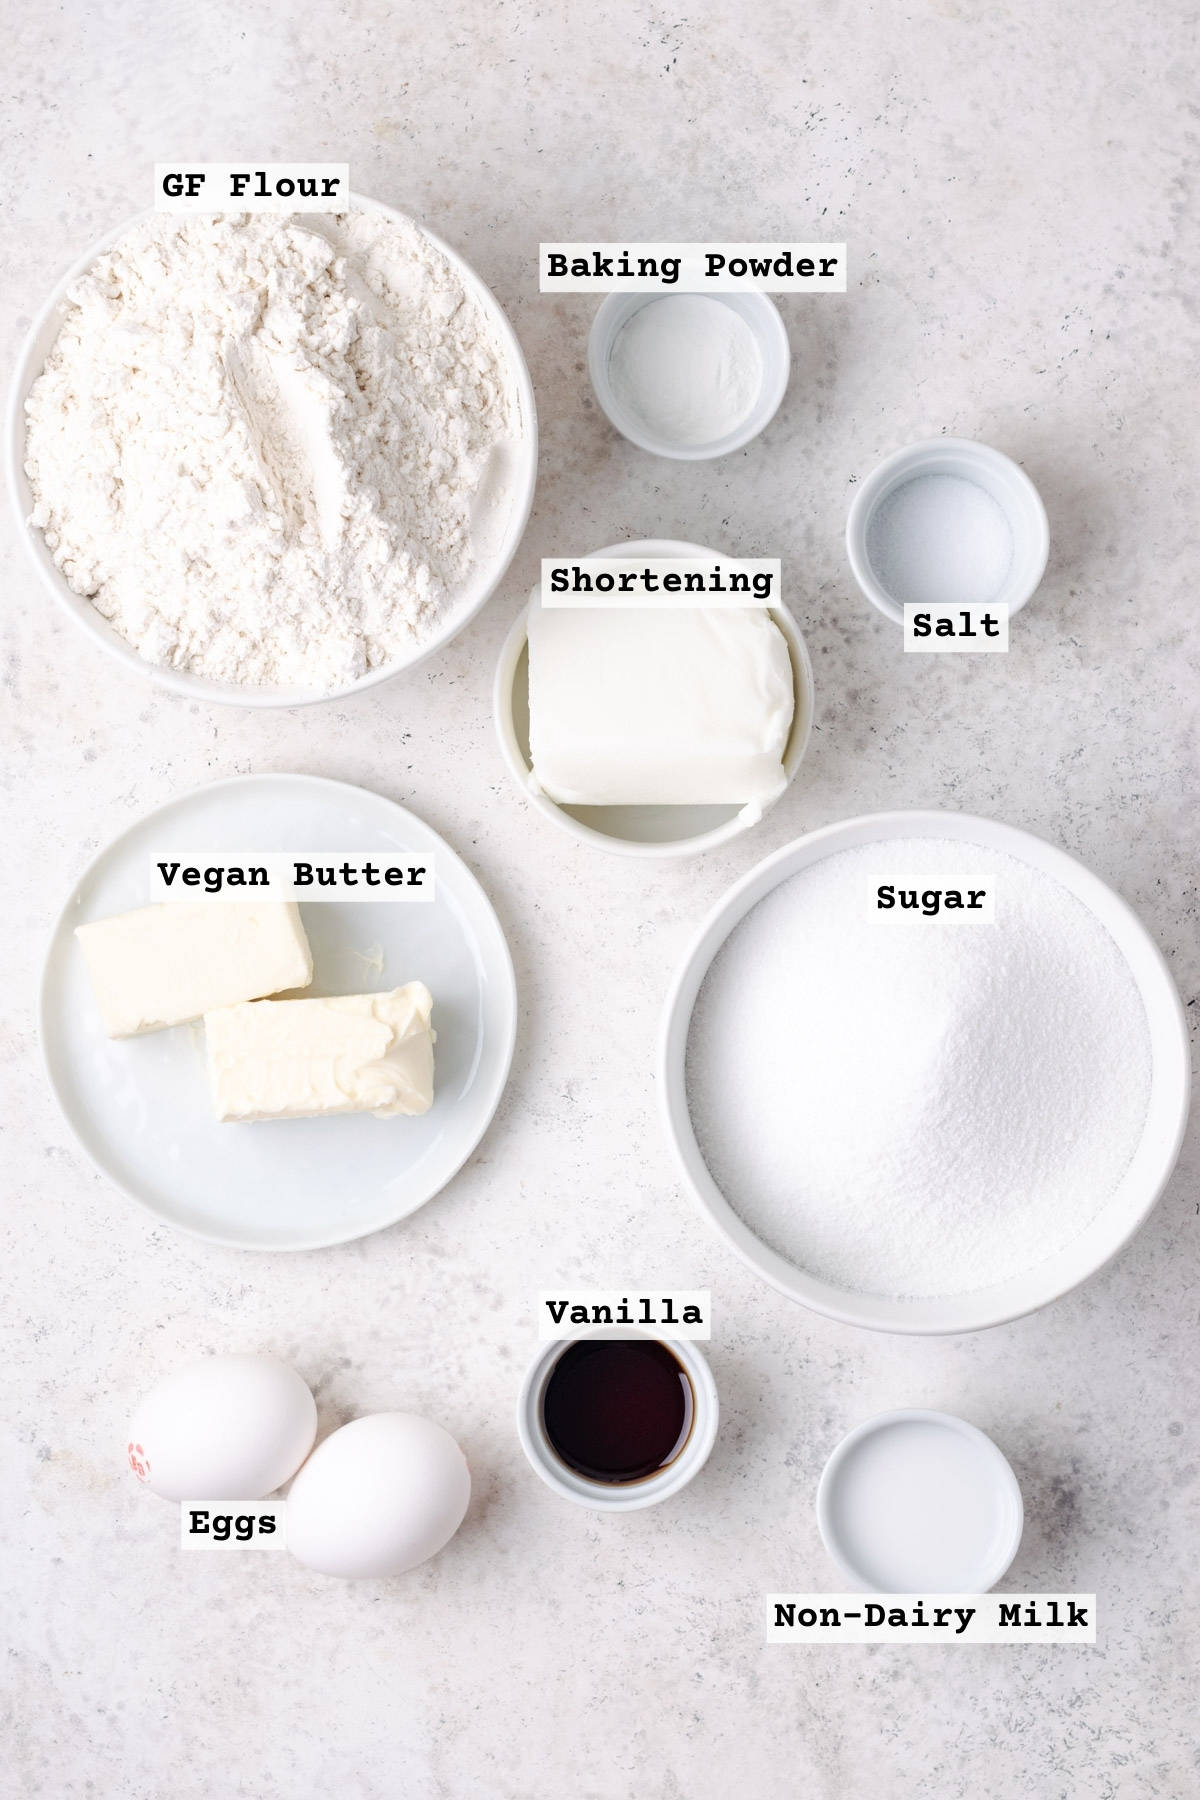
- Gluten Free 1-to-1 Flour Blend - I use Bob's Red Mill. You can use the flour blend of your choice, but this recipe has been created specifically with BRM so you may experience different results. As always, I recommend you weigh your flour if you plan to use another blend.
- Salt - Salt is a crucial ingredient to balance the sweet flavor of the cookies. Don't be tempted to skip it.
- Baking Powder - This leavening agent helps the cookies puff up and stay soft after baking with very little spread so they hold their shape.
- Sugar - Use granulated white sugar here. I haven't tested it with any sugar alternatives, so I'm not sure what the outcome will be.
- Vegan Butter - I use Miyoko's or Country Crock Plant Butter. If you're not dairy free, use unsalted dairy butter in the same measure.
- Shortening - Crisco is my preference. You can also use the full amount of butter in place of the shortening, but may experience some spreading during baking.
- Egg - This recipe uses two eggs, which helps the cookies stay soft and also provides structure so they aren't too crumbly. I have not tested this with an egg replacer.
- Vanilla - Provides that sweet touch that you expect from a sugar cookie.
See the recipe card below for complete ingredient list with measurements.
Substitutions & Variations
- Not Dairy Free - If you're not dairy free, replace the vegan butter with unsalted dairy butter in the same measure.
- Chocolate Sugar Cookies - Replace ½ cup of gluten free flour with cocoa powder for a chocolate version.
- Flavors - Add other extracts like orange, lemon or almond to switch the flavor of these cookies. You can also incorporate orange, lime or lemon zest with the sugar for more flavor.
- Colorful cookies - Add a few drops of gel food coloring to your dough to make any color cookie you like.
- Shapes - These cookies aren't just for Christmas. Cut them into any shape to suit your holiday or celebration, like my Easter sugar cookies - or just cut them into plain circles to enjoy year round.
- No icing - If you don't like decorating cookies, you can sprinkle these with sanding sugar, colorful sprinkles or just use turbinado sugar for a crunchy coating.
How to Make Gluten Free Sugar Cookies
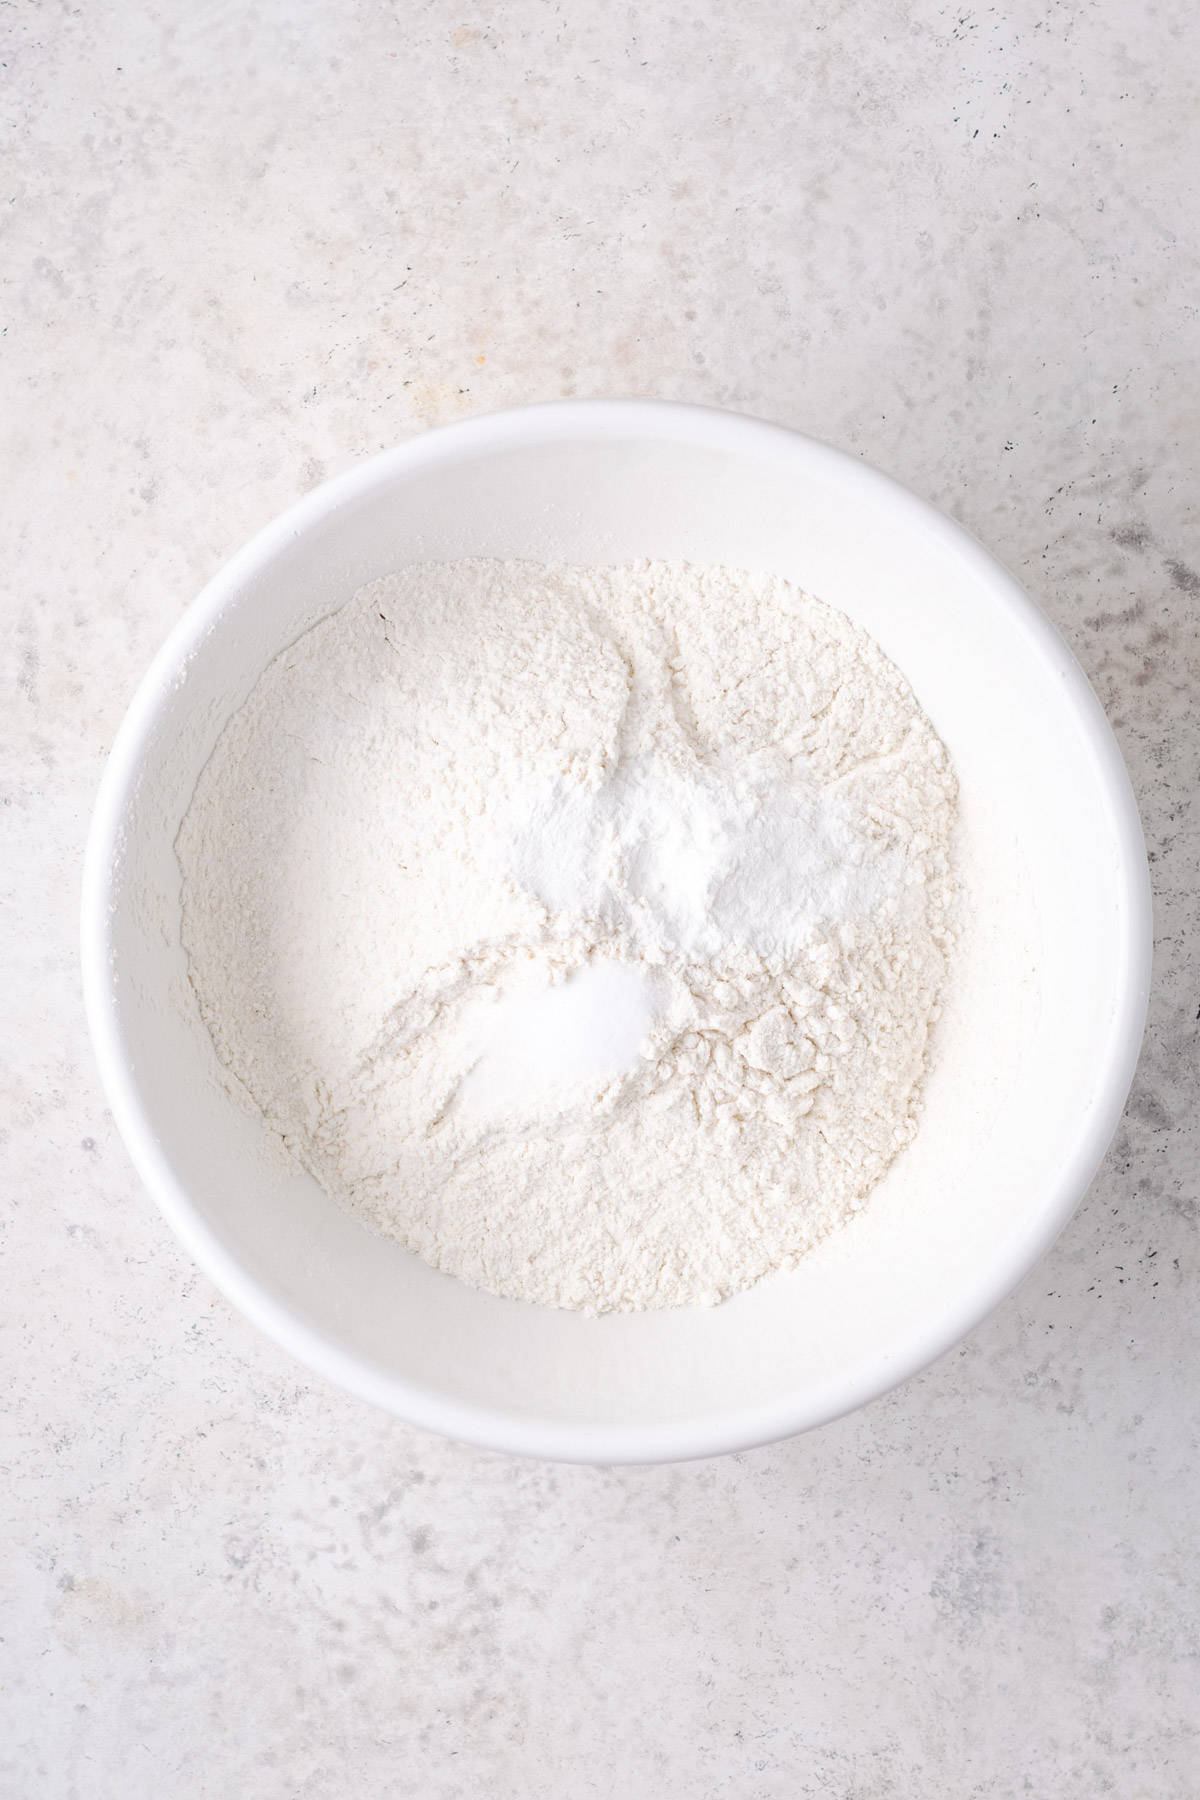
STEP 1: Combine the gluten free flour, baking powder and salt in a large mixing bowl. Whisk to mix together.
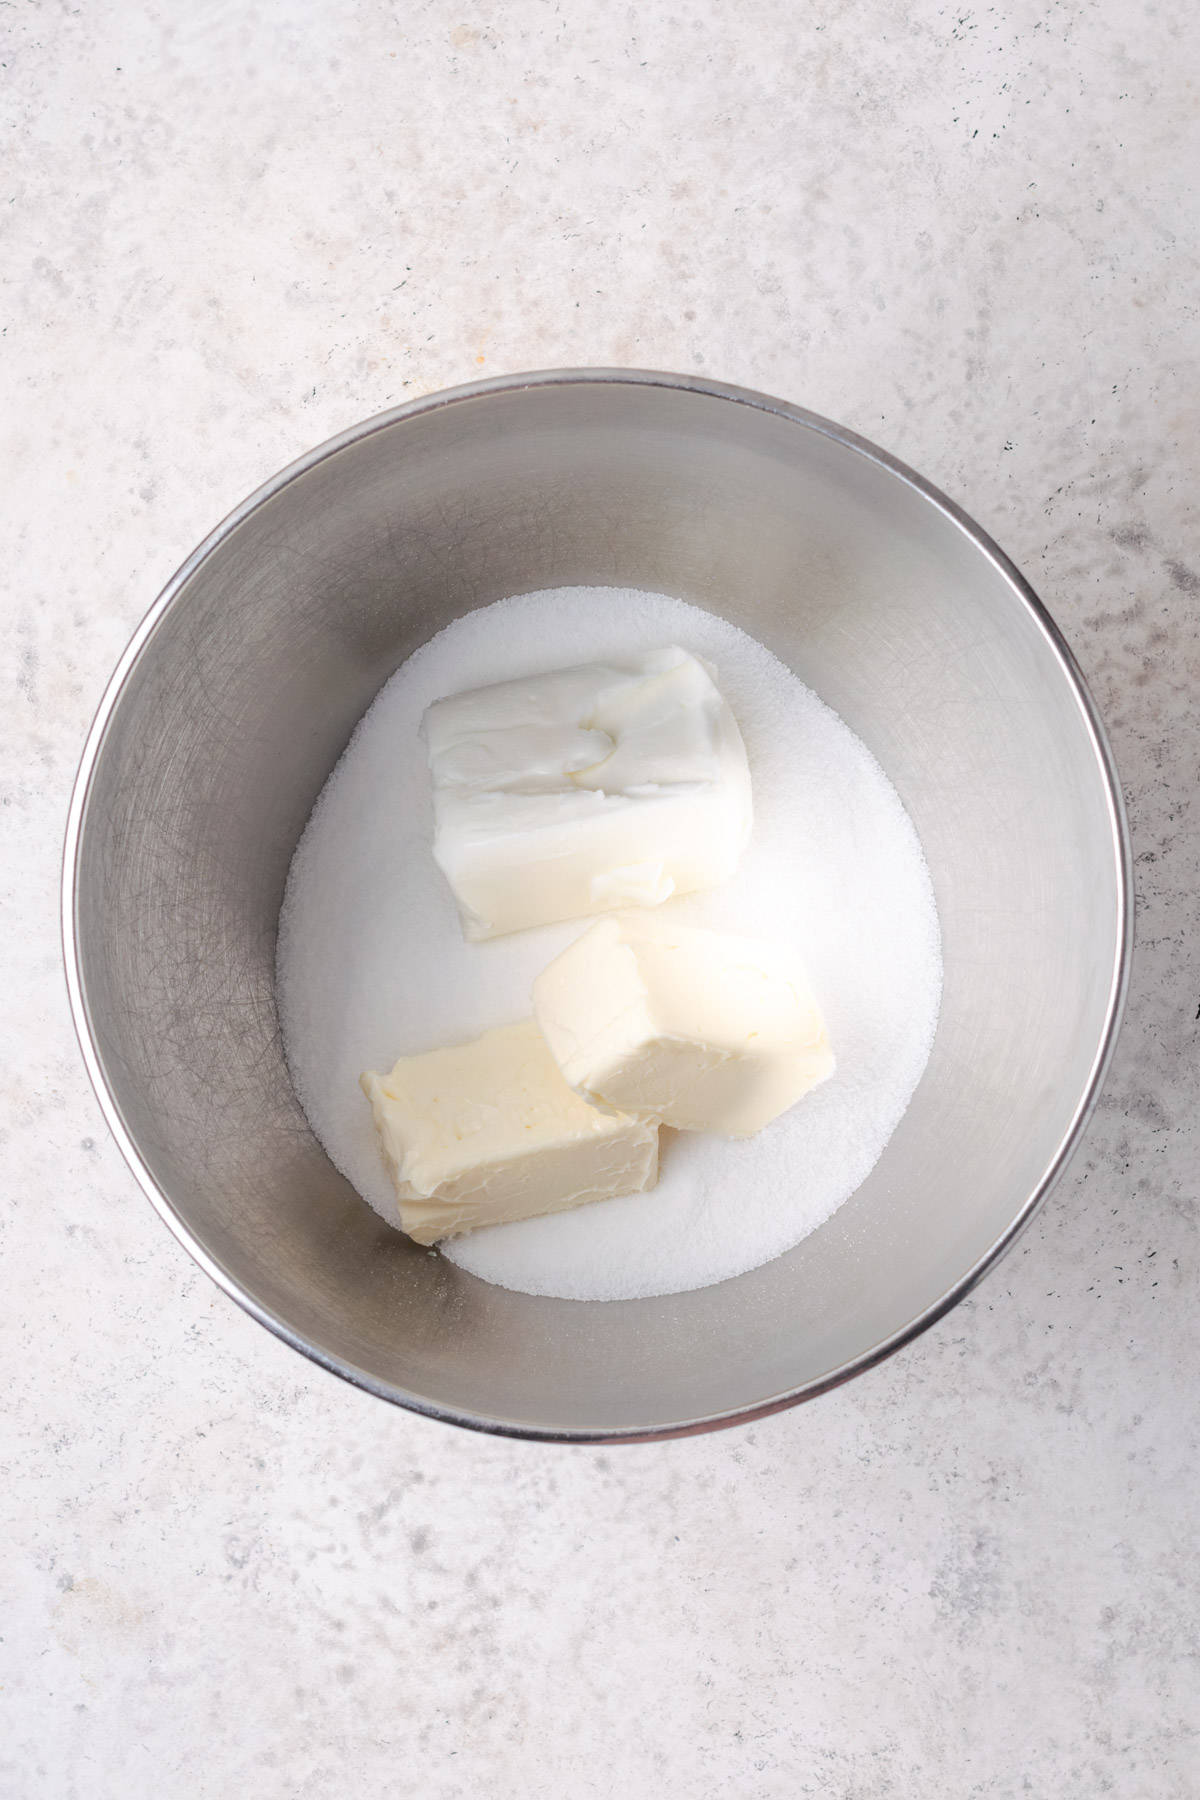
STEP 2: Add the sugar, butter, and shortening to the bowl of a stand mixer. Beat on medium speed for 3-5 minutes until light and fluffy.
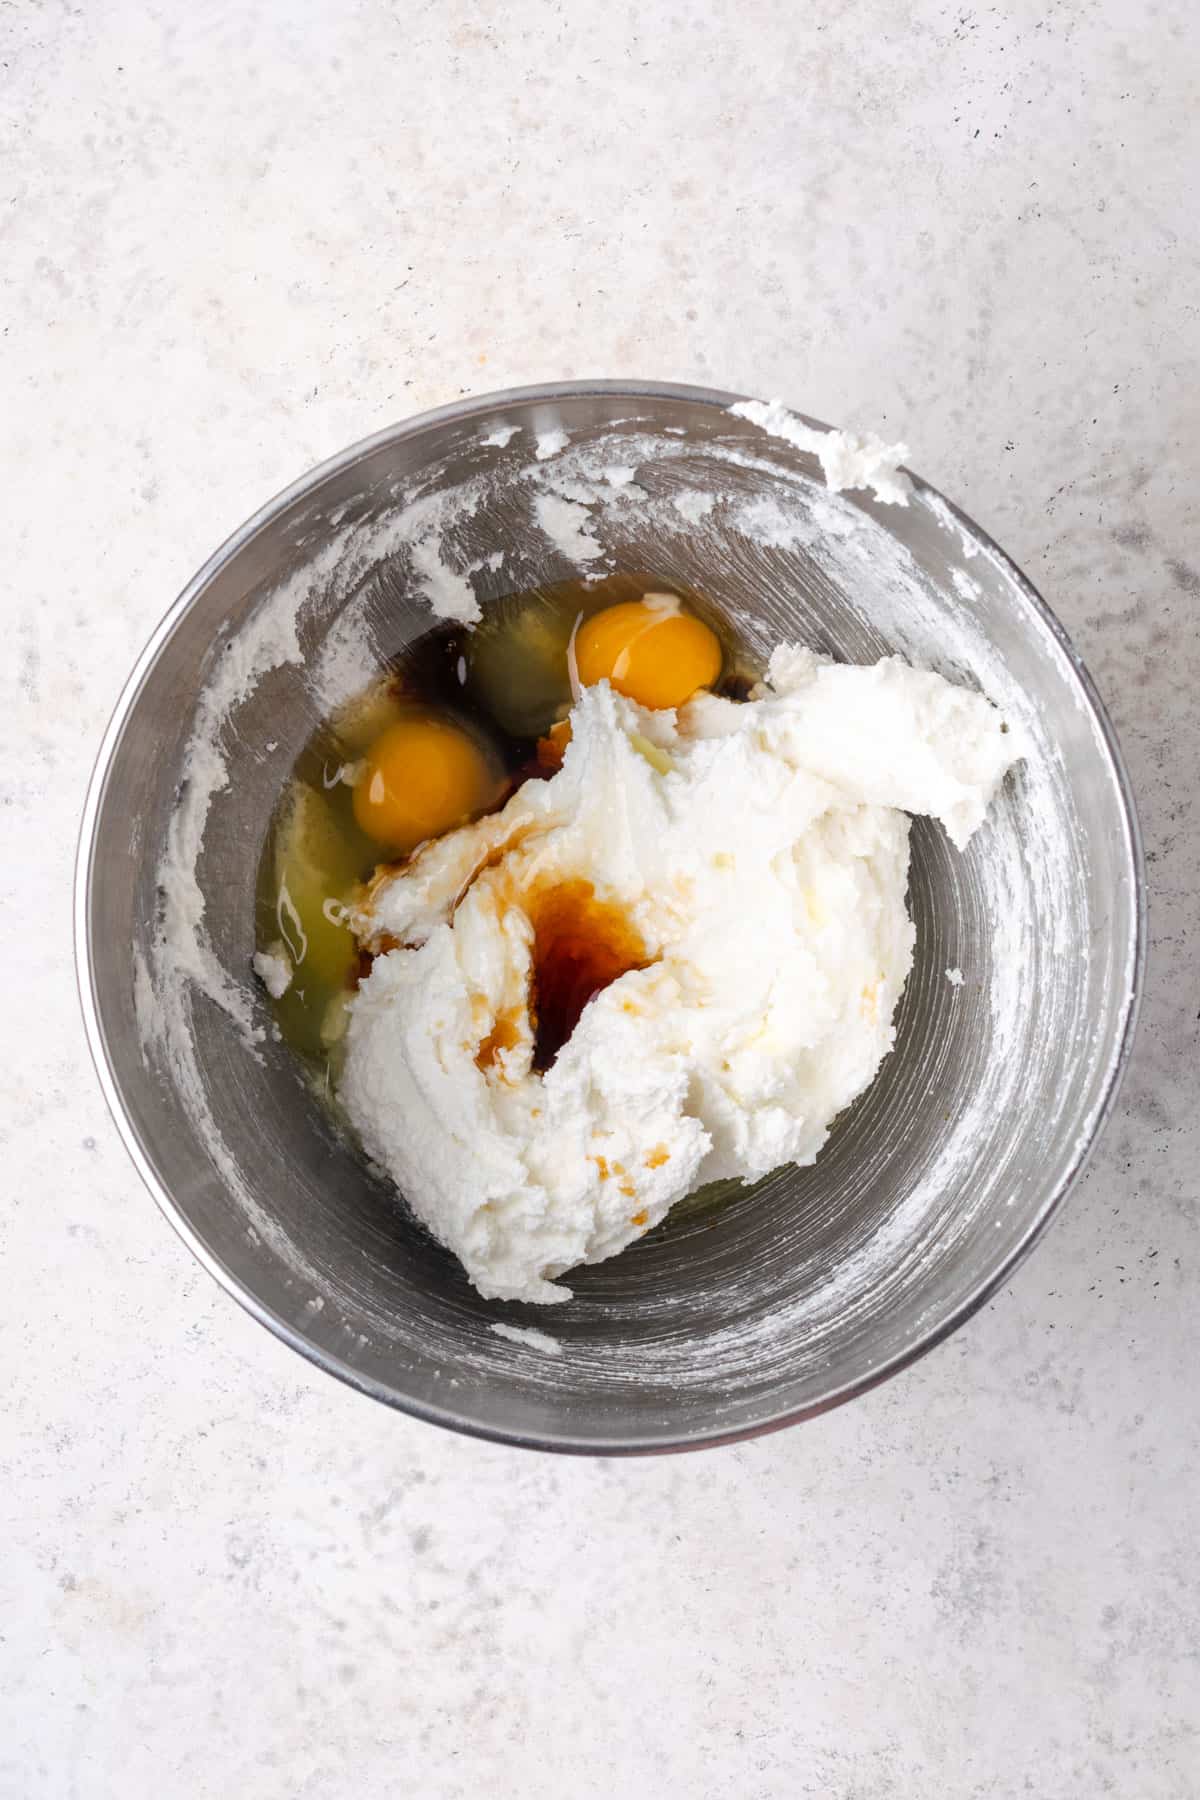
STEP 3: Add the eggs and vanilla to the creamed sugar-butter mixture. Beat again for about 90 seconds.
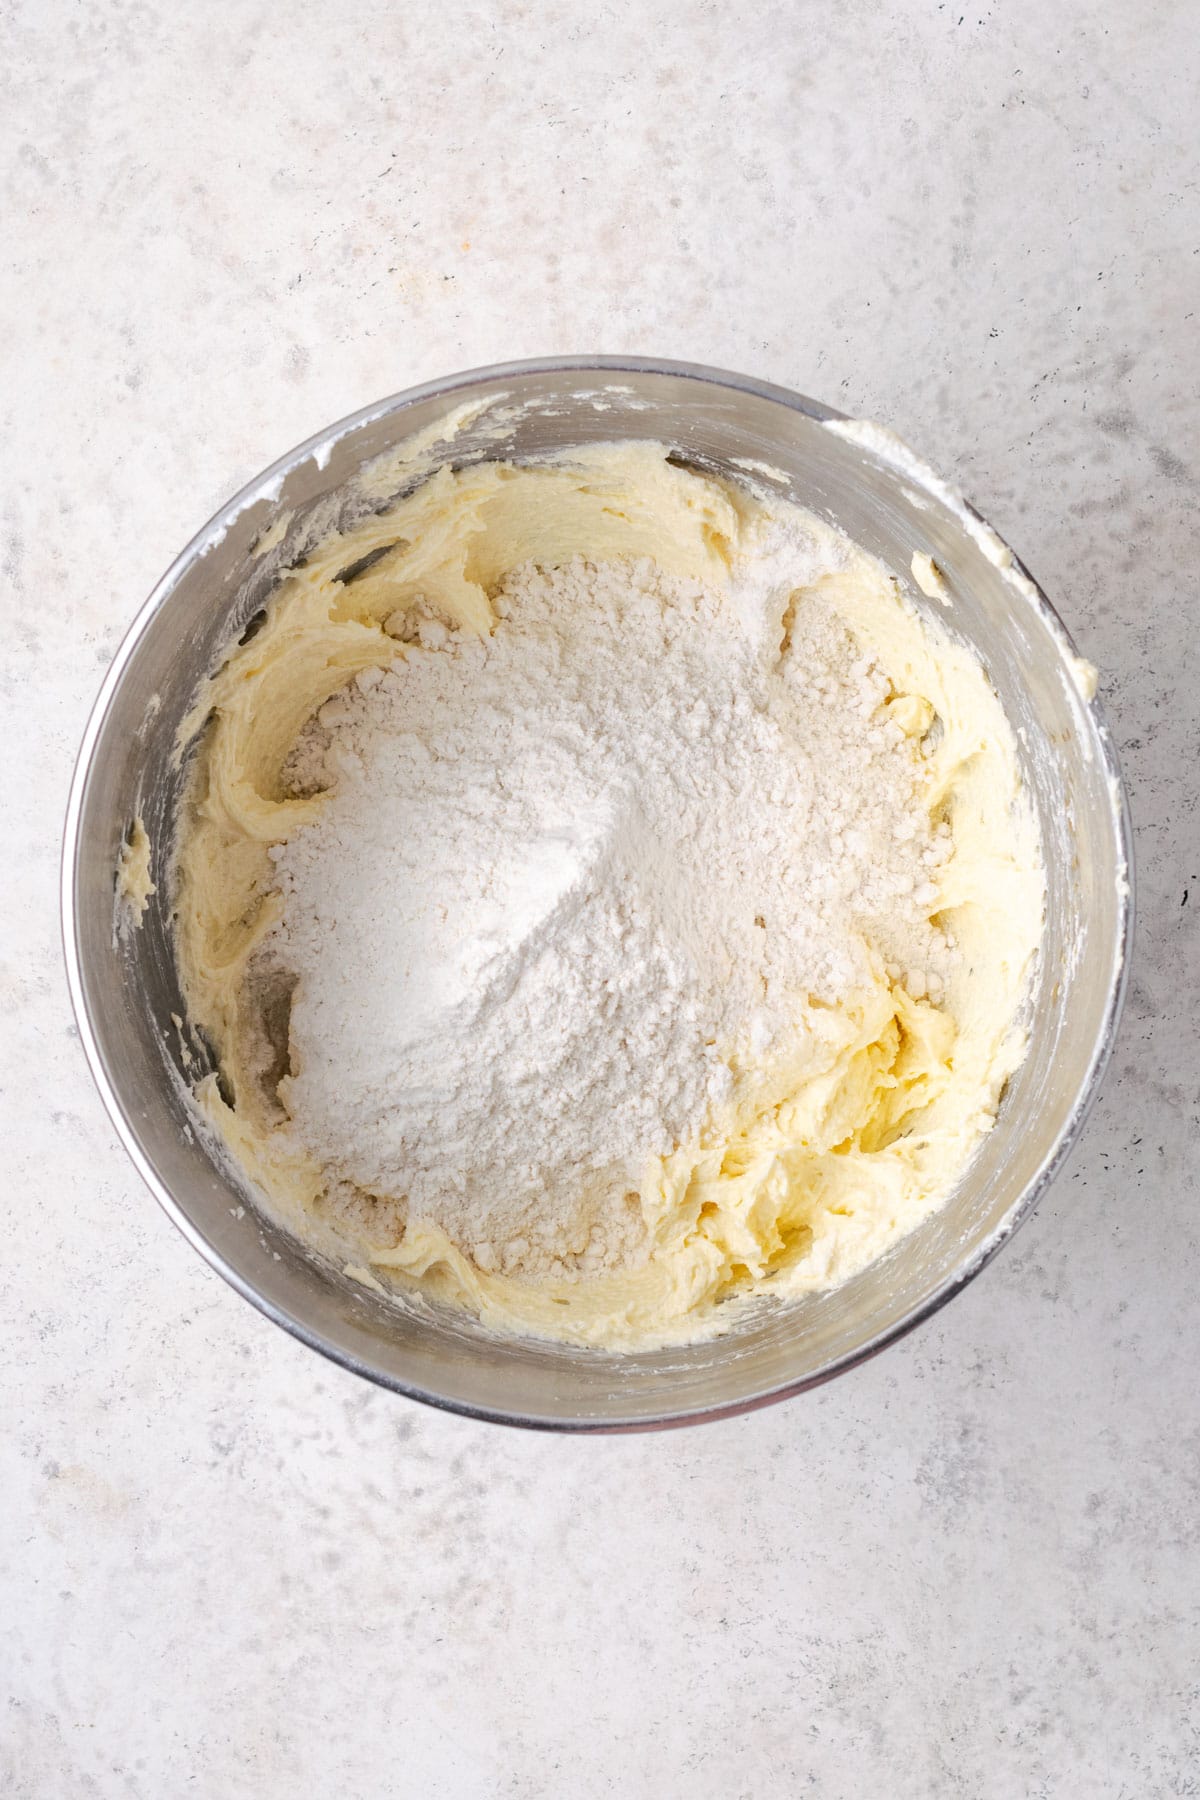
STEP 4: With the mixer on low speed, slowly add the dry ingredients. Mix until just incorporated.
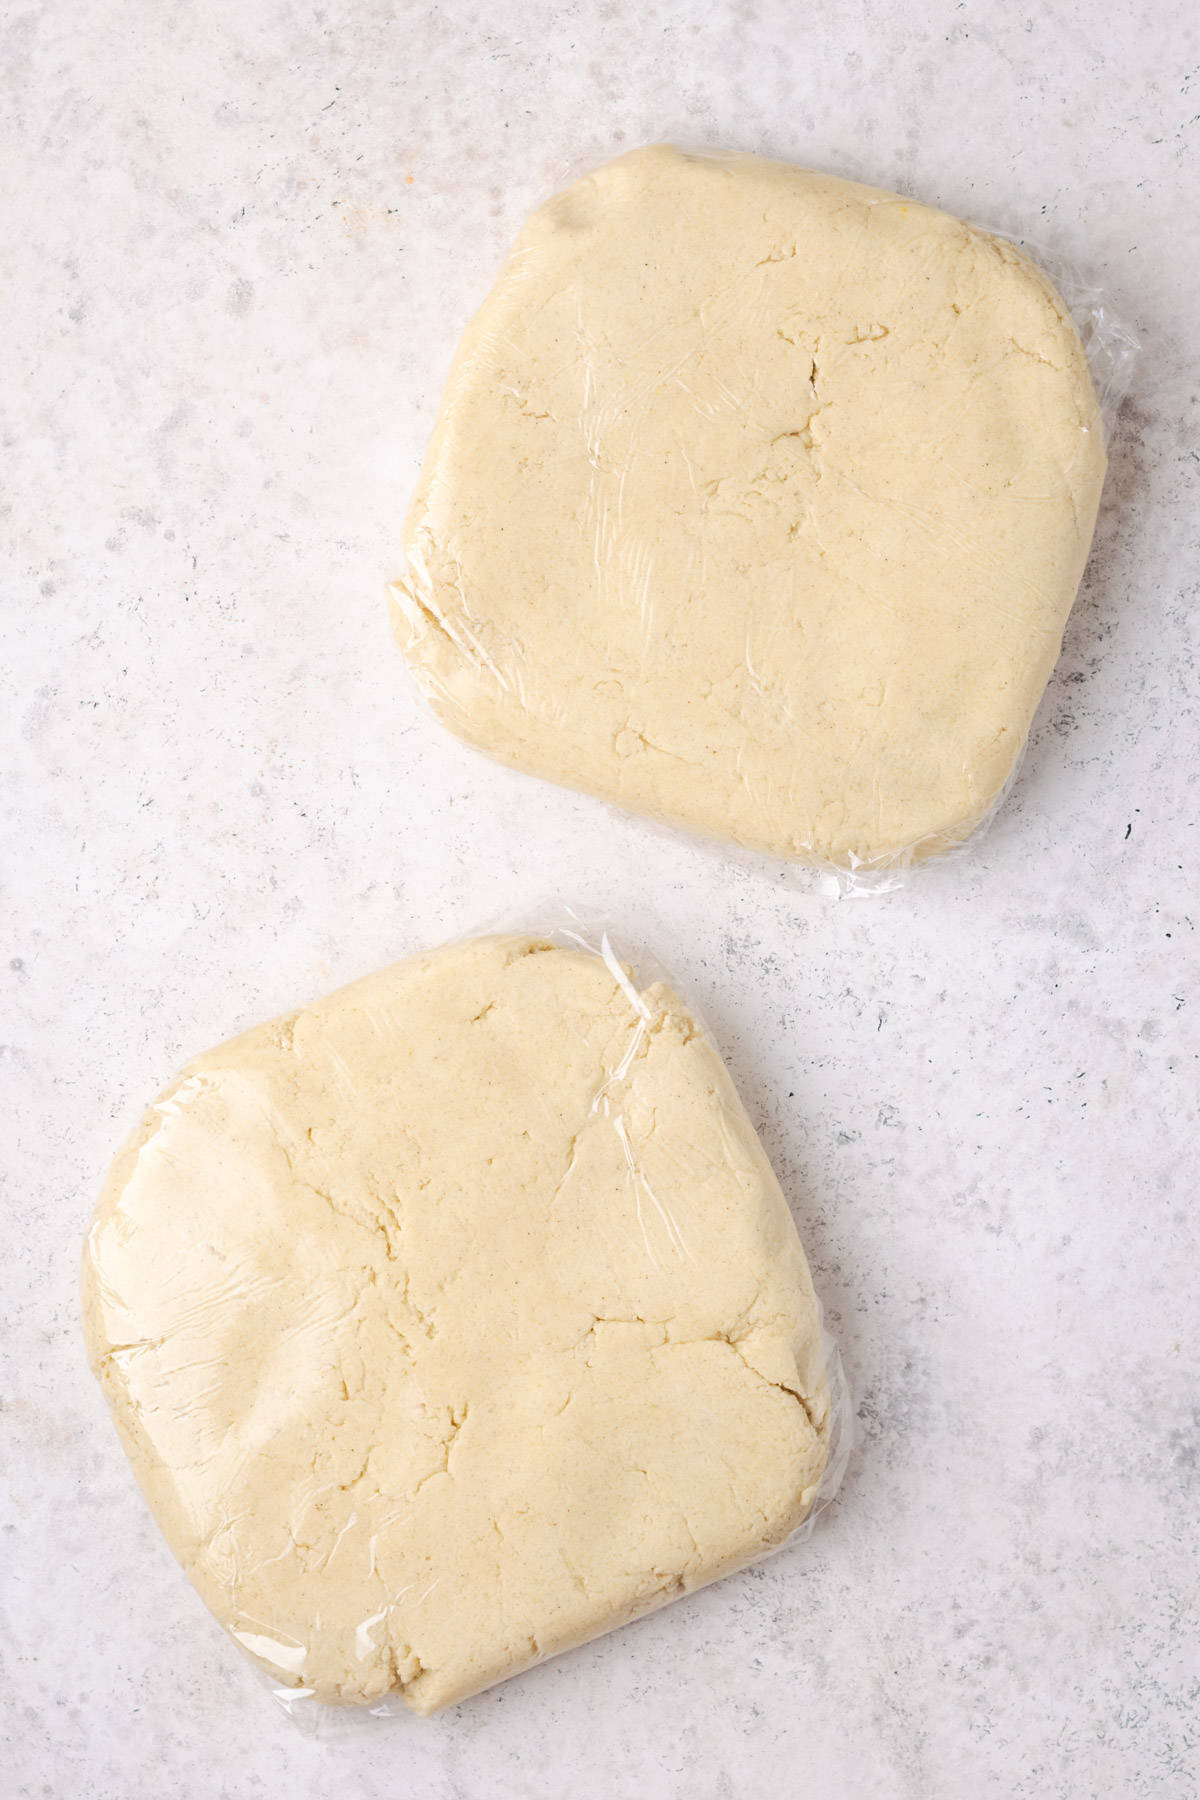
STEP 5: Divide the sugar cookie dough into two portions. Wrap each in plastic wrap and flatten into a disc about 1 inch thick. Refrigerate for at least 2 hours.
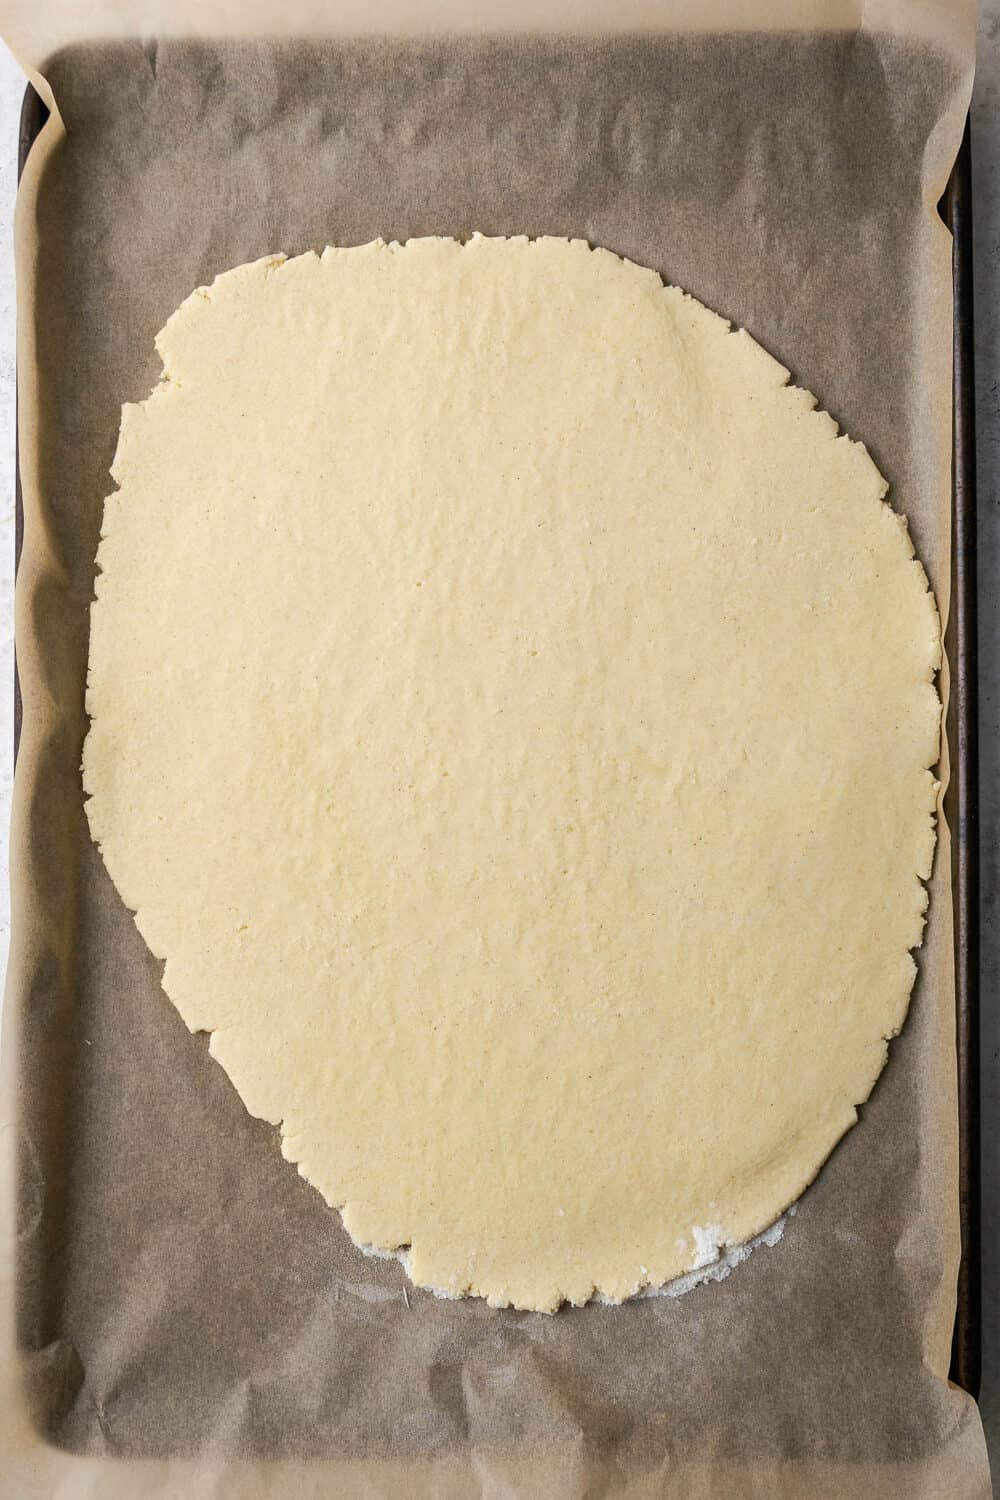
STEP 6: Roll out one portion of the cookie dough on a piece of parchment paper until it's about ¼" thick. Place the dough sheet on a baking tray and put it in the freezer for 15 minutes.
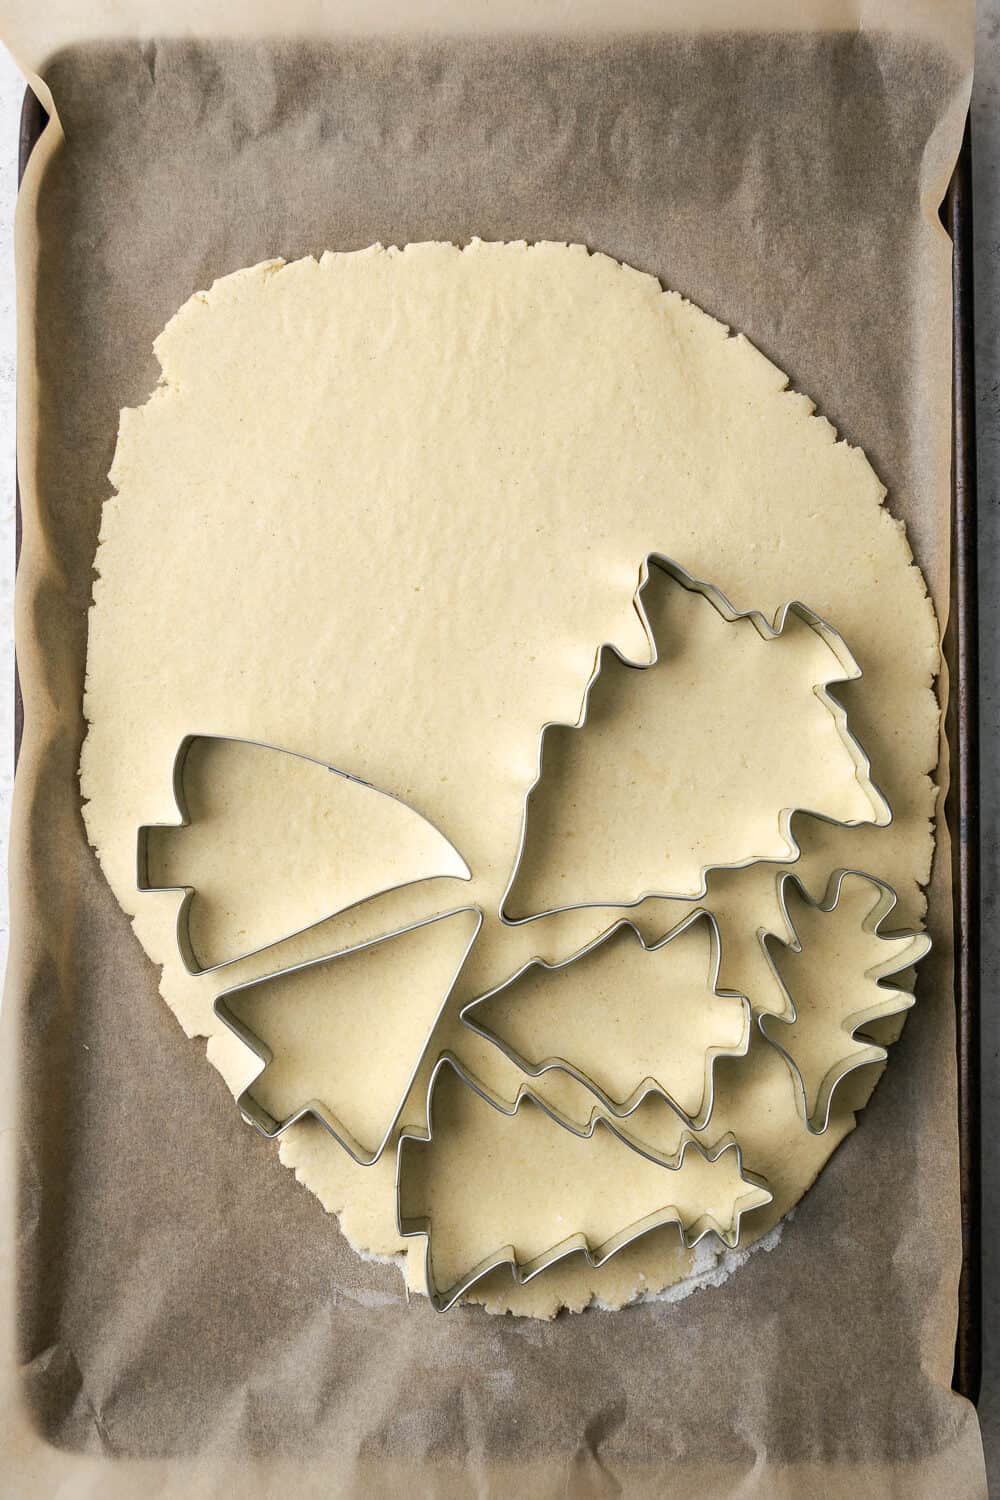
STEP 7: Use cookie cutters to cut out your shapes.
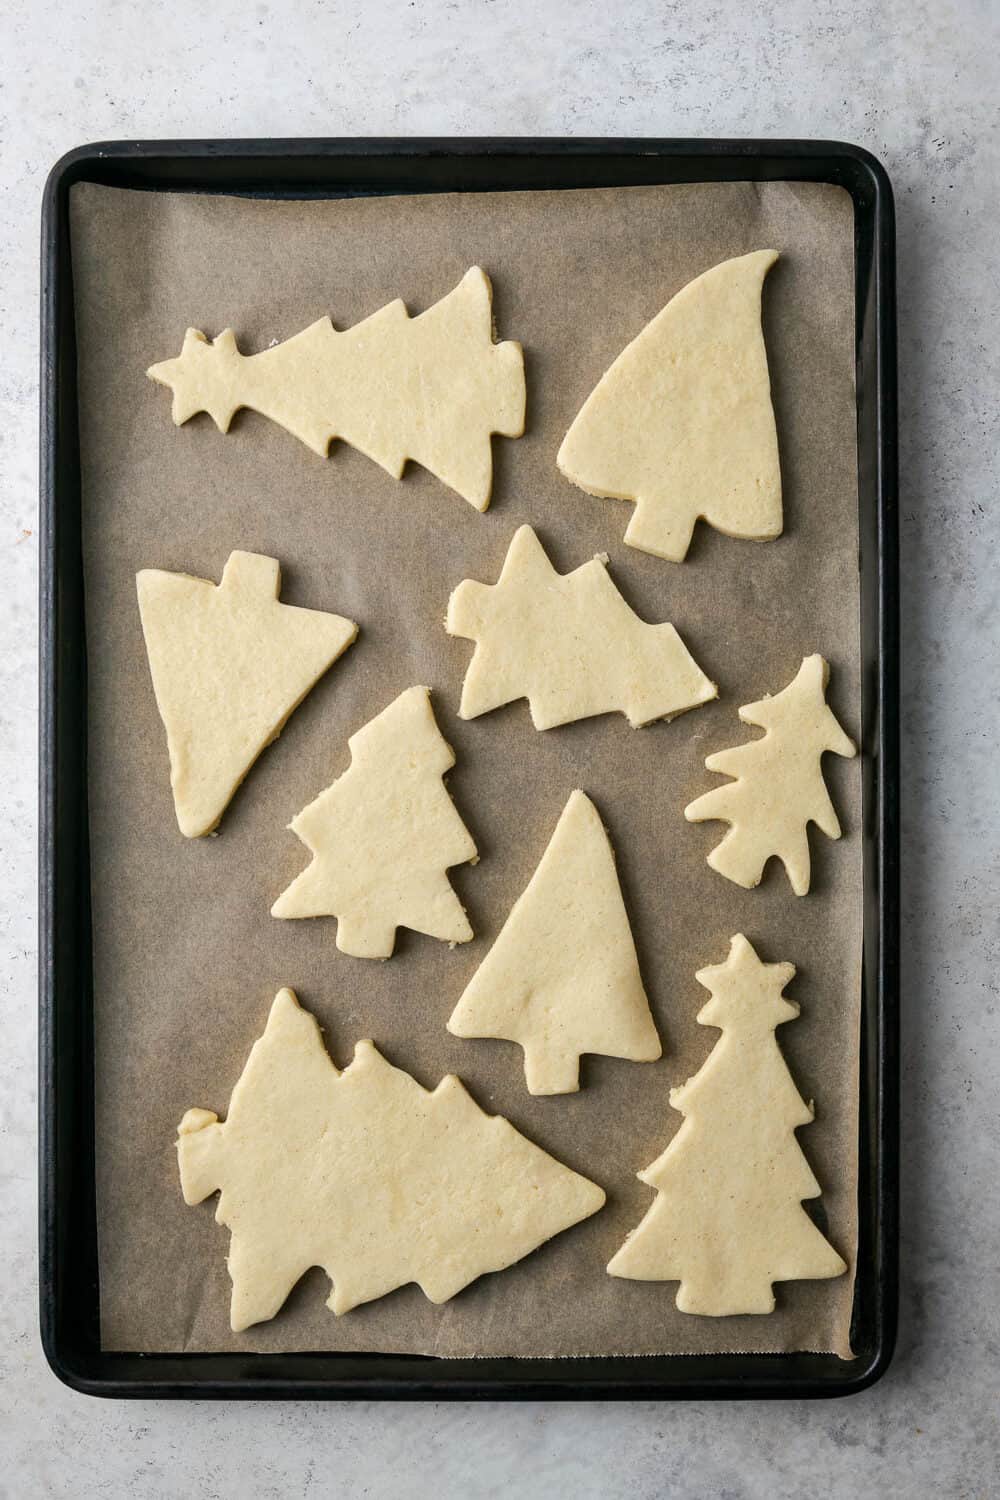
STEP 8: Transfer the cut out cookie shapes to a parchment lined baking sheet. Place the baking sheet in the freezer for 15 minutes. Then move it directly from the freezer to the oven and bake.

Baking Tip
These cookies will not brown on top at all. If you cook them until they are golden brown, they will end up very crunchy once cooled. For soft cookies, only cook until the edges of the cookies are just stiff when you touch them with your finger.

How to Decorate Gluten Free Sugar Cookies
If you don't want to decorate your cookies with icing, you can sprinkle them with colored or white sugar before baking. To decorate with icing, make the royal icing recipe below. It will create a thick icing, which you can thin to your desired consistency depending on your design.
The icing recipe below will create more than enough to decorate all of the cookies in a variety of colors. To create separate icing colors, just scoop a portion of the mixed icing into a small bowl and add gel food coloring until you reach your desired color. Then transfer your icing to a piping bag for decorating.

How to Store Frosted Sugar Cookies
Once you apply the icing, it will take a while to dry to the point you can safely stack the cookies. Leave them out on a baking tray for several hours until you're sure they are dry. Then transfer the cookies to an airtight container, layering them with was paper in between. They can be stored at room temperature for 3-4 days.
Recipe FAQs
The recipe is important because having too much sugar or butter will cause the cookies to melt and spread.
But the key to getting perfect cut out cookies is keeping the dough really cold. Put the shapes into the freezer right before baking and move the cookie sheet directly from the freezer to the oven.
I usually roll my dough out to about ¼" thick, maybe a little less. I like to keep them thick so the center stays softer after baking. Having them on the thick side also makes the cookies a little more sturdy for decorating.
Cut your shapes out of the dough before baking.
The edges should feel a little stiff when you gently touch them. You don't want to wait until the tops are golden unless you like your cookies crunchy/crispy.
More gluten free cookie recipes to consider:


If you try this recipe, please leave a 🌟🌟🌟🌟🌟 star rating and let me know how you liked it in the comments below.
Recipe

Gluten Free Cut Out Sugar Cookies
Ingredients
For the cookies
- 3 ½ Cup Gluten Free 1-to-1 Flour Blend sifted (I use Bob's Red Mill)
- 1 teaspoon Baking Powder
- ½ teaspoon Salt
- 2 Cup Sugar
- ½ Cup Vegan Butter room temperature
- ½ Cup Shortening
- 2 Eggs
- 2 teaspoon Vanilla
- 1 Tablespoon Water may not need
For the Royal Icing
- 4 Cup Powdered Sugar sifted
- ½ Cup Water may need more depending on how thick you want your icing
- 2 Egg Whites or 5 tablespoon Meringue Powder
- 1 teaspoon Vanilla
Instructions
For the cookies
- Combine sifted gluten free flour, salt and baking powder in a medium size bowl. Set aside.3 ½ Cup Gluten Free 1-to-1 Flour Blend, 1 teaspoon Baking Powder, ½ teaspoon Salt
- In the bowl of an electric mixer, combine butter, shortening, and sugar. Beat on medium speed about 3-5 minutes until light and fluffy. Scrape down bowl.2 Cup Sugar, ½ Cup Vegan Butter, ½ Cup Shortening
- Add in the eggs and vanilla. Beat on medium speed for about 90 seconds until combined. Scrape down the bowl.2 Eggs, 2 teaspoon Vanilla
- Turn mixer to lowest speed. Slowly add the flour mixture. Stir until just combined. If the mixture seems too stiff, add the 1 tablespoon of water.1 Tablespoon Water
- Divide dough in half. Cover each half with plastic wrap and flatten to 1 inch thick. Place wrapped dough in refrigerator for 2 hours or overnight.
- Remove chilled dough from refrigerator and roll out to ¼” thickness. Place on cookie sheet and return to the freezer for 15 minutes.
- Preheat oven to 325 degrees and line 2 baking sheets with parchment paper.
- Remove chilled dough from freezer and cut into shapes. Place cut shapes on cookie sheet and return to freezer for 15 minutes. The extra chilling helps the shapes stay crisp/defined when baking.
- Bake in preheated oven for 11-13 minutes. Ideally the cookies should be very light in color on the top and sides and the bottoms should be lightly browned. If you notice browning around the edges it usually means the dough wasn't rolled to an even thickness or you've baked too long.
- Continue the process until all the dough has been used.
For the Royal Icing
- Combine all of the ingredients in a stand mixer with paddle attachment. Start out on slow speed until the ingredients are incorporated. Then turn mixer to high setting and beat for 6-8 minutes until very fluffy. If the icing is too thick, stir in a little more water 1 tablespoon at a time.4 Cup Powdered Sugar, ½ Cup Water, 2 Egg Whites, 1 teaspoon Vanilla
Notes

Tiffany is the recipe developer, stylist and food photographer behind Well Fed Baker. As a lifelong baker who had to go gluten free and dairy free in 2016, Tiffany strives to share allergen friendly recipes that never feel like they are free from anything.
Robyn says
These are really good ! I doubled the recipe, being VERY careful to measure properly. As I went along though, I baked them longer than recommended. Approximately 13 minutes. Don't skip the freezer part, it's very very important !
I'm so glad you liked them! 🙂