
Being gluten free, dairy free or even vegan doesn't mean you have to live without delicious pie. With this amazing gluten free pie crust recipe, you'll happily say goodbye to pies of the past and start dreaming of all of your future pies. Plus, I have included step by step instructions and a video, so even beginning bakers can successfully make this pie crust.
I have made this gluten free pie crust well over a hundred times and it comes out perfect every time. I mostly serve my food to gluten eaters and I get so many compliments on my flaky crust whenever I serve pie. So don't worry about anyone knowing it's gluten free.
This recipe makes enough dough for one double-crust pie or two single-crust pies. You can serve this with your favorite pie filling or use or try one of my gluten free pie recipes.

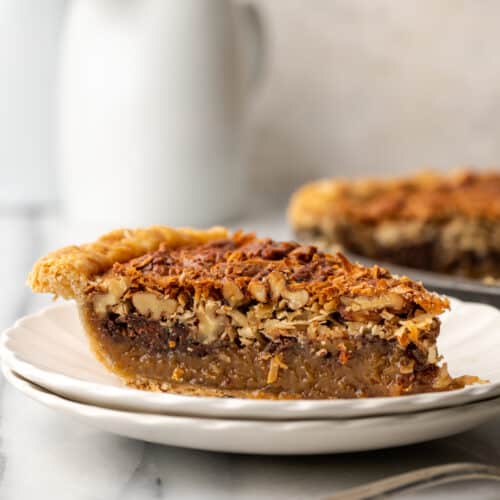
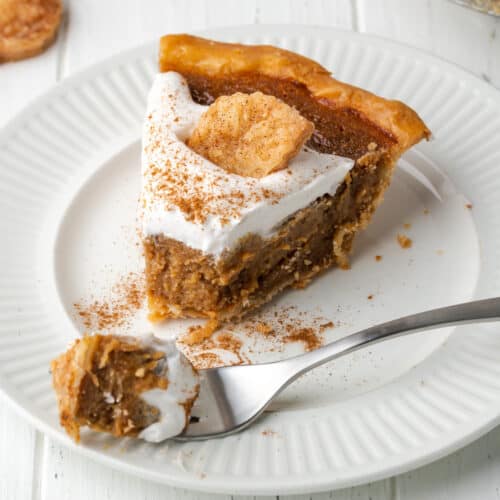
Make sure to check out a few of my favorite pie recipes to fill your gluten free pie crust: german chocolate pecan pie, gluten free dutch apple pie and gluten free derby pie. For cookie crusts, check out my gluten free graham cracker crust and gluten free oreo pie crust which are perfect for cheesecakes and no bake pies.
Jump to:
- Why This is the Best Gluten-Free Pie Crust Recipe
- Equipment Needed
- Ingredient Notes
- Substitutions & Variations
- How to Make Gluten Free Pie Crust
- Expert Tip
- Expert Tip
- How to Make Extra Flaky Pie Crust
- How to make a lattice pie crust
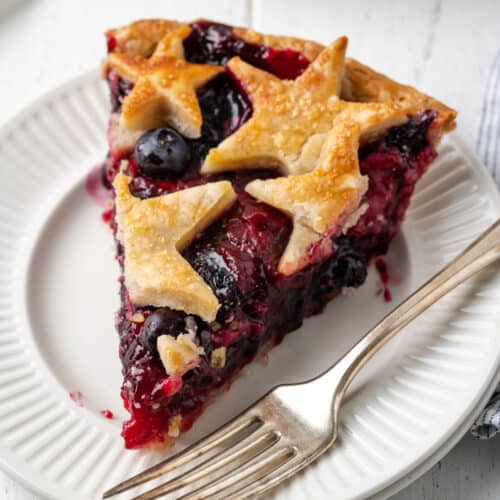
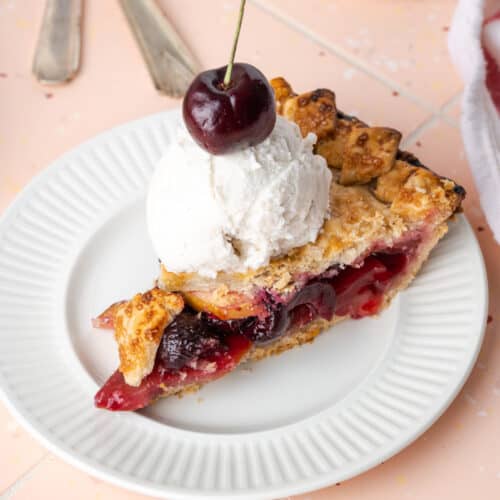
- Use This Recipe to Make Decorative Pie Crusts
- Recipe FAQs
- Gluten Free Pie Recipes to consider:
- Recipe
Why This is the Best Gluten-Free Pie Crust Recipe
- It's so flaky, it almost shatters in your mouth.
- It uses simple ingredients.
- It's gluten free & vegan (and so delicious)
- It handles almost as easily as a traditional pie crust.
- It can be used for sweet pies or savory pies

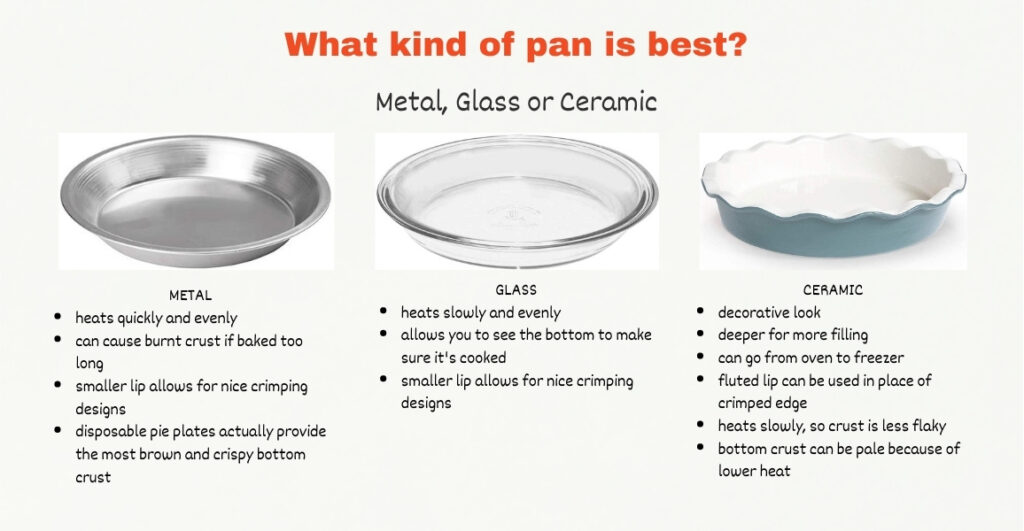
Equipment Needed
For a basic pie crust, you will need:
- a pie plate or pie dish (either metal, glass or ceramic)
- a rolling pin
- plastic wrap or parchment paper
Additionally, for some recipes you may need pie weights for par-baking. A bench scraper and a food scale also come in handy, but are not required.
Ingredient Notes
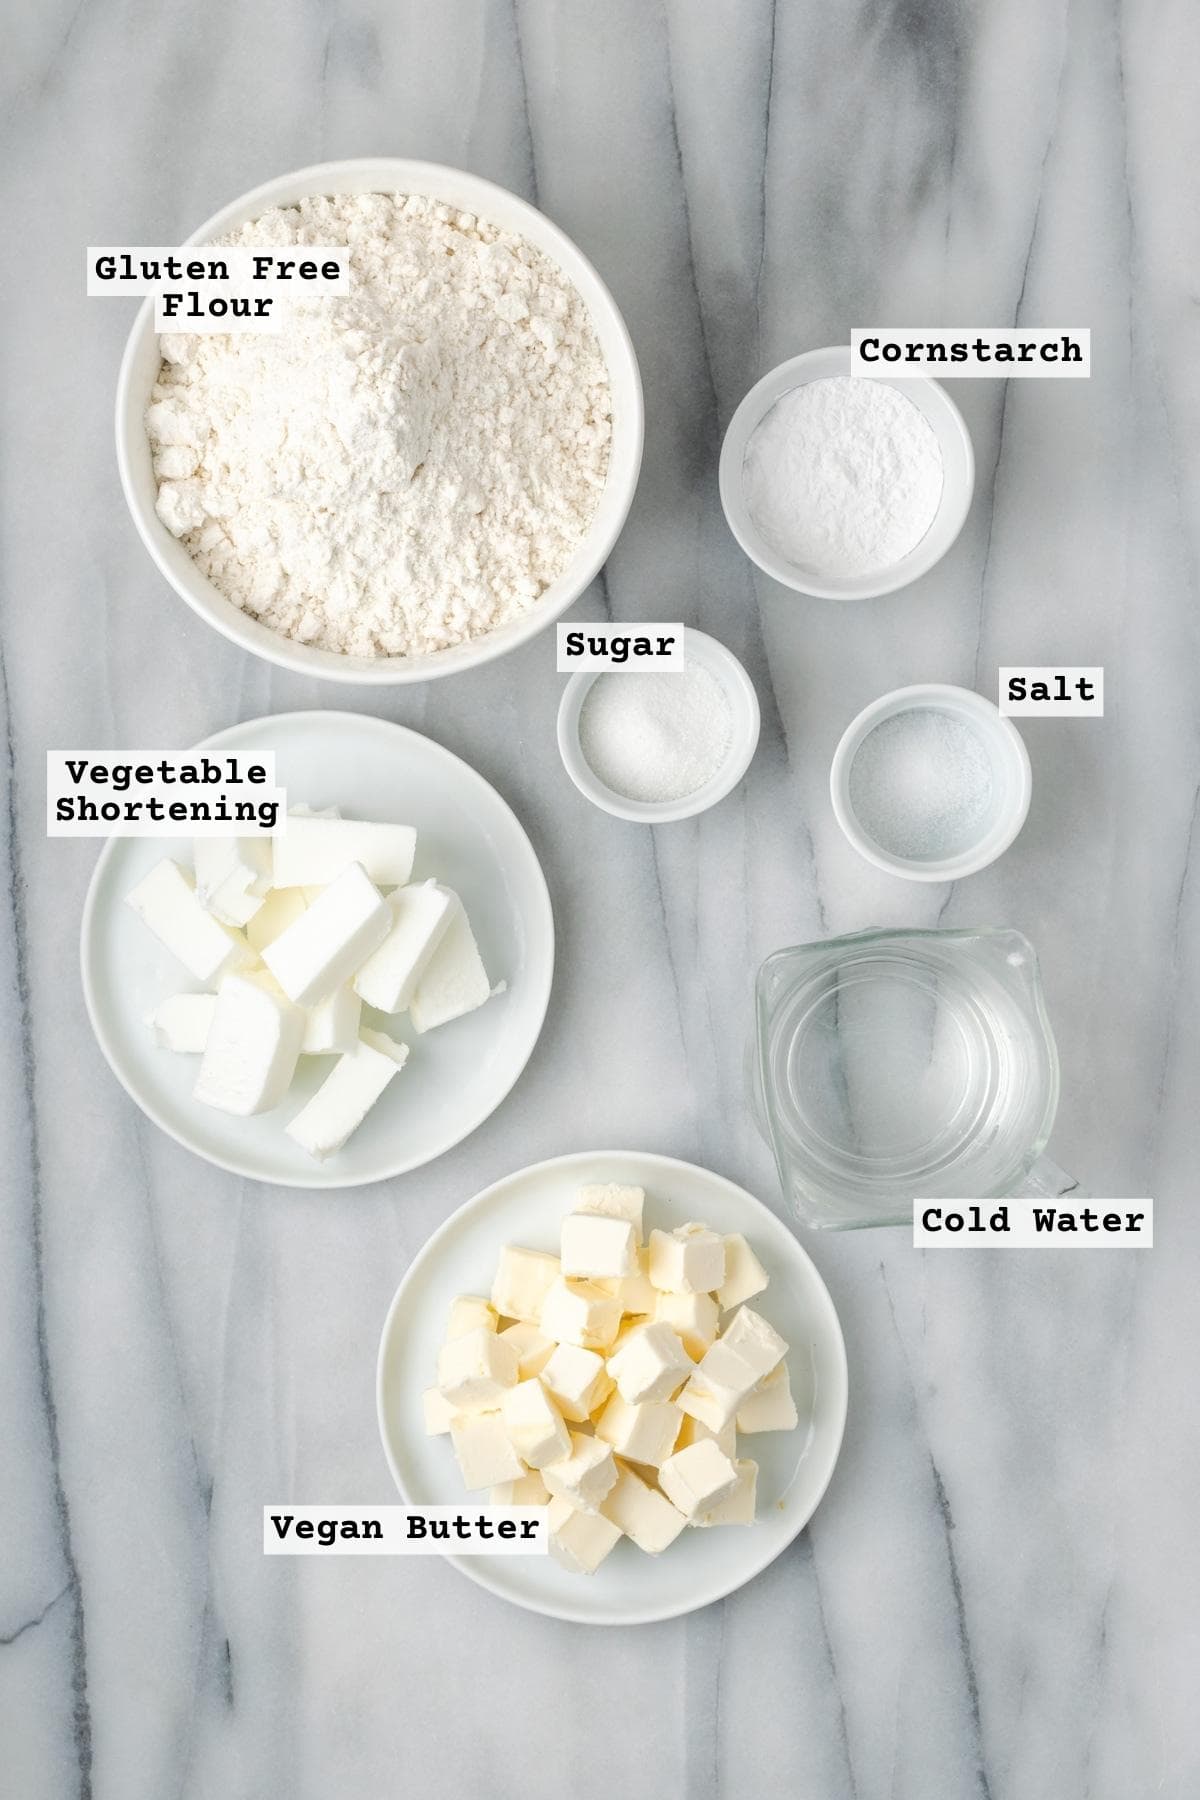
- Gluten Free Flour Blend - I use Bob's Red Mill 1-to-1 Flour for my recipe. I have also tested it with King Arthur Measure for Measure flour with success. If you use another gluten-free flour blend make sure it contains xanthan gum or you will need to add it.
- Cornstarch - Adding a little starch helps lighten the texture of the crust to make it more like a pastry shell. You can substitute arrowroot powder or tapioca starch if you avoid corn.
- Salt - Just a little for flavor
- Sugar - A small amount of sugar helps the crust to brown and be crispy. It does not make the crust taste sweet, so do not omit.
- Vegan Butter - I use either Miyoko's Plant Butter or Country Crock Plant Butter for my crust. Both work well. One thing to note when working with vegan butters is they melt quicker than dairy butter, so you must take care to keep the dough cold. If you don't need a dairy-free option, use regular unsalted butter in the same measure. Do not substitute margarine or other butter replacement products.
- Vegetable Shortening - For years I made my gluten free crust with all vegan butter and while it tastes delicious it can make it hard to work with the dough because it melts very quick. For the past year or so, I've been using half shortening and it gives the best of both worlds - extra flaky and buttery taste!
- Water - Ice water to keep the dough extra cold.
See the recipe card below for the full ingredient list with measurements.
Substitutions & Variations
- Savory pie crust - add ¼ teaspoon black pepper, ⅛ teaspoon paprika, ⅛ teaspoon thyme per single pie crust recipe. It's great for pot pies and savory galettes!
- All butter crust - Replace the shortening portion with vegan butter, but be warned that the dough will be soft and prone to melting during assembly.
- Chocolate pie crust - Replace ⅓ cup of flour with cocoa powder for a chocolate crust that will take your pie to the next level.

How to Make Gluten Free Pie Crust
Cut the vegan butter and shortening into cubes about ½″ wide and place into the freezer at least 15 minutes before you begin.
Measure your water and place it in the freezer while you measure and mix the remaining ingredients.
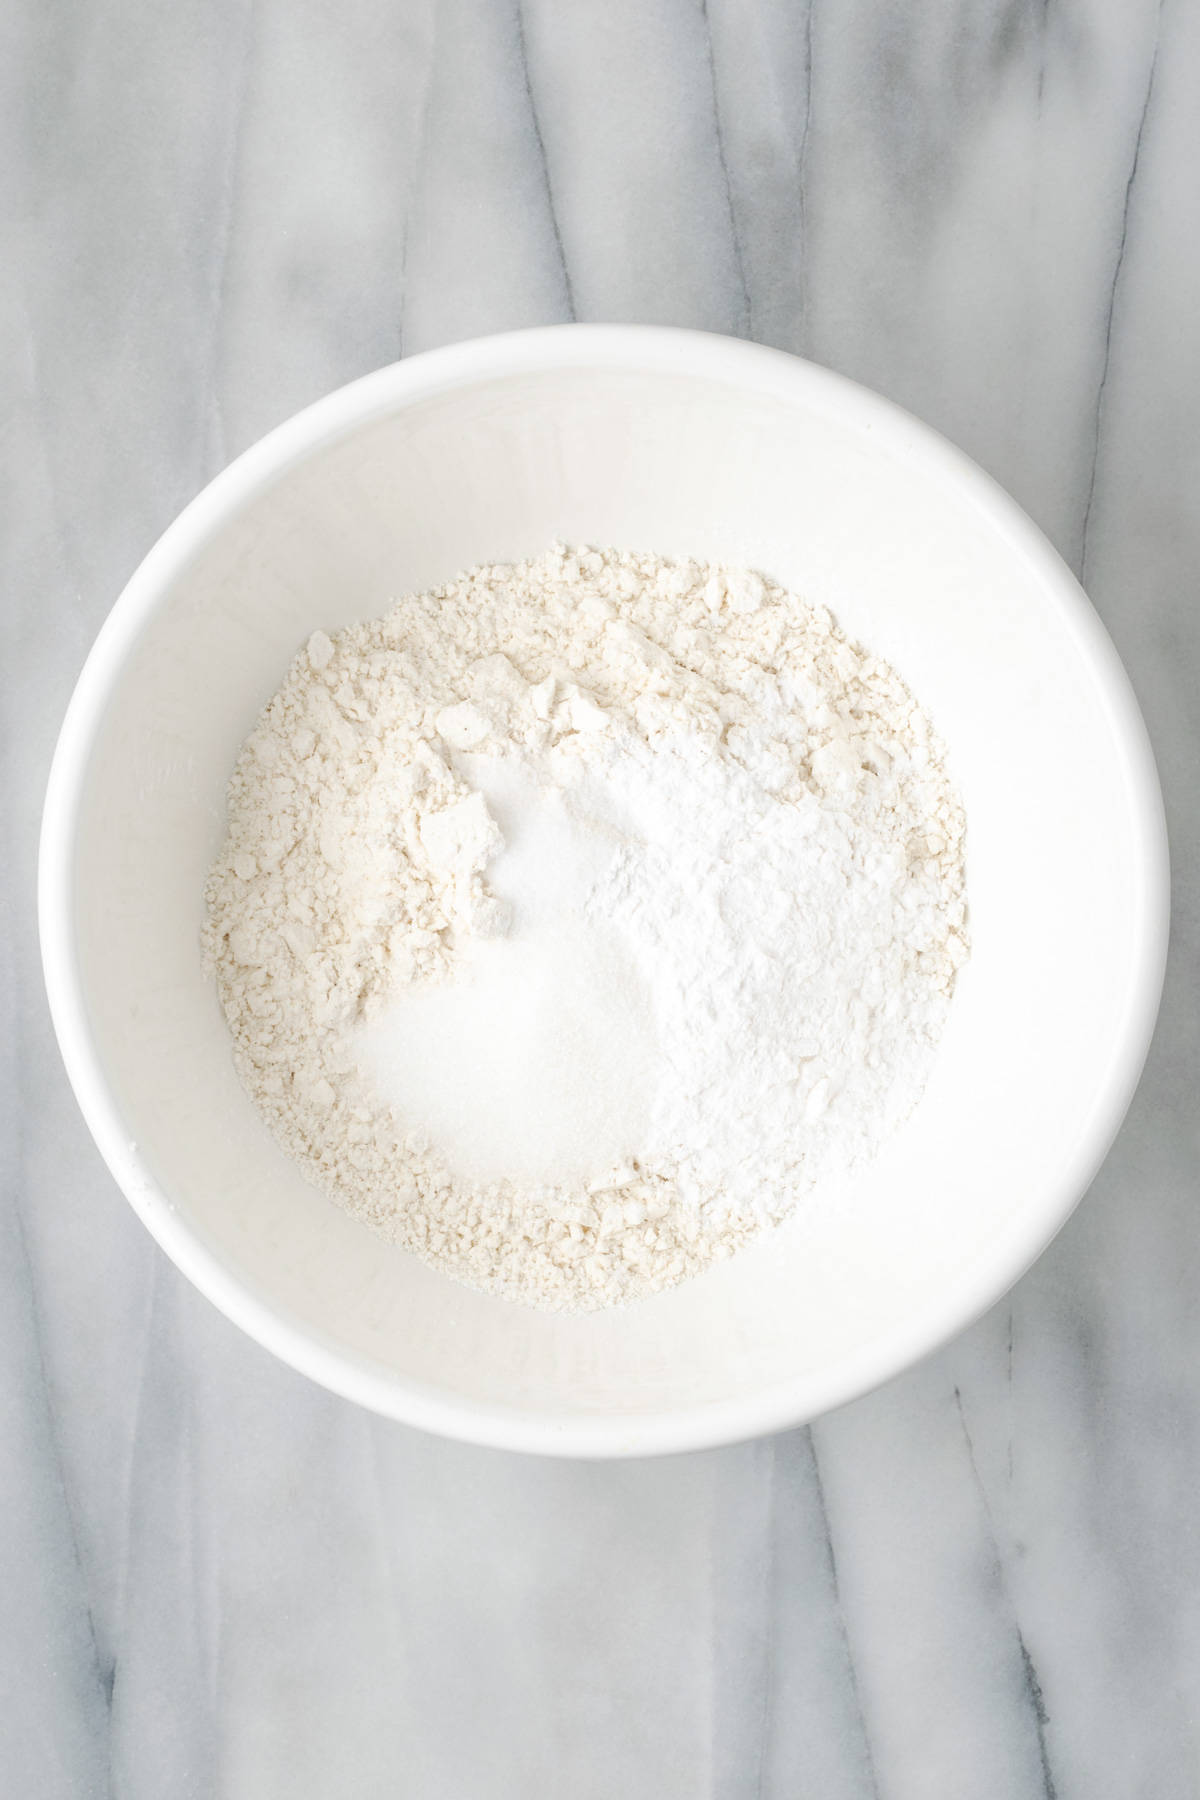
STEP 1: Combine the gluten free flour, starch, salt and sugar in a large mixing bowl. Stir well.
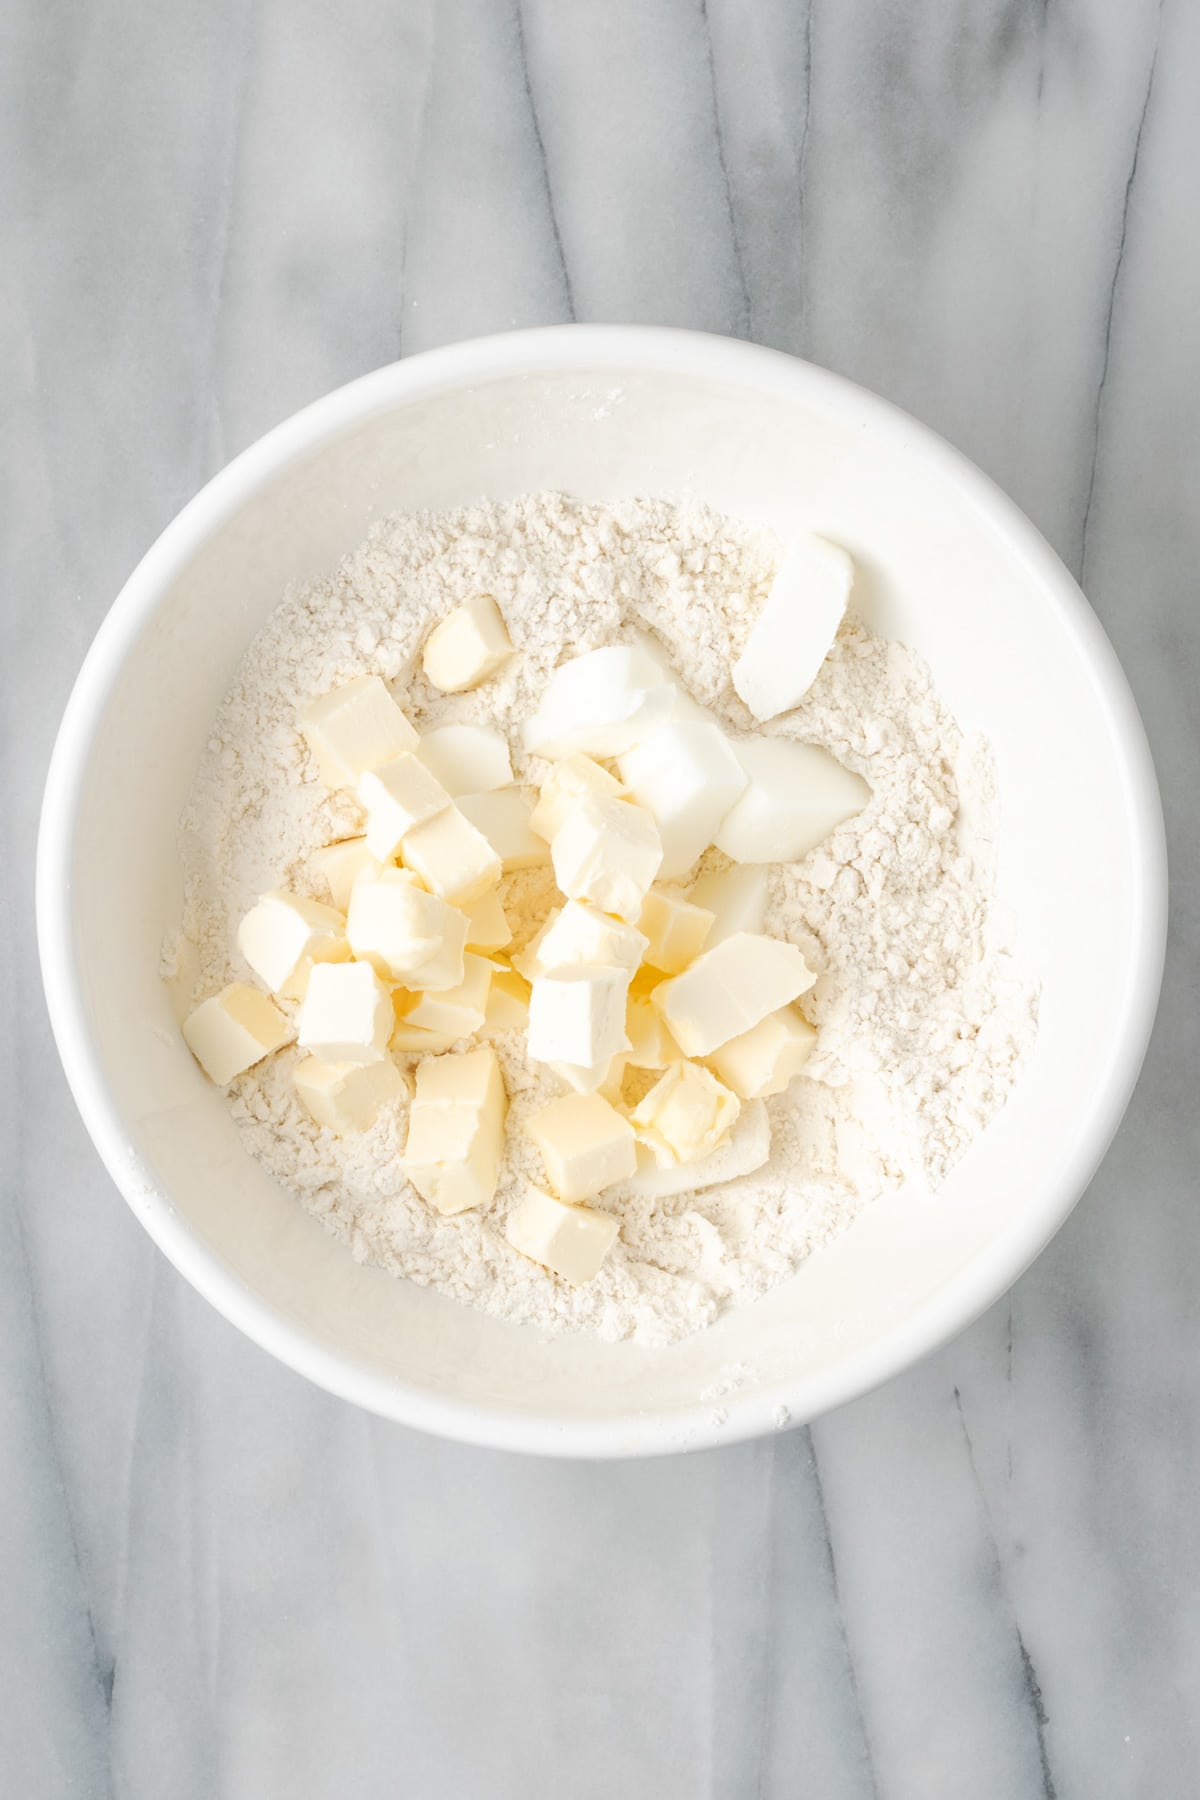
STEP 2: Add the cold butter and shortening cubes to the dry ingredients. Toss them together to coat the fat with flour.
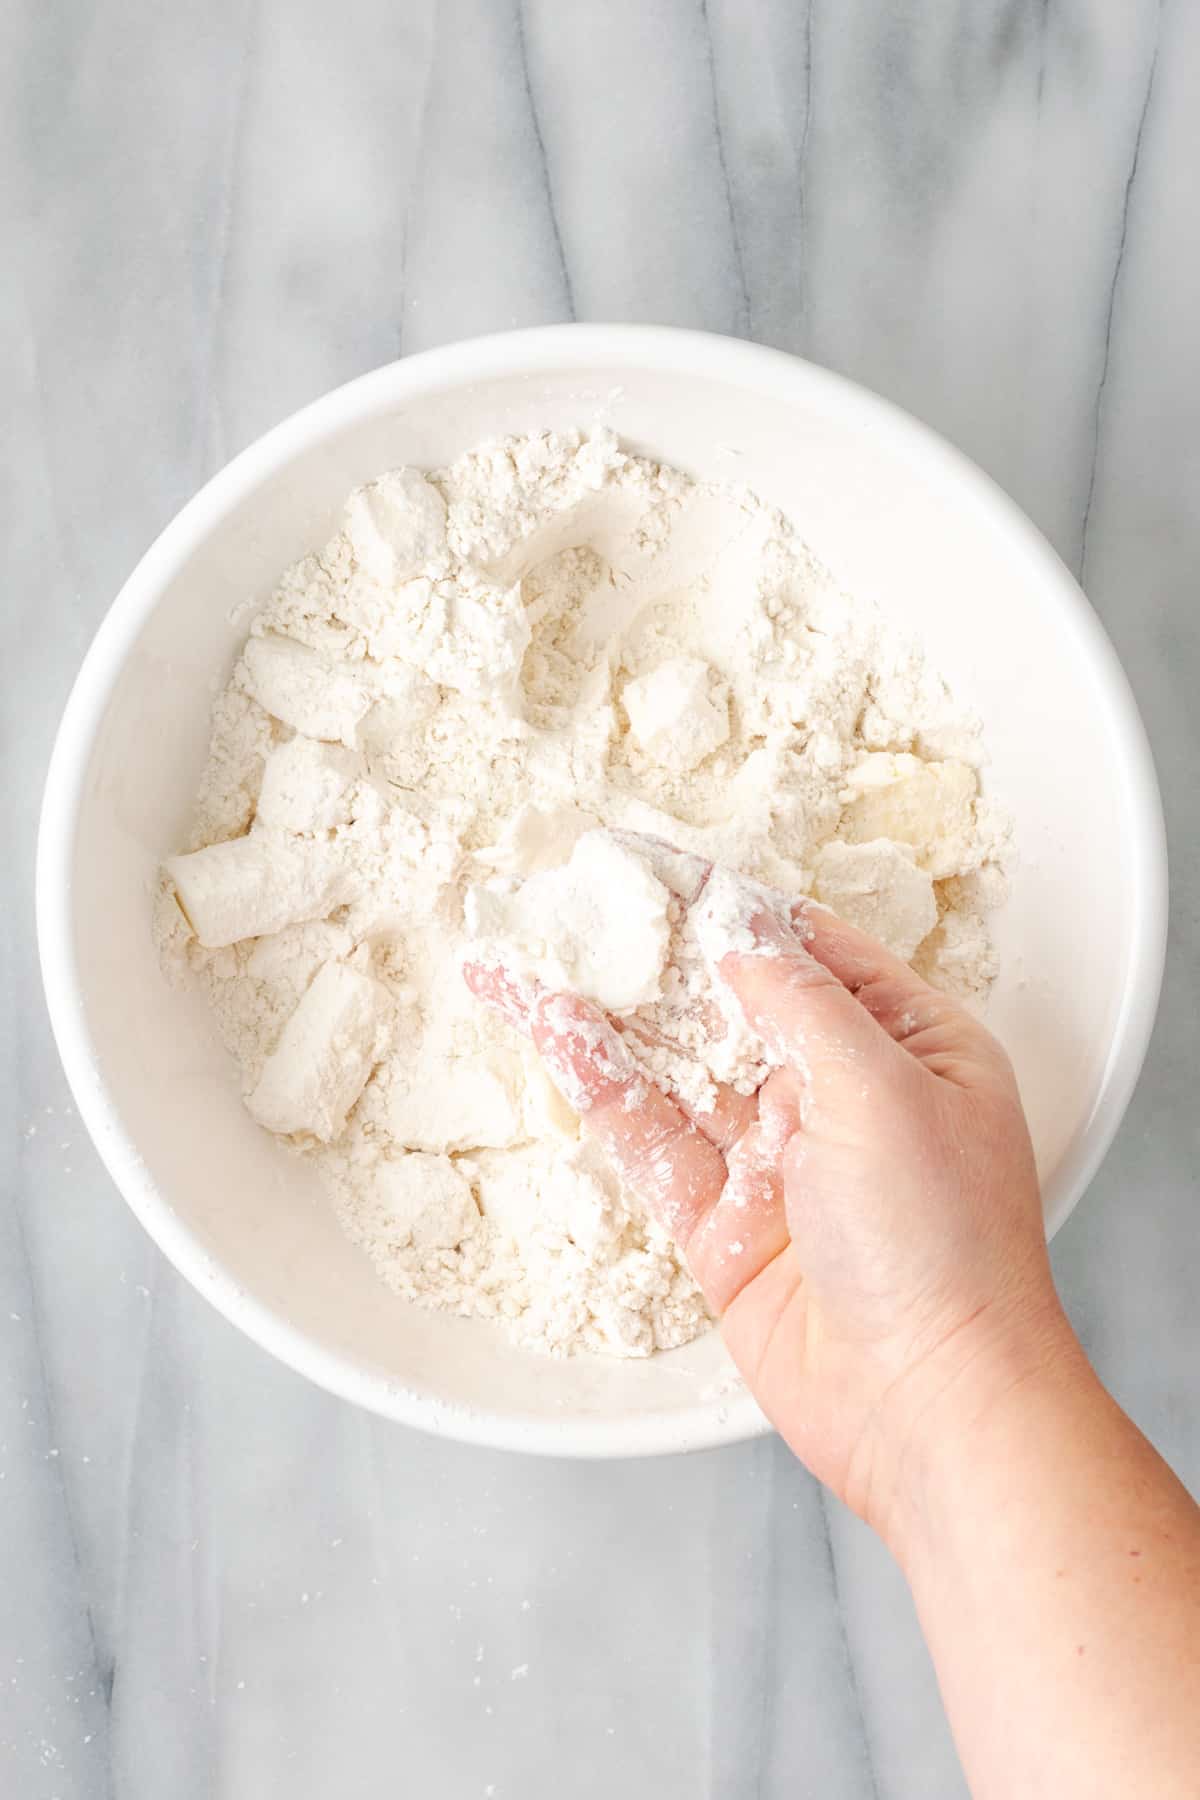
STEP 3: Once all of the fat is coated with flour, squish the pieces between your fingers to flatten them until they resemble quarters. Continue working your way through the bowl until everything has been reduced to large crumbles. If you prefer, you can cut in the fat with a pastry cutter.
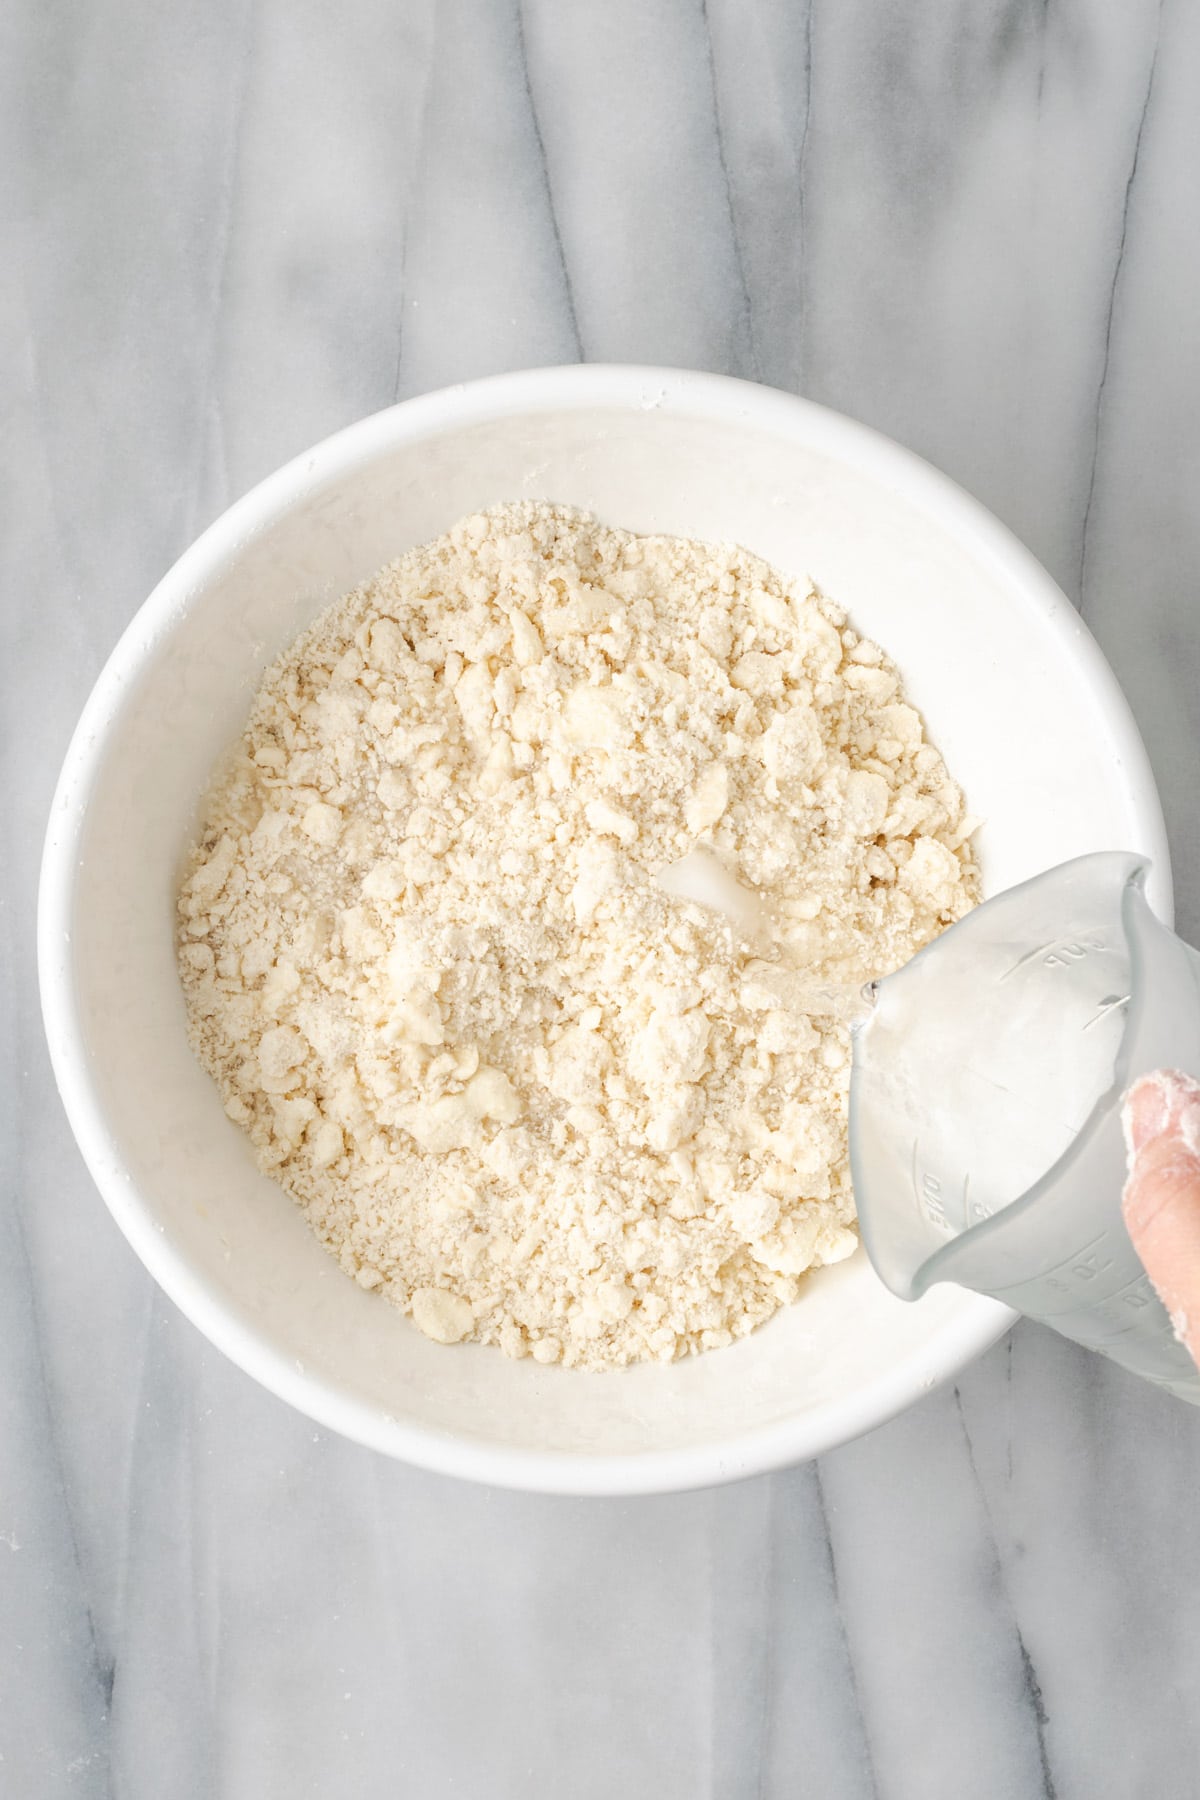
STEP 4: Once the fat has been worked with the dry ingredients, add about half of the water. Toss the mixture together (like you would toss a salad) to distribute the liquid. Continue to add a little water at a time until the dough sticks together in your hands.
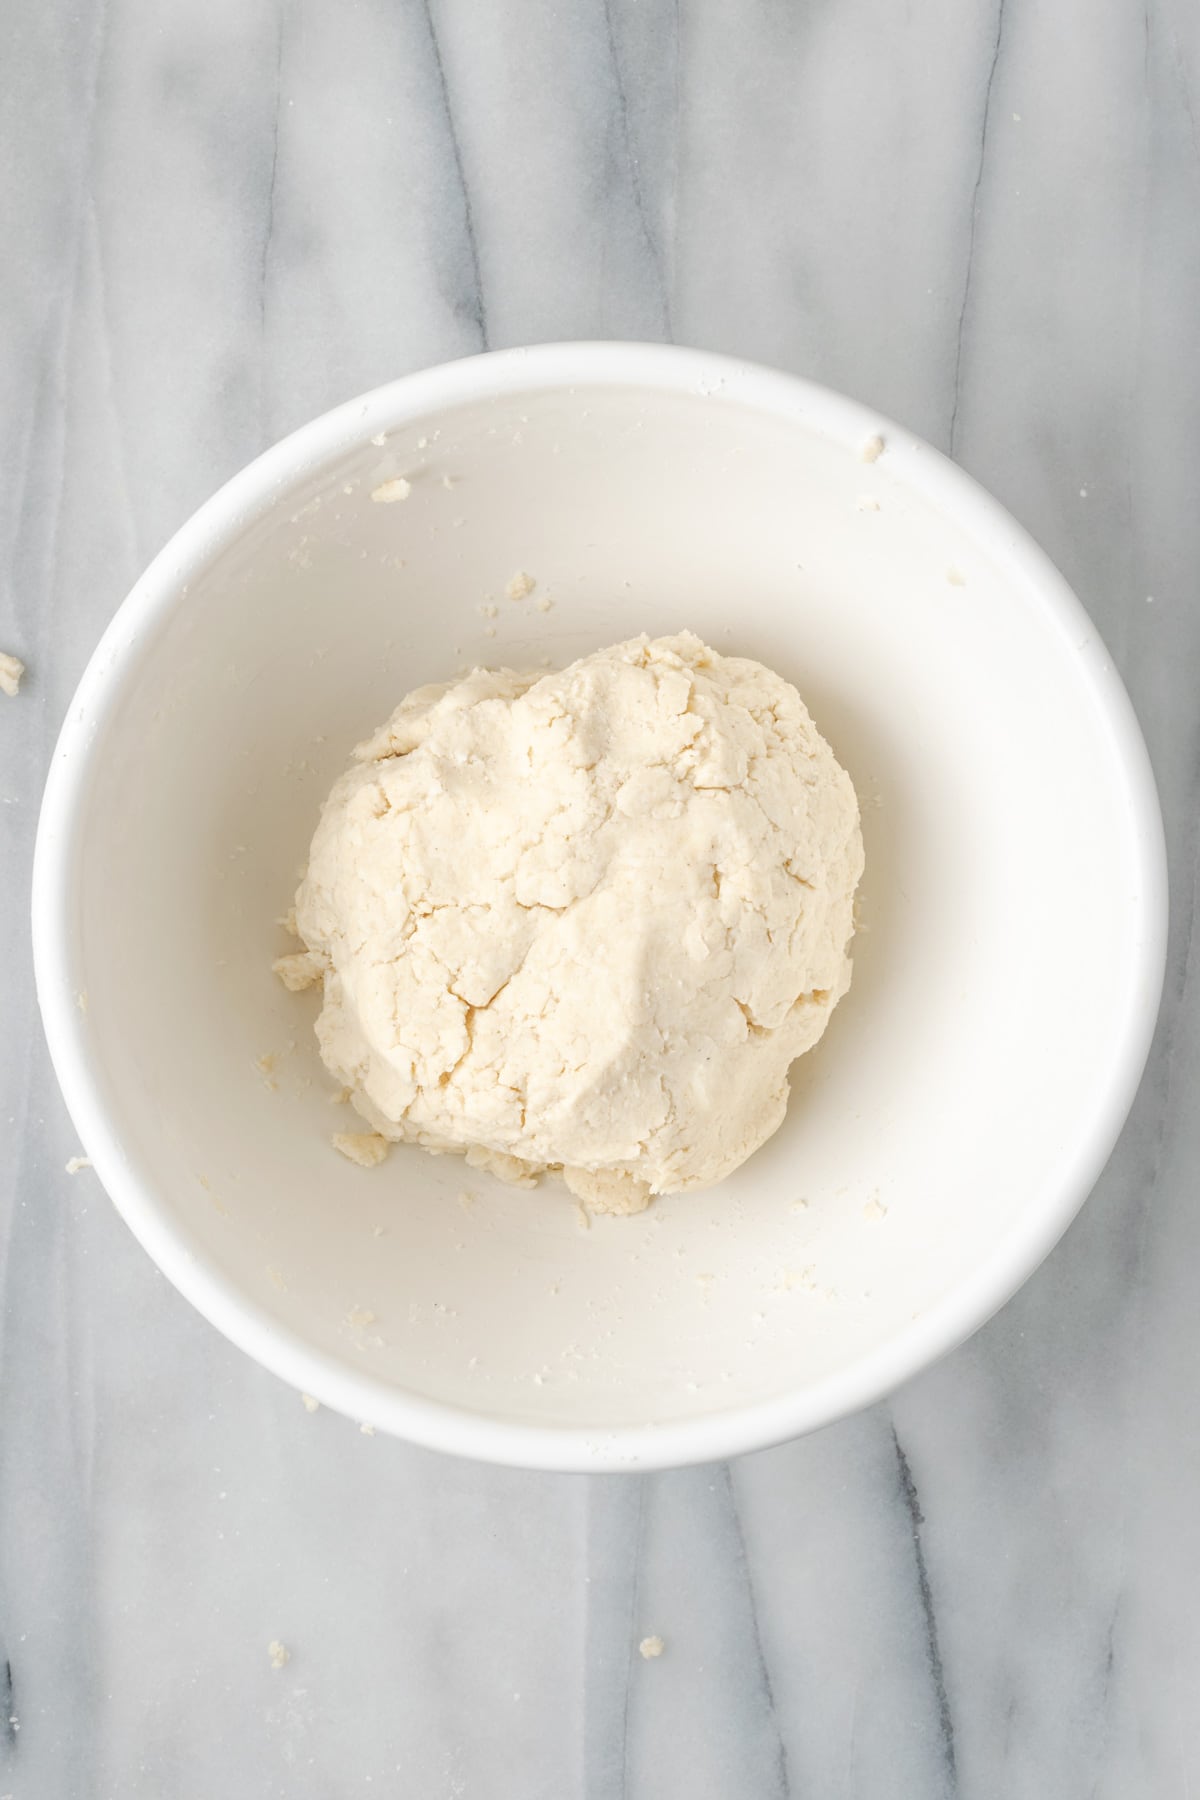
STEP 5: Form the dough into a large ball. It should not stick to the bowl at all. Since this recipe makes a double crust, cut your dough ball in half.
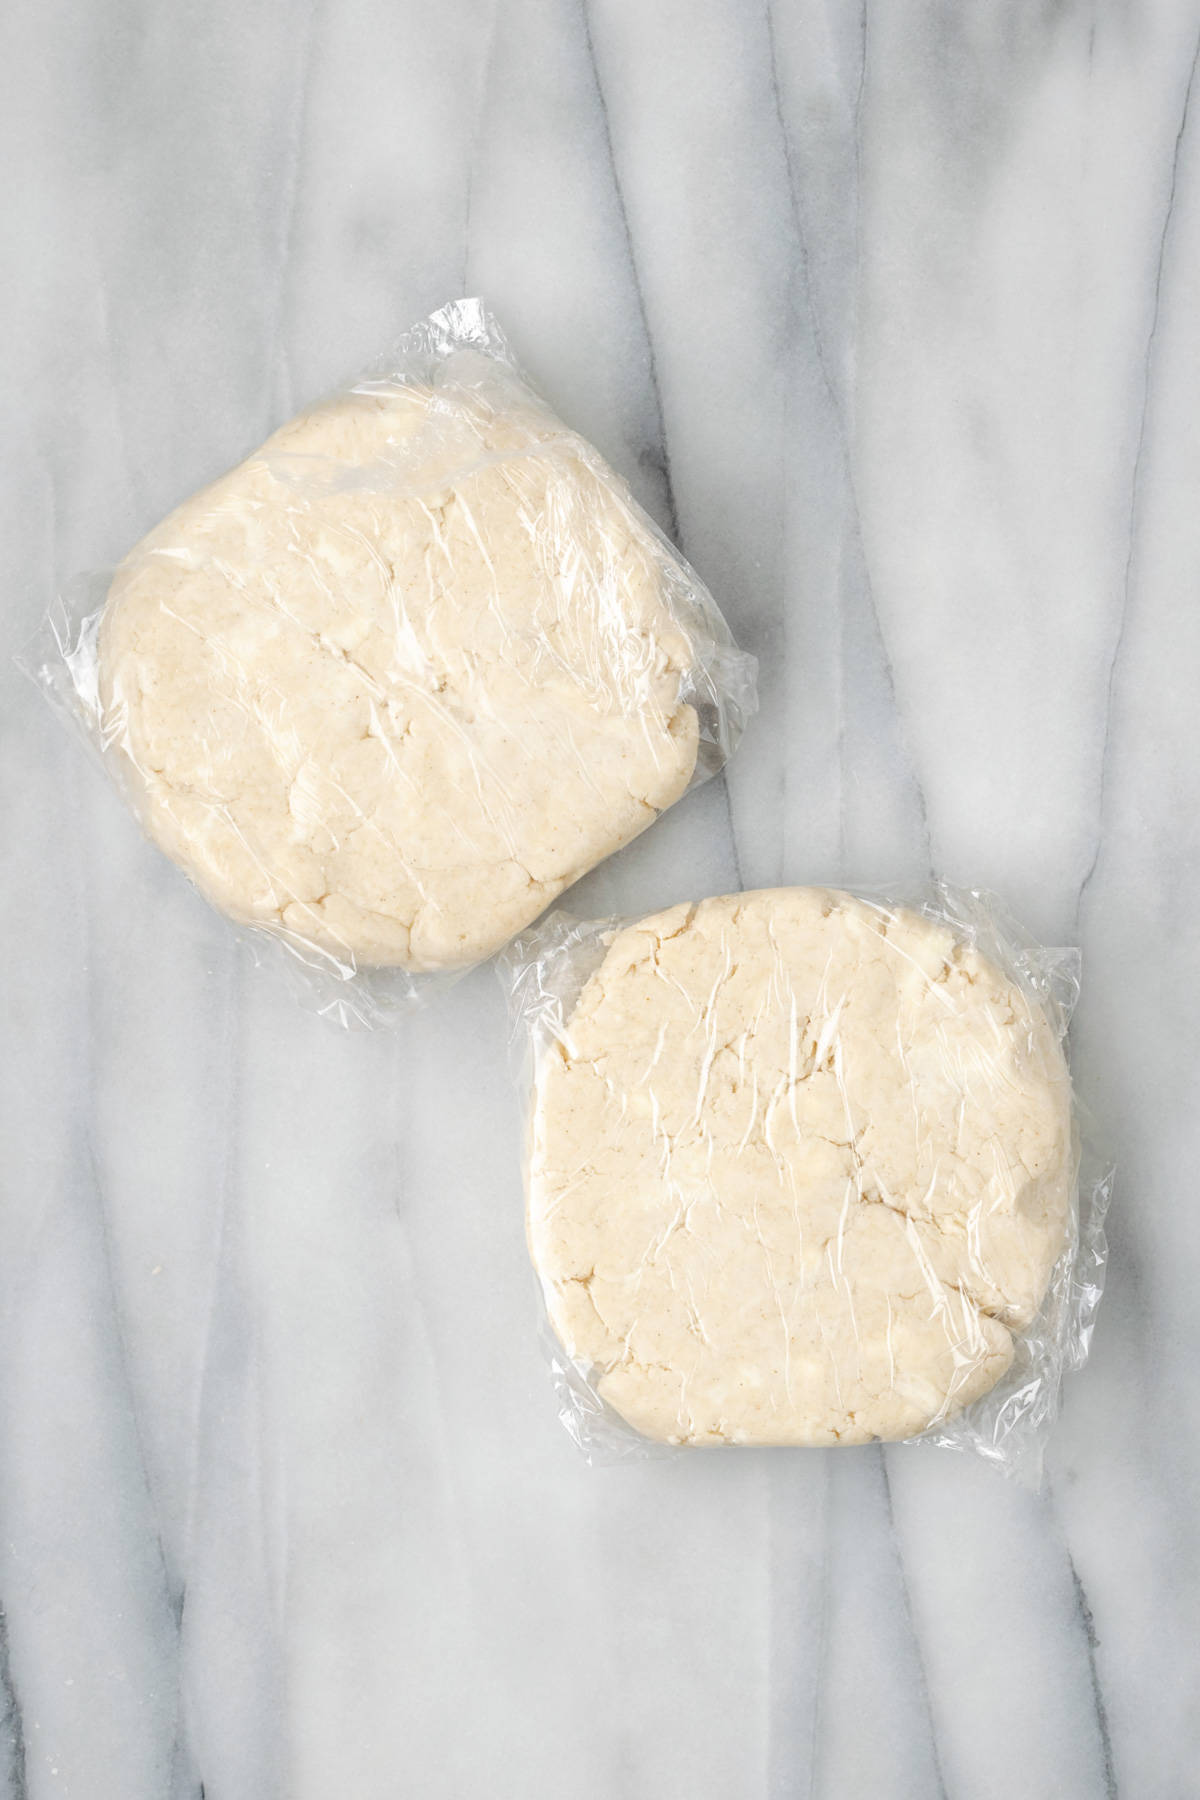
STEP 6: Wrap each half of the dough in a large piece of plastic wrap. Flatten it into a disc about 1 inch thick, then refrigerate for 2 hours or up to 5 days.
Expert Tip
You can also make this dough using a food processor. A food processor makes things much quicker but the end result will be a little less flaky because the butter pieces are smaller.
- Simply combine all the dry ingredients in your food processor and add the cold butter and shortening .
- Pulse a few times until the butter is about the size of small peas.
- Dump the flour mixture into a bowl and add the water as listed above, mixing by hand.
Here's a video showing how I mix dough by hand
Remove your chilled dough from the refrigerator. There are two methods for rolling out the dough.
Method 1: Using plastic wrap to roll out dough sheets
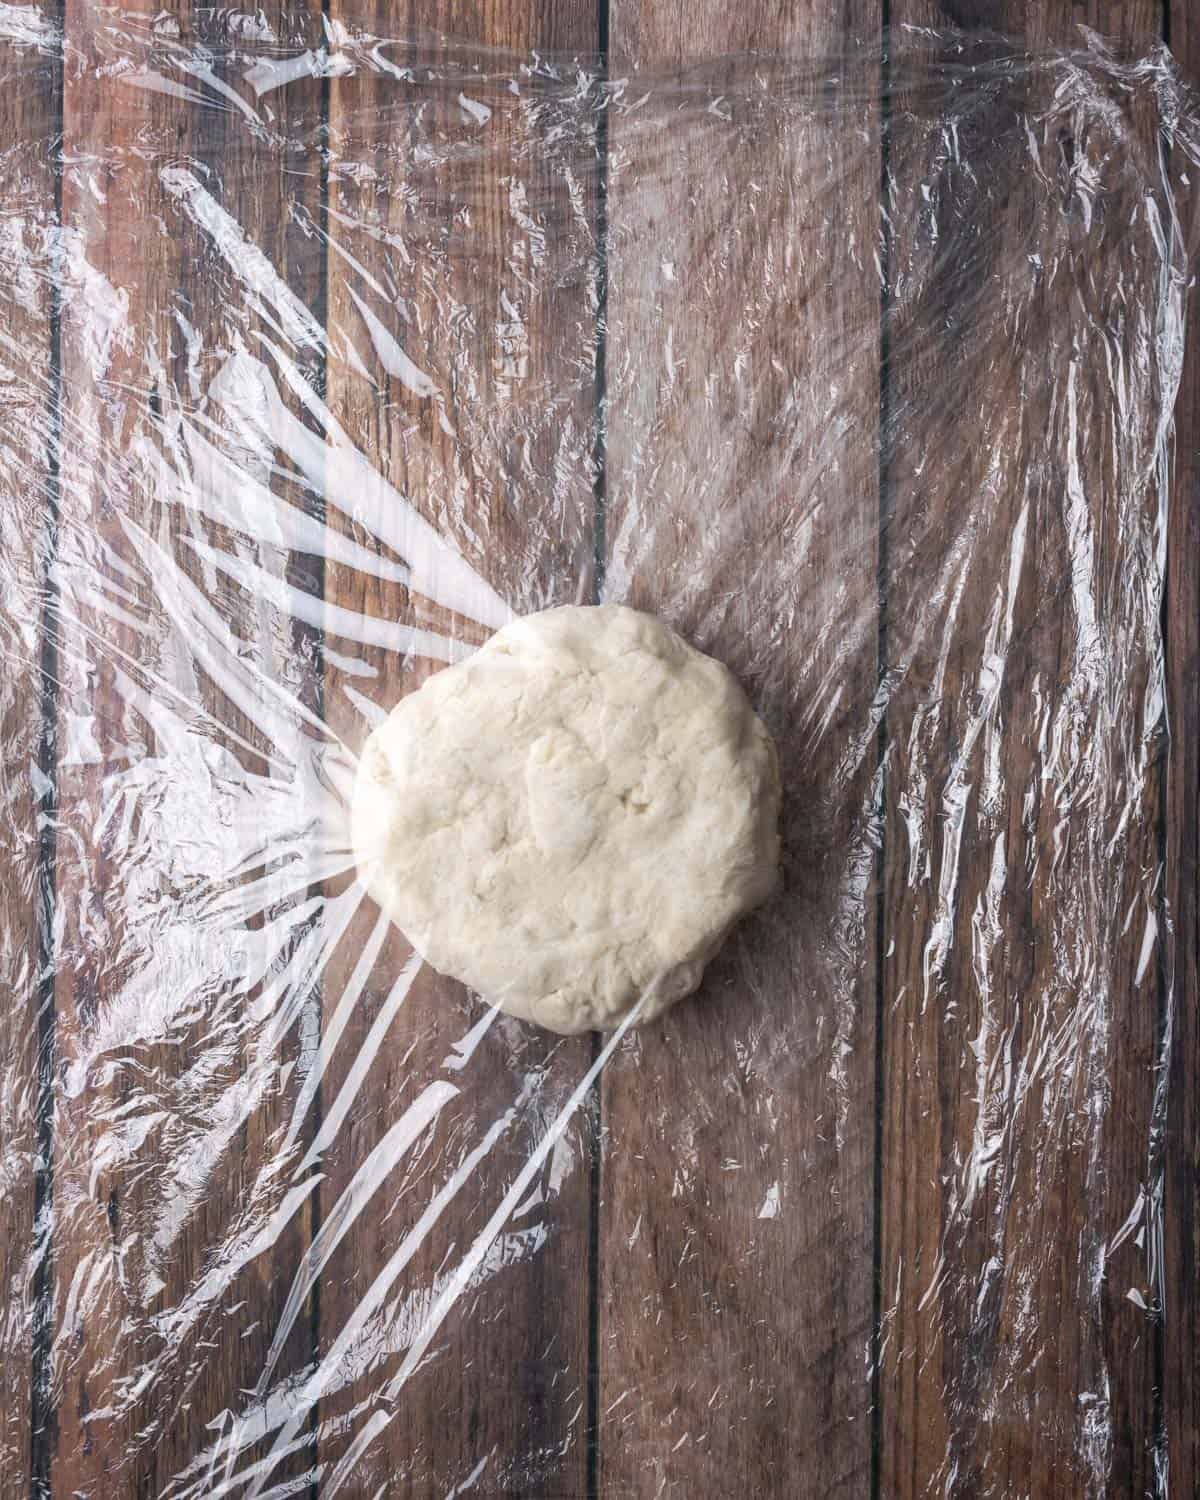
STEP 1: Place the chilled dough disc between two sheets of plastic wrap (like a sandwich).
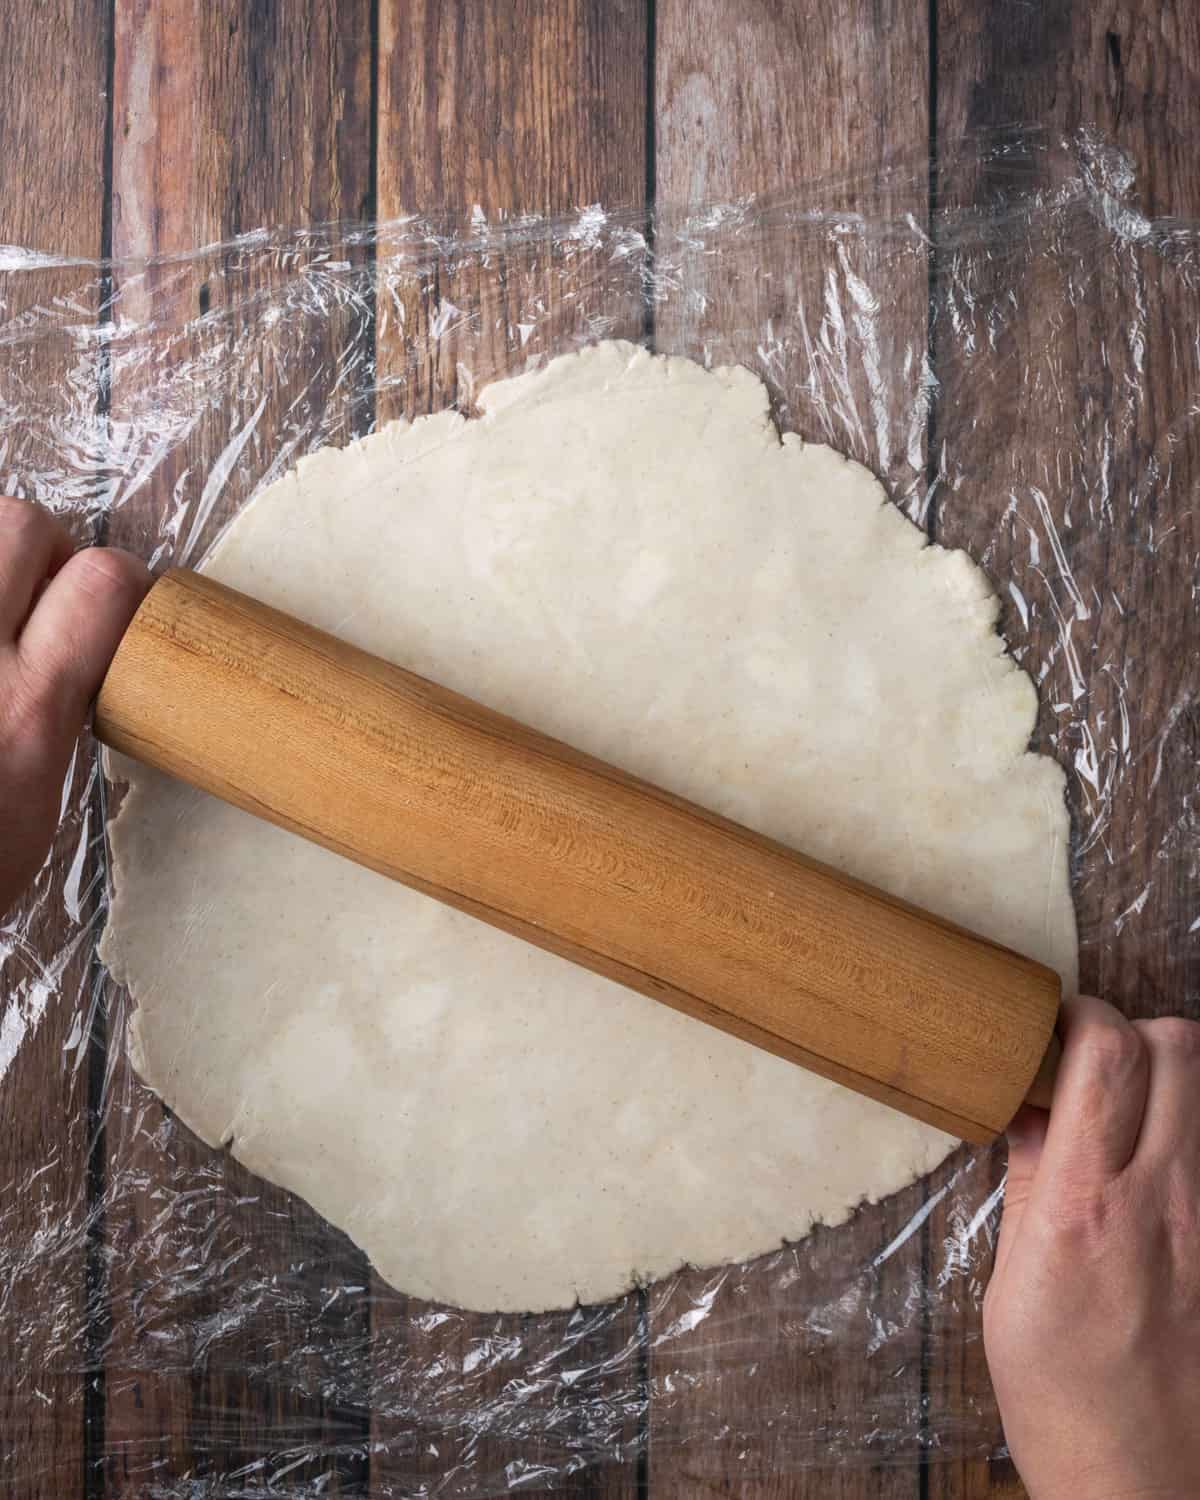
STEP 2: Roll out the dough with a rolling pin until it is 1" larger than the diameter of your pie pan.
Method 2: Using flour to roll out dough sheets
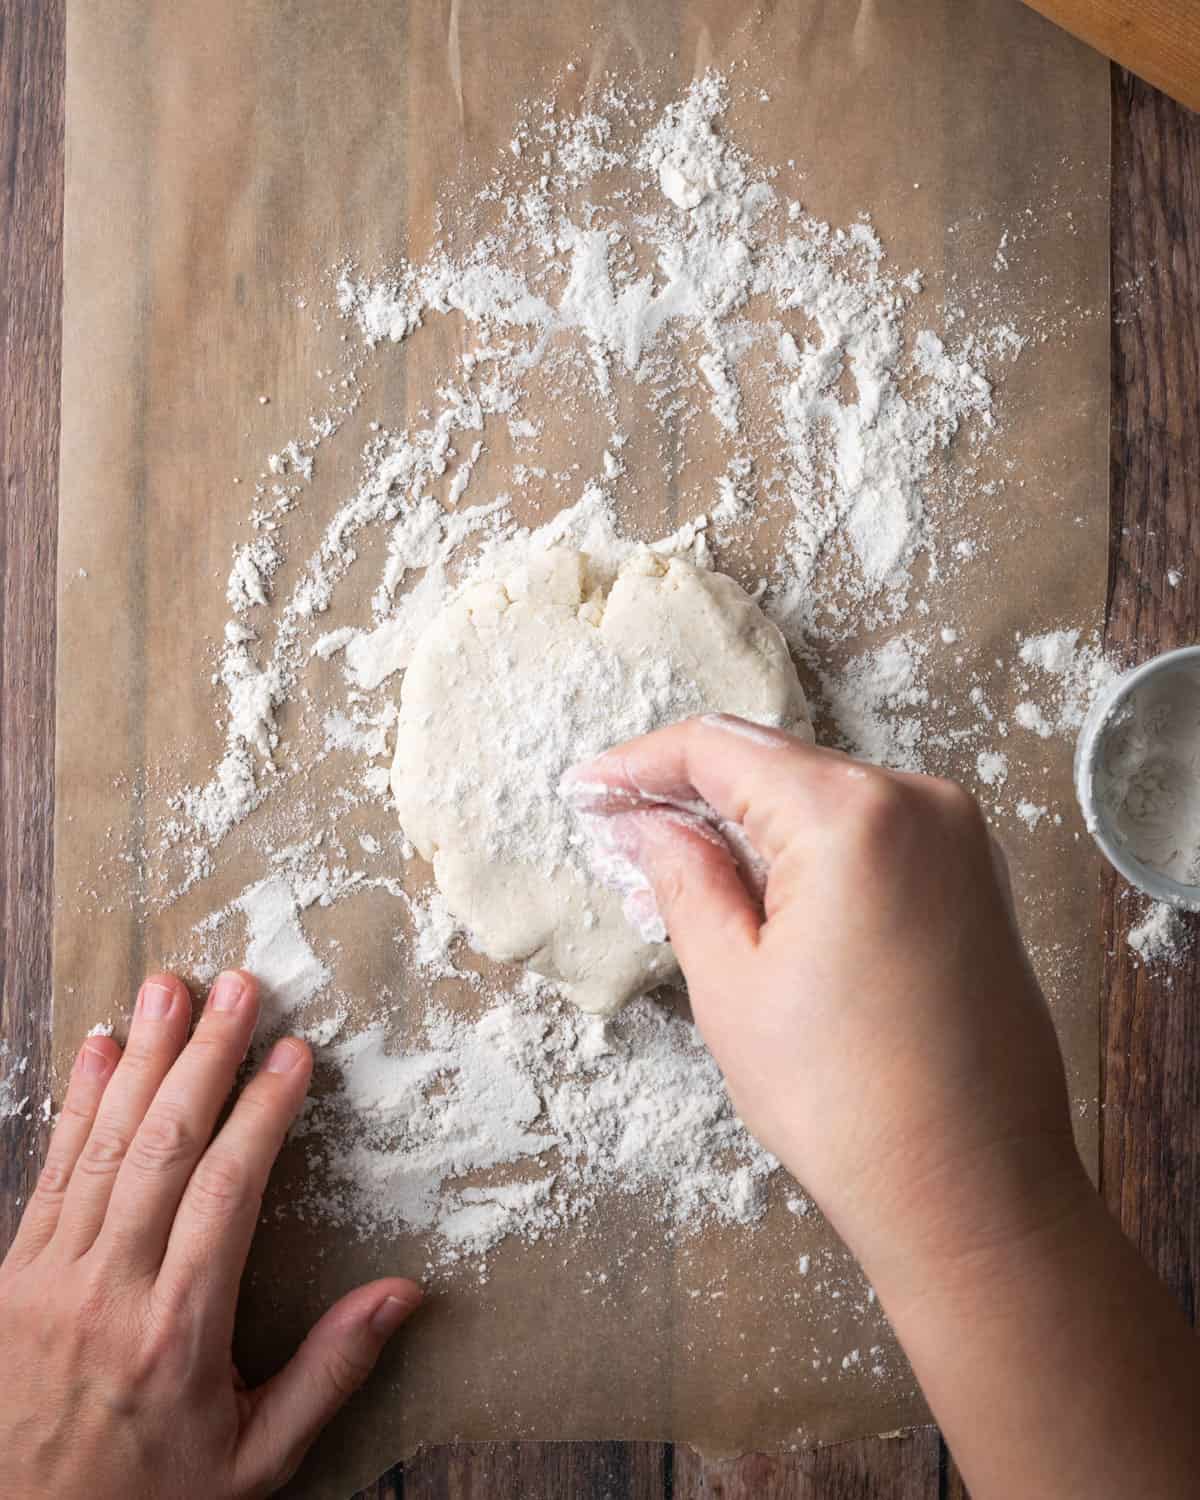
STEP 1: Place a sheet of parchment paper on your counter and sprinkle with about 1 tablespoon of gluten free flour. Place the dough on top of the flour.
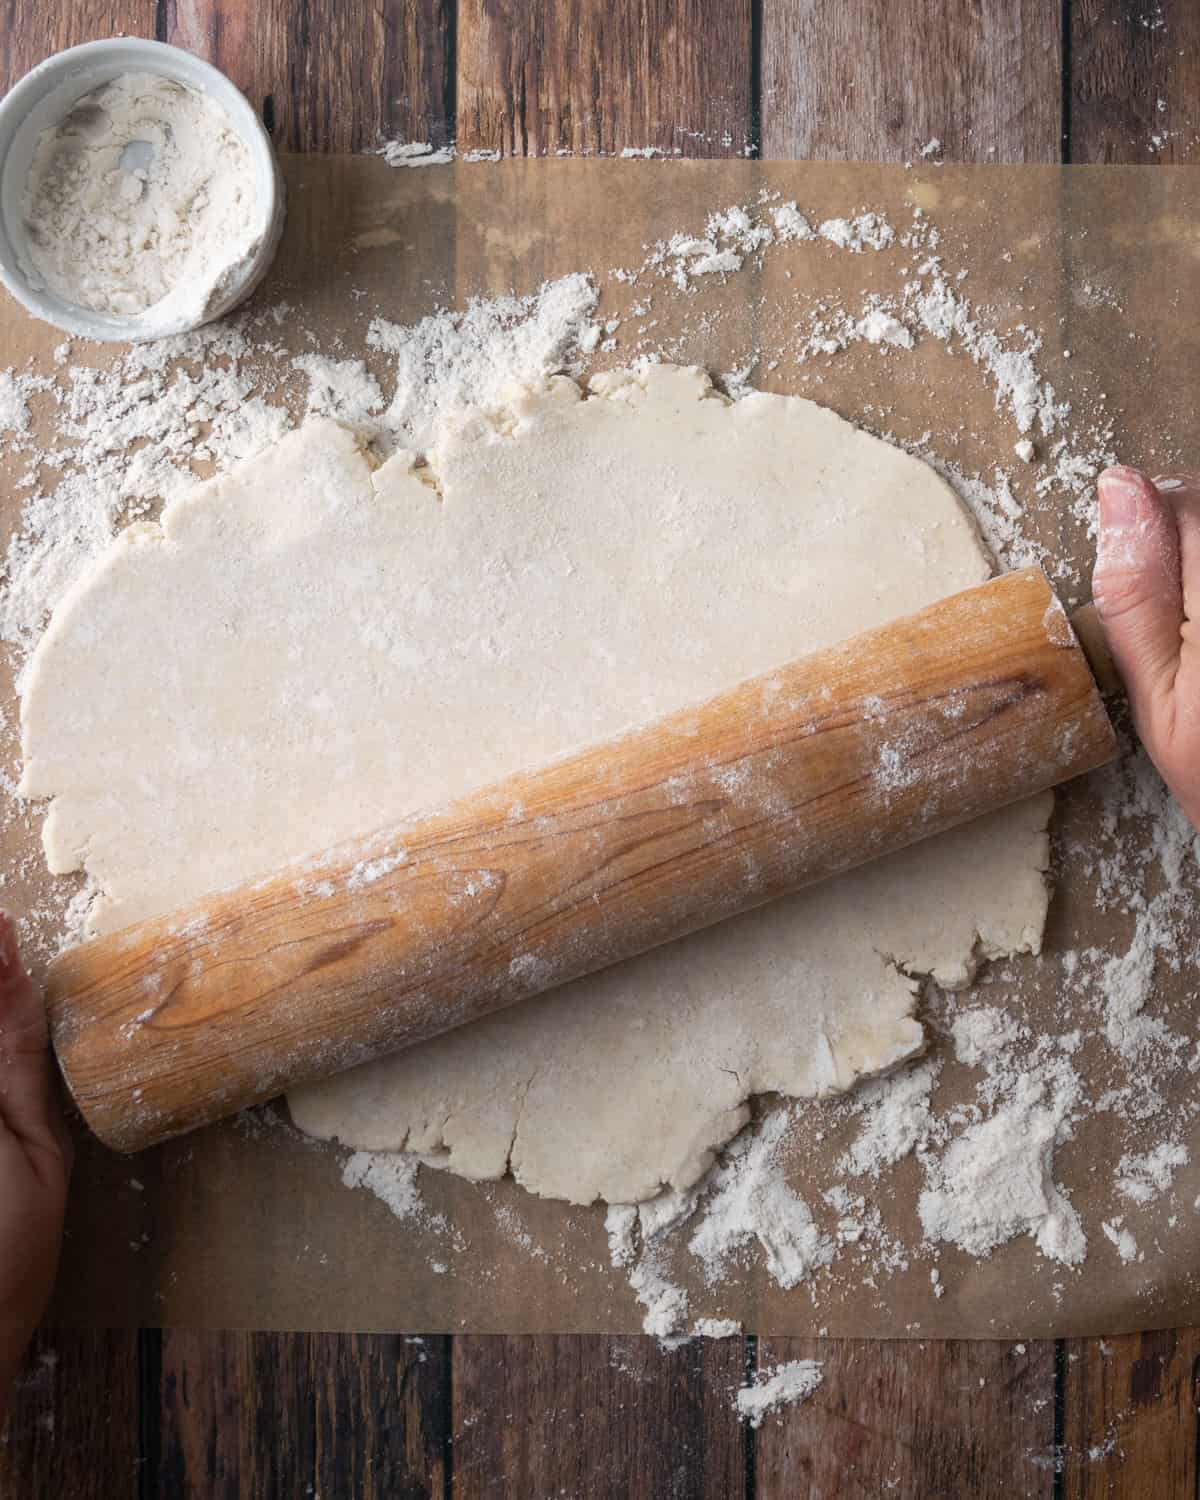
STEP 2: Sprinkle another tablespoon of flour on top of the pie dough and the rolling pin and roll directly on the dough.
Whichever method you choose, once your dough is rolled into a sheet. Place it on a baking sheet and refrigerate for another hour.
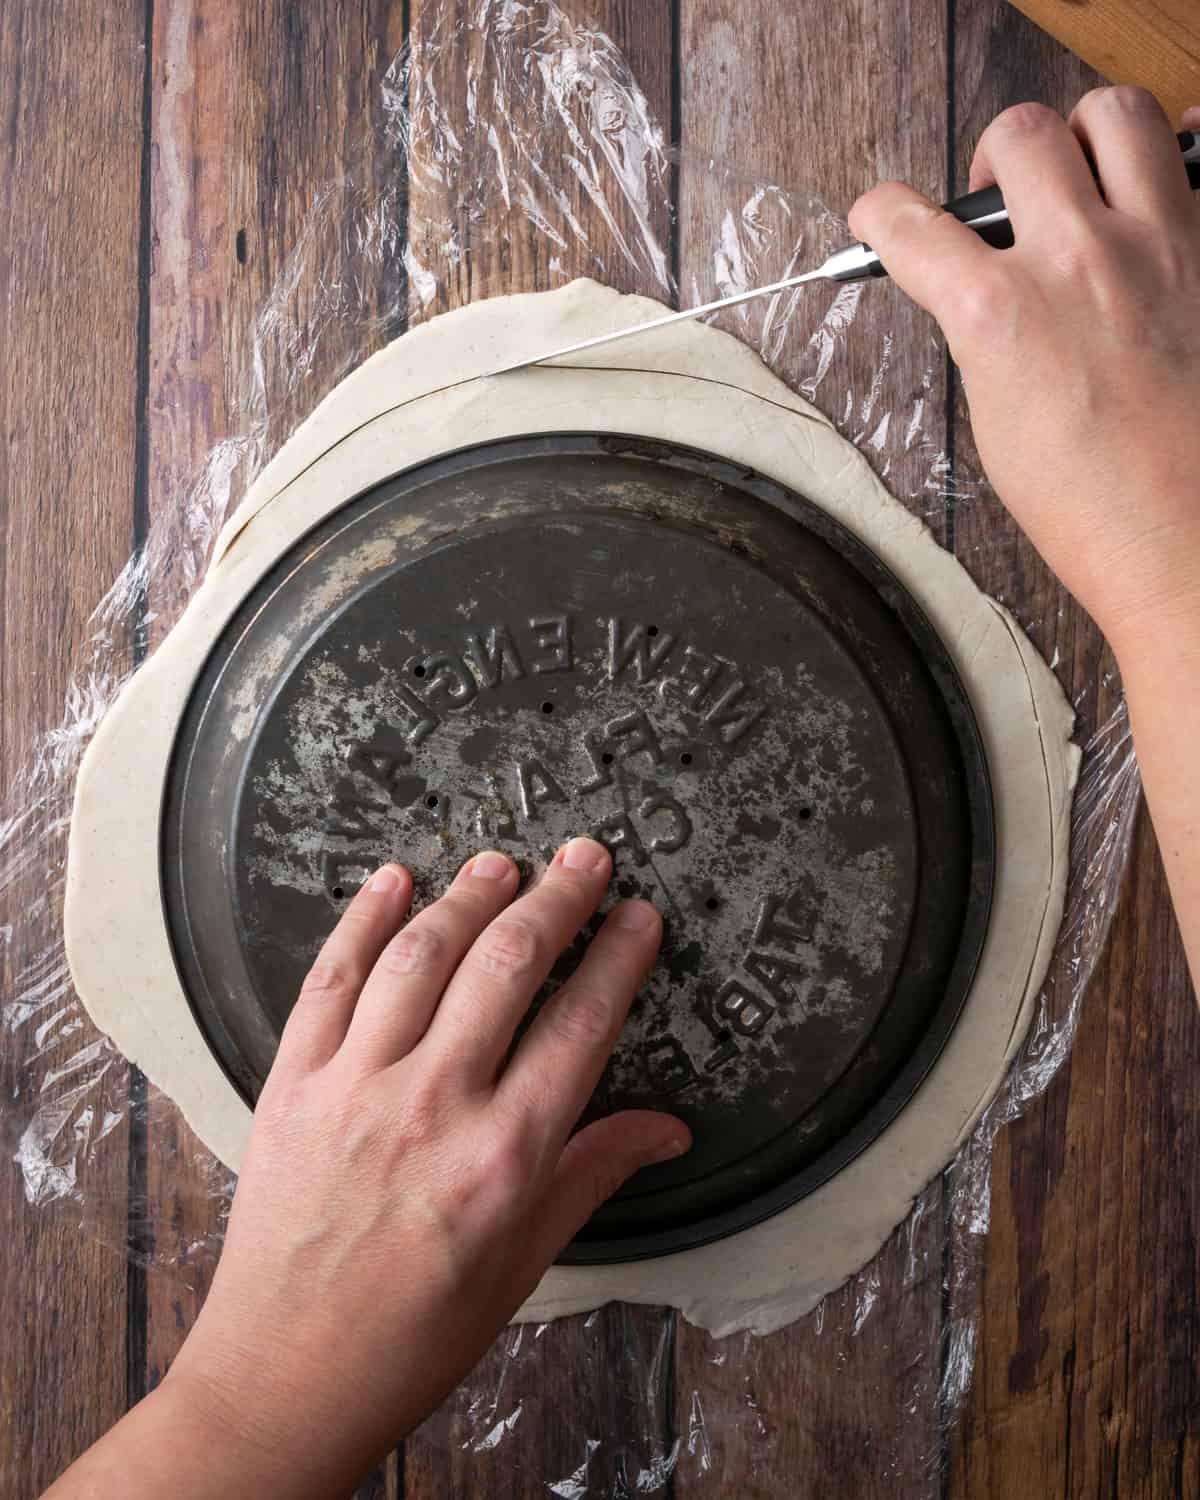
STEP 3: Remove the chilled dough sheet from the refrigerator. Flip the pan over and use it as a guide to trim the edges of the dough leaving a ½" overhang.
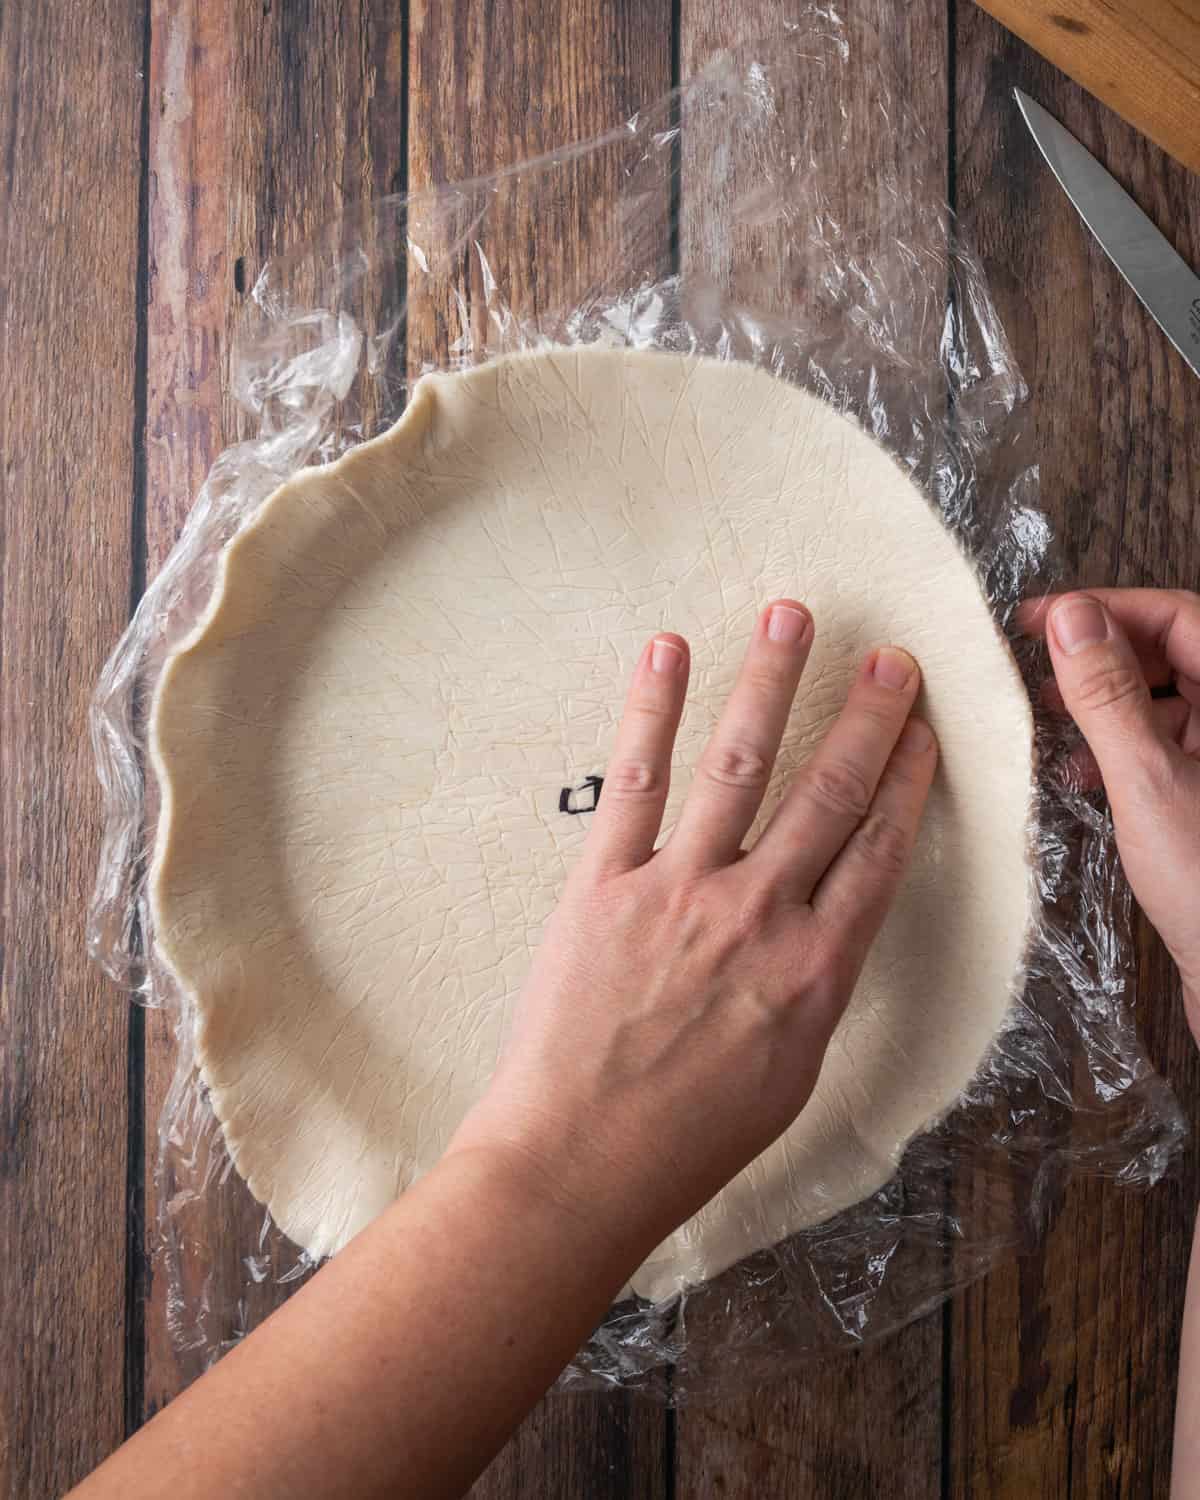
STEP 4: Flip the dough and pan over. Gently work the dough into the shape of the pan, taking care not to press it in because it will stick after it's baked.
Place pie shell in the freezer while you make your favorite filling. If it will be frozen for more than 30 minutes, make sure to cover it well with plastic wrap to prevent drying out.
Expert Tip
Patch any holes in your crust with the trimmed pieces of dough. Pie filling can leak through holes in the crust and make the pie stick to the pan.

How to Make Extra Flaky Pie Crust
There are a few things that contribute to the flaky texture of pie crust.
- Keep your butter extra cold - When the dough starts to set as the butter melts in the oven, little pockets of steam form which make the flaky airy texture in pie crust. If your butter is too warm when it enters the oven, it will melt out before the crust sets leaving a greasy pool and a crunchier, more cracker like crust.
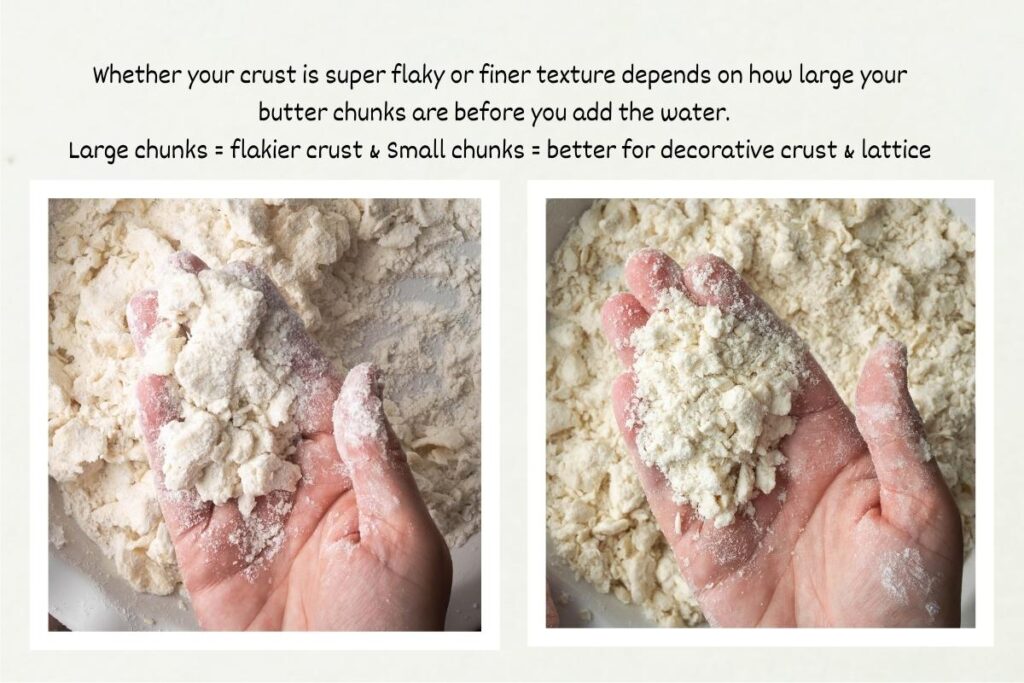
- Size of the butter pieces in the dough - Many recipes call for pea sized butter, which is ideal for lattice work and designs, but for flakiness you want large pieces of butter.
- Create layers in your crust - You will need to use the flour dusted method described above to do this. Once you roll your dough into a large sheet, carefully fold the dough in half right to left. Then fold it in half again top to bottom. Then re-roll out the dough to the size of your pie pan. You've now added several extra layers into your flaky pie crust.
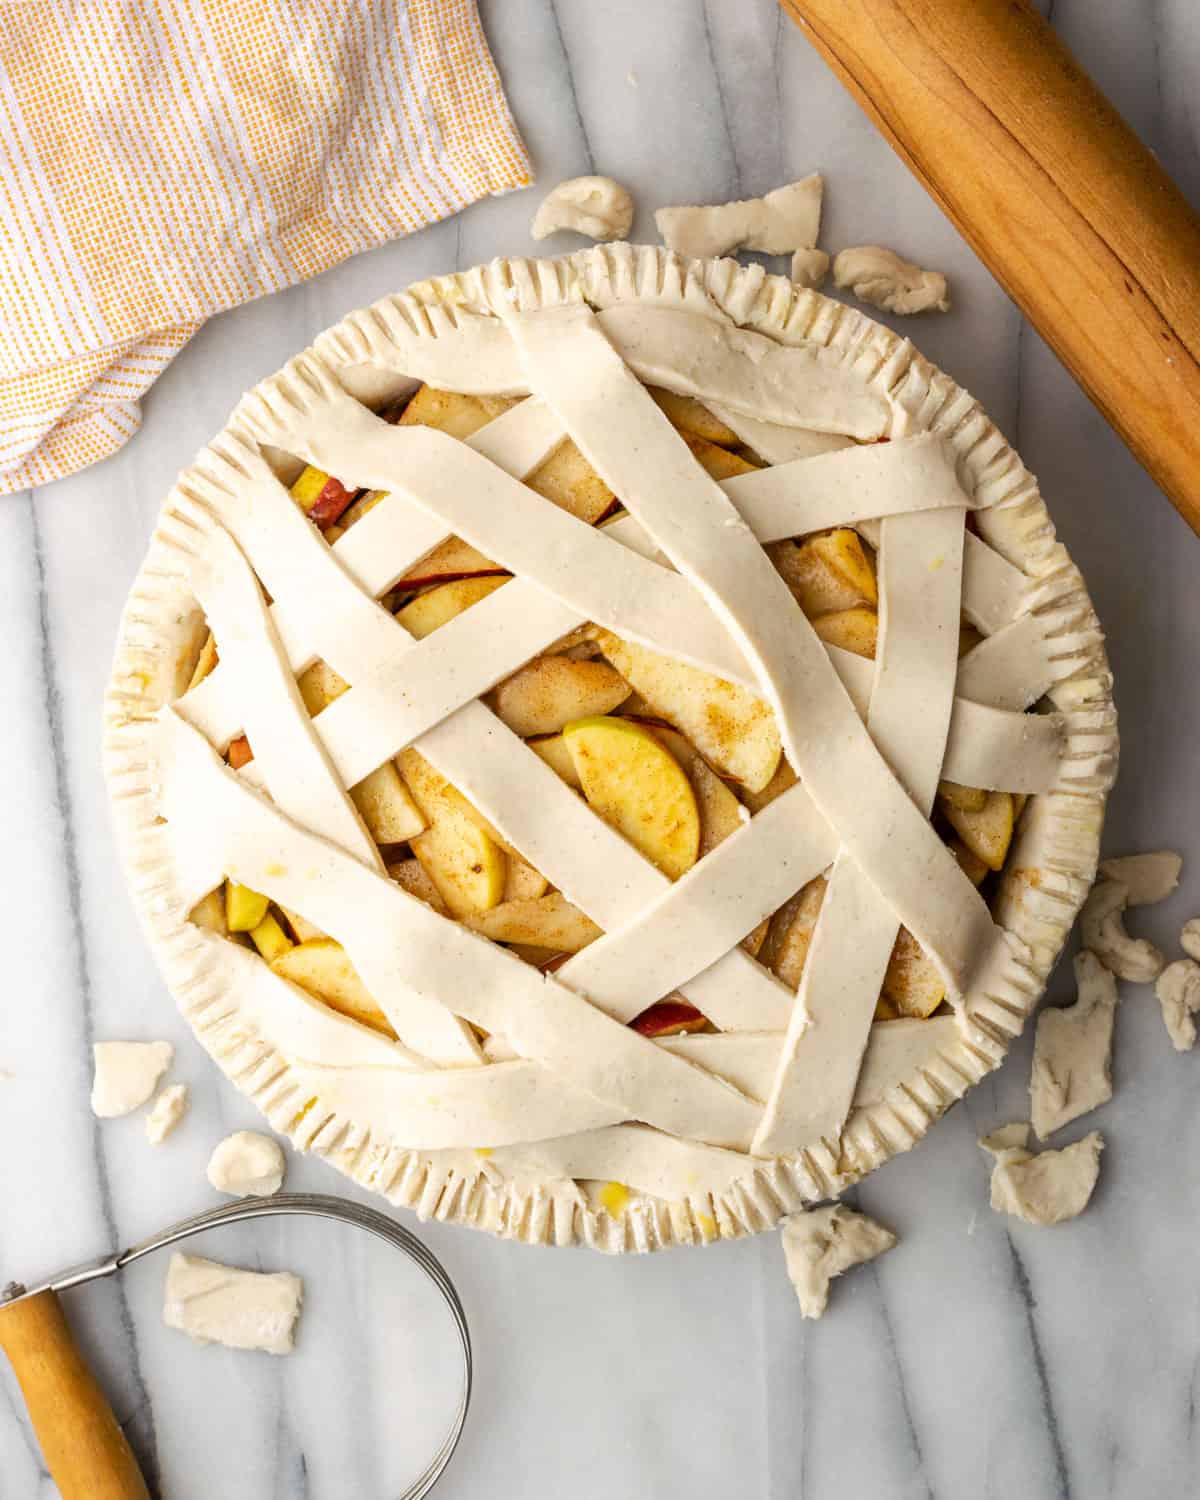
How to make a lattice pie crust
Once you've mastered making gluten-free pie dough, making designs with your pie crust is a fun way to dress up your pie.
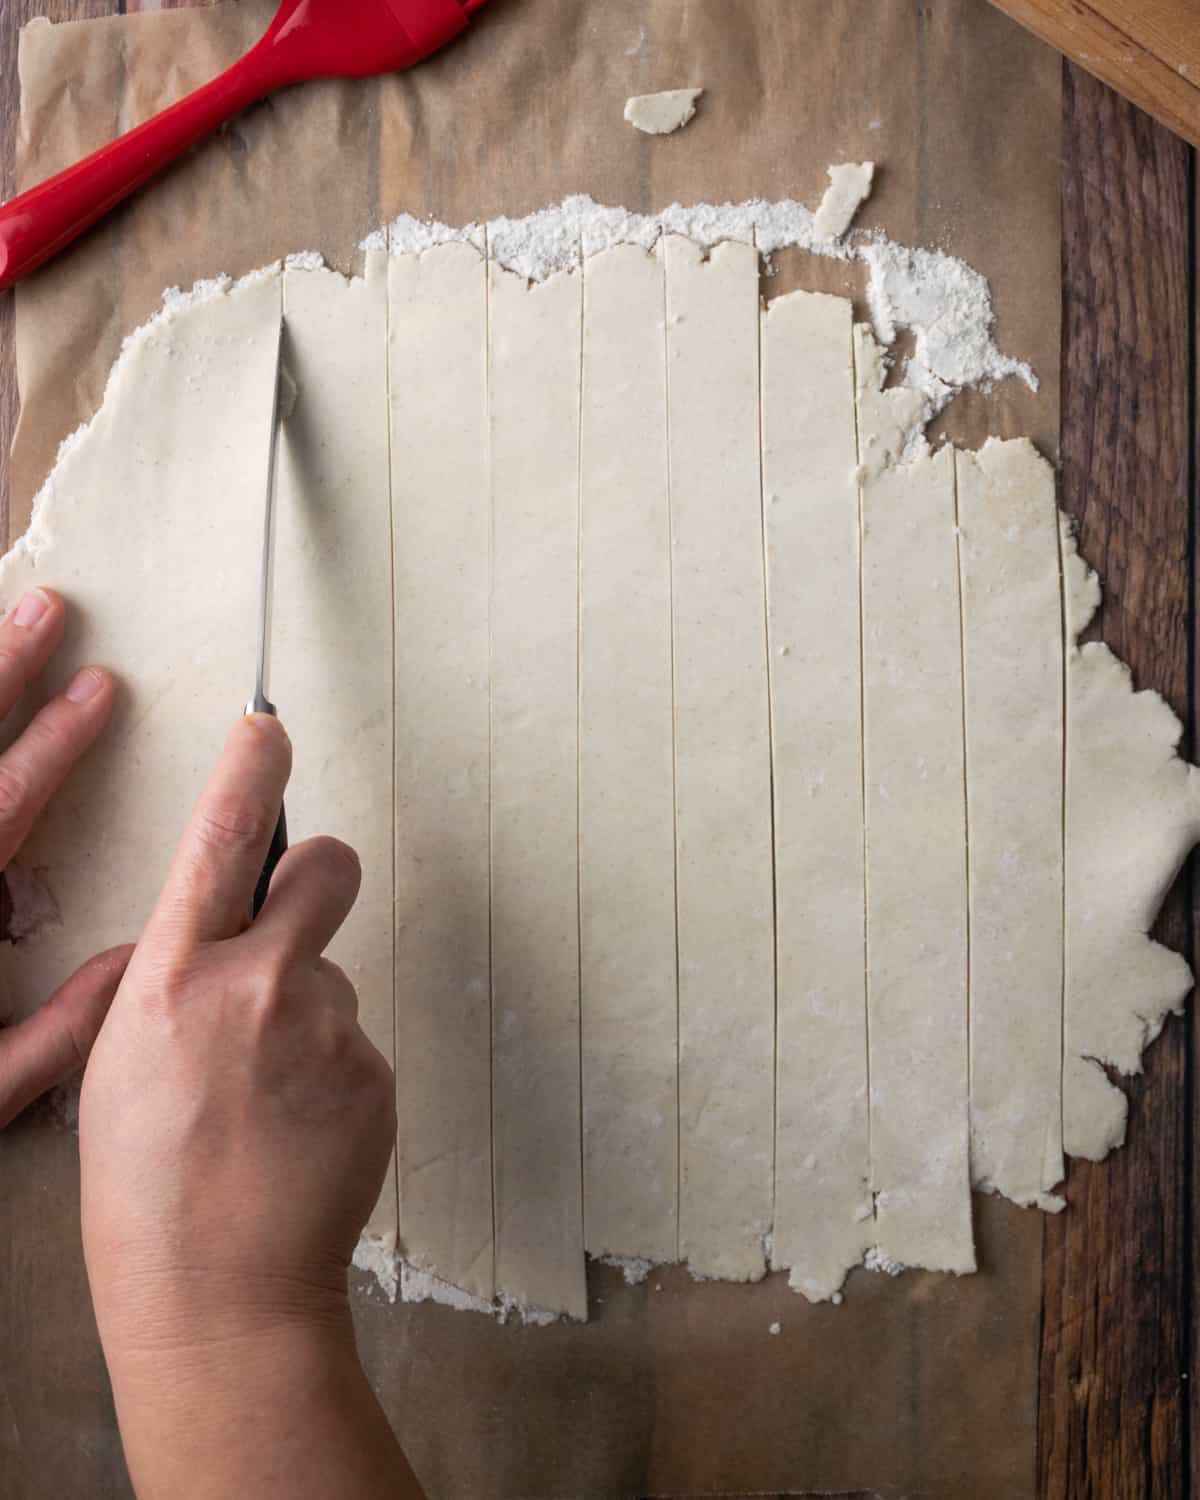
STEP 1: Roll out a sheet of gluten free pie dough. Cut it into strips.
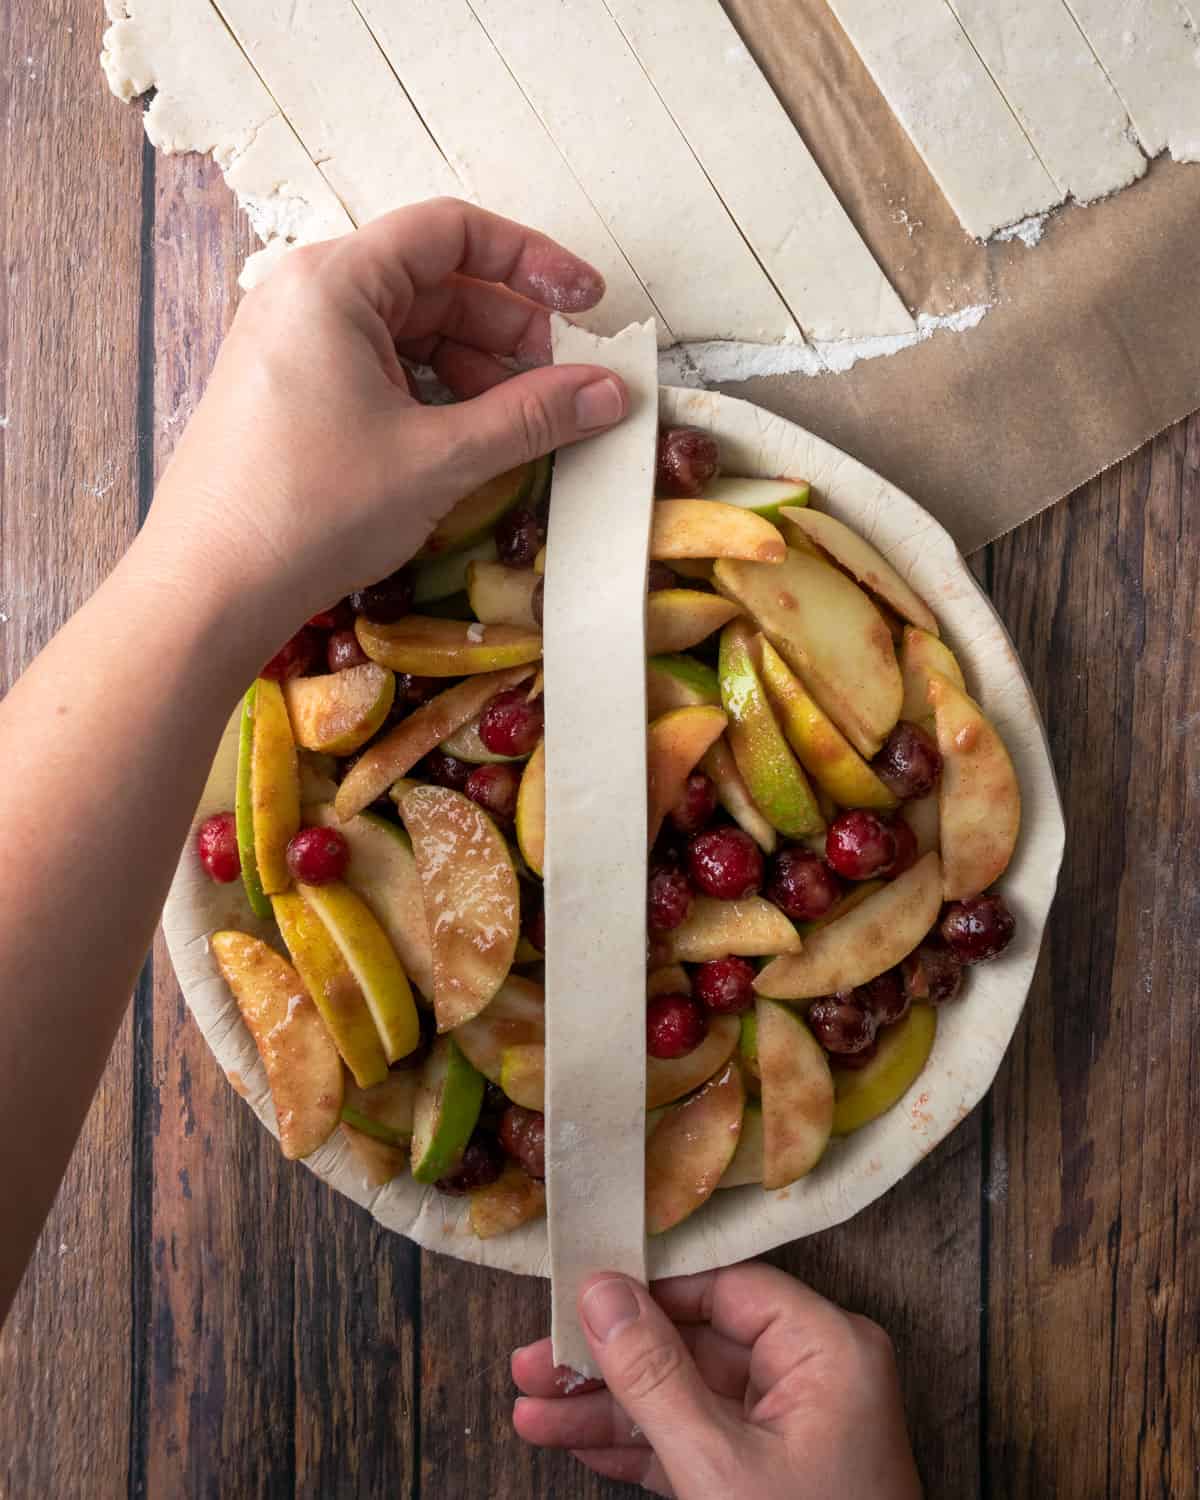
STEP 2: Using every other strip from the sheet of dough, place all of the lines going one direction.
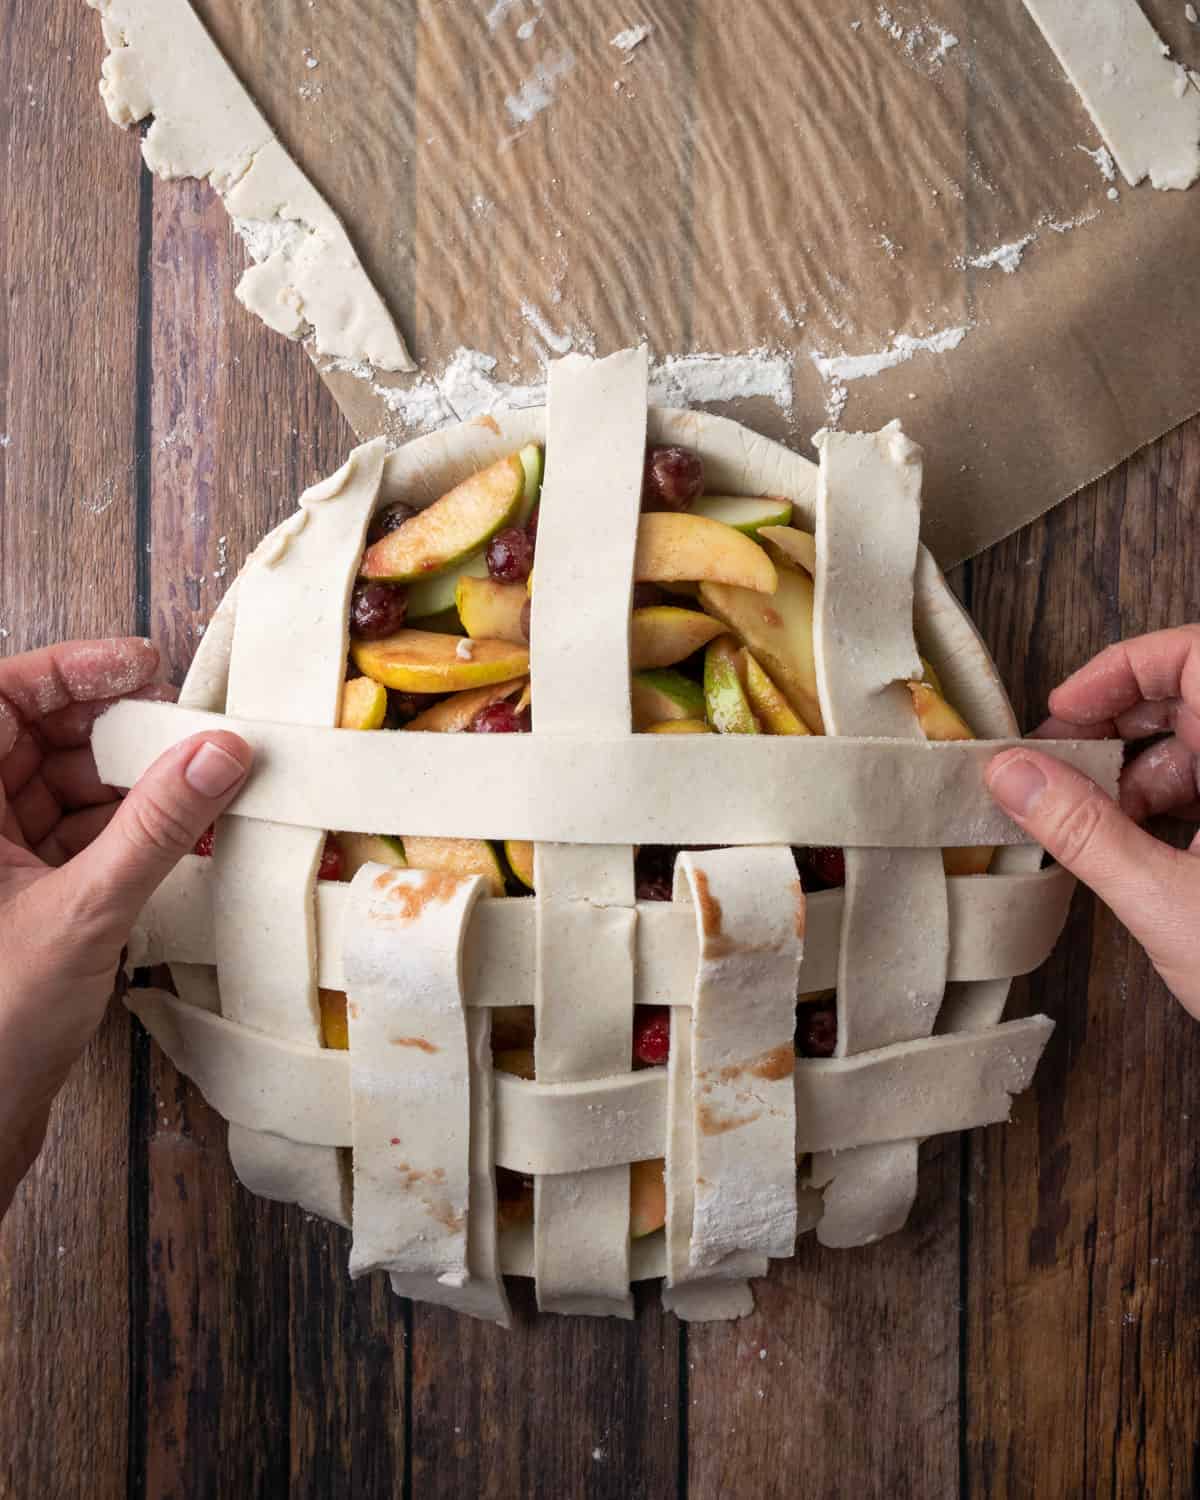
STEP 3: Fold back every other strip of dough and place the perpendicular piece of dough across. Then fold the pieces up and repeat with the alternating strips.
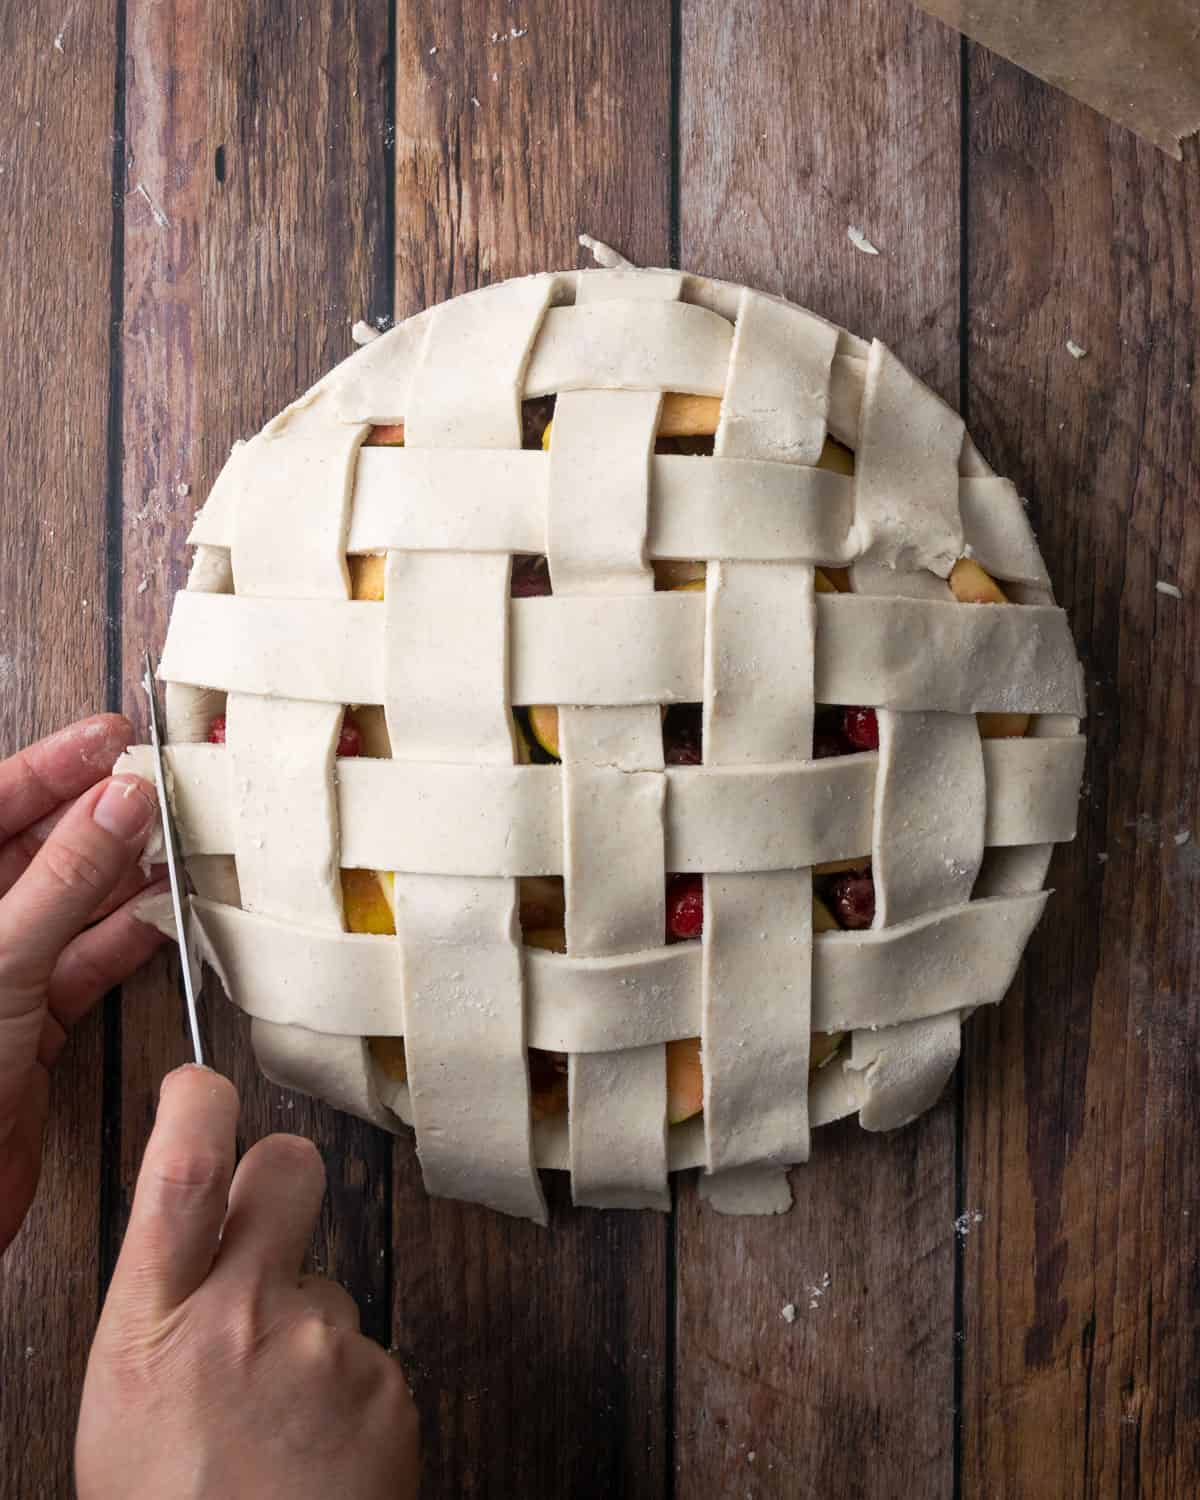
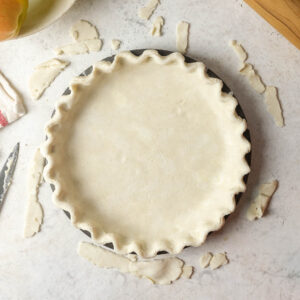
STEP 4: Once the lattice is complete, trim the edges off and crimp with your favorite design.
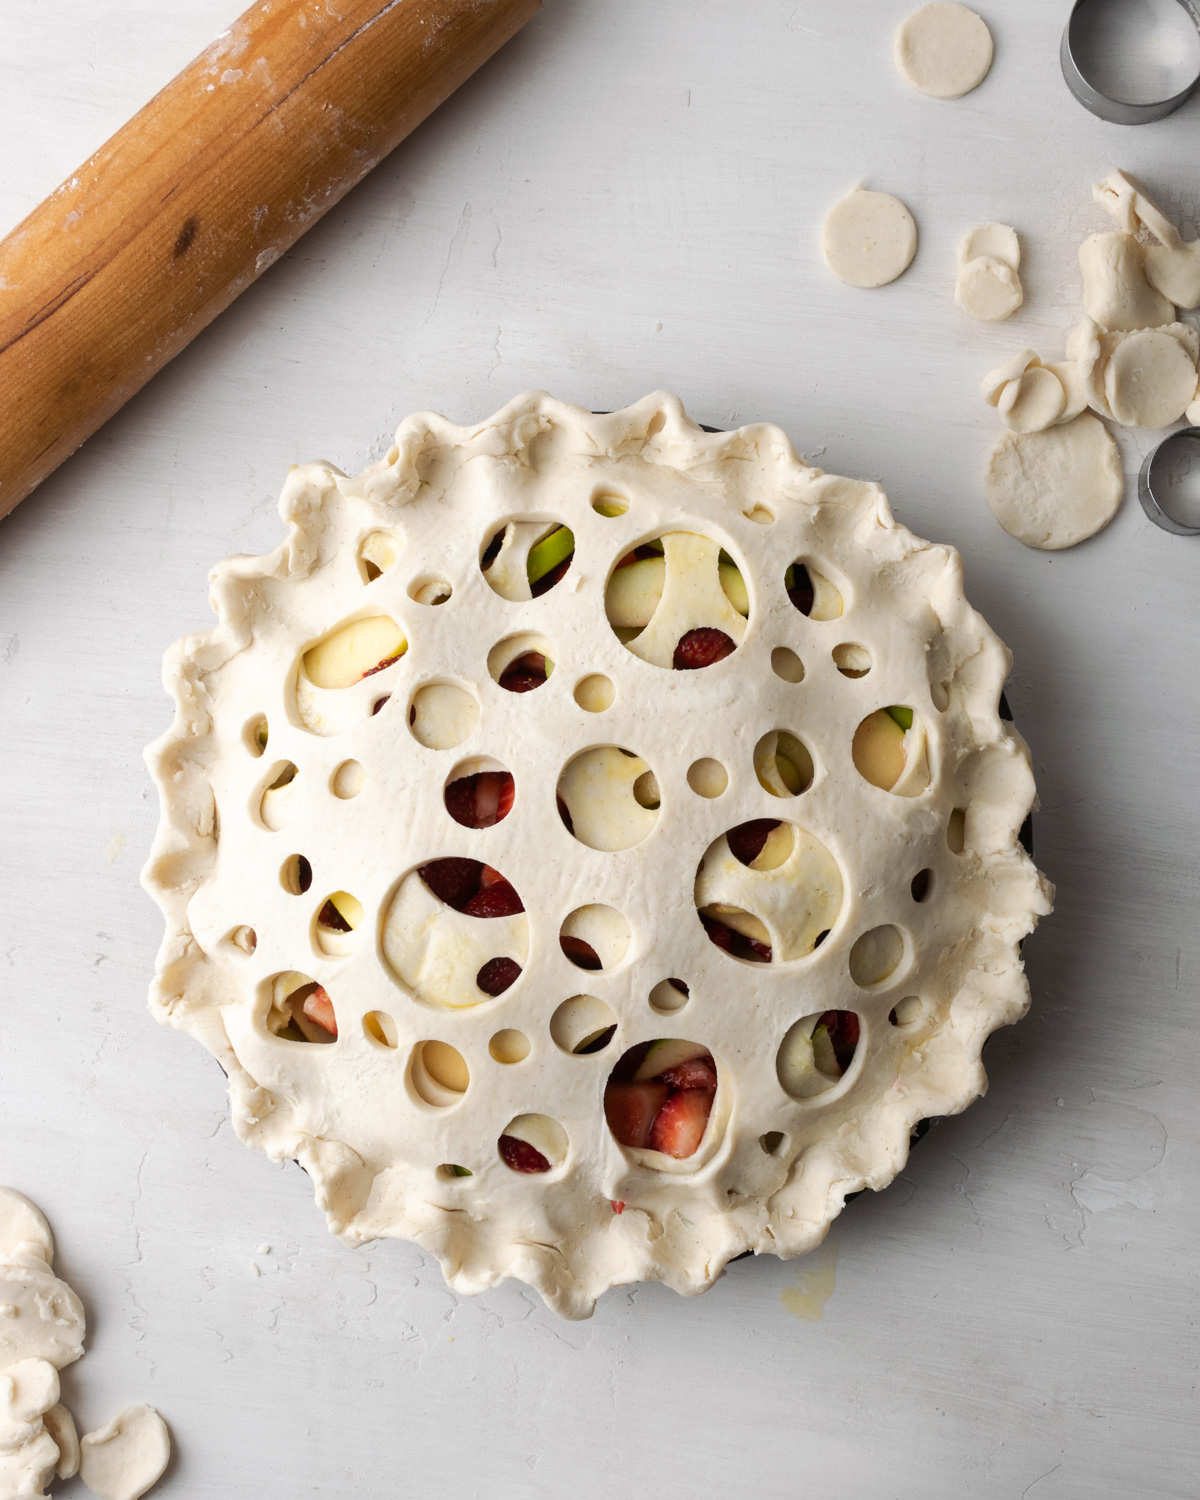
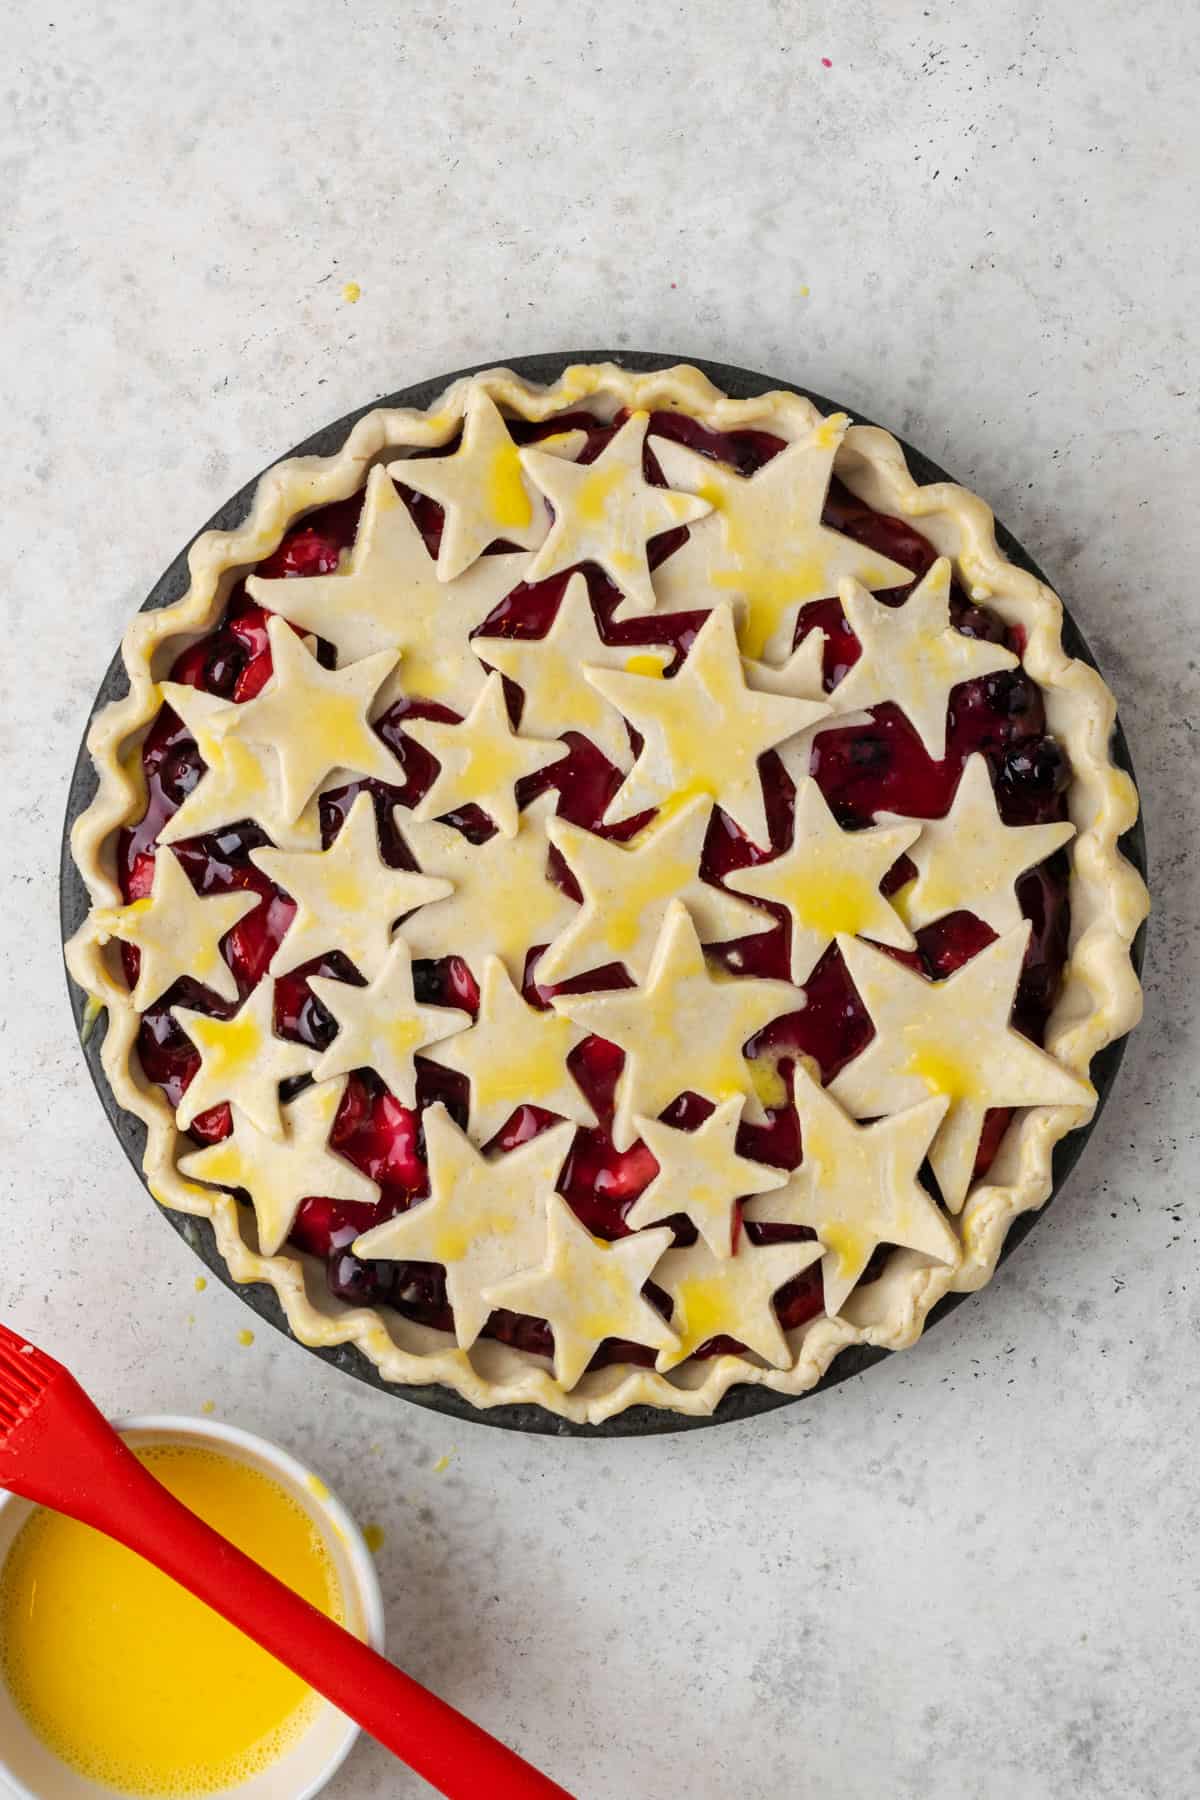
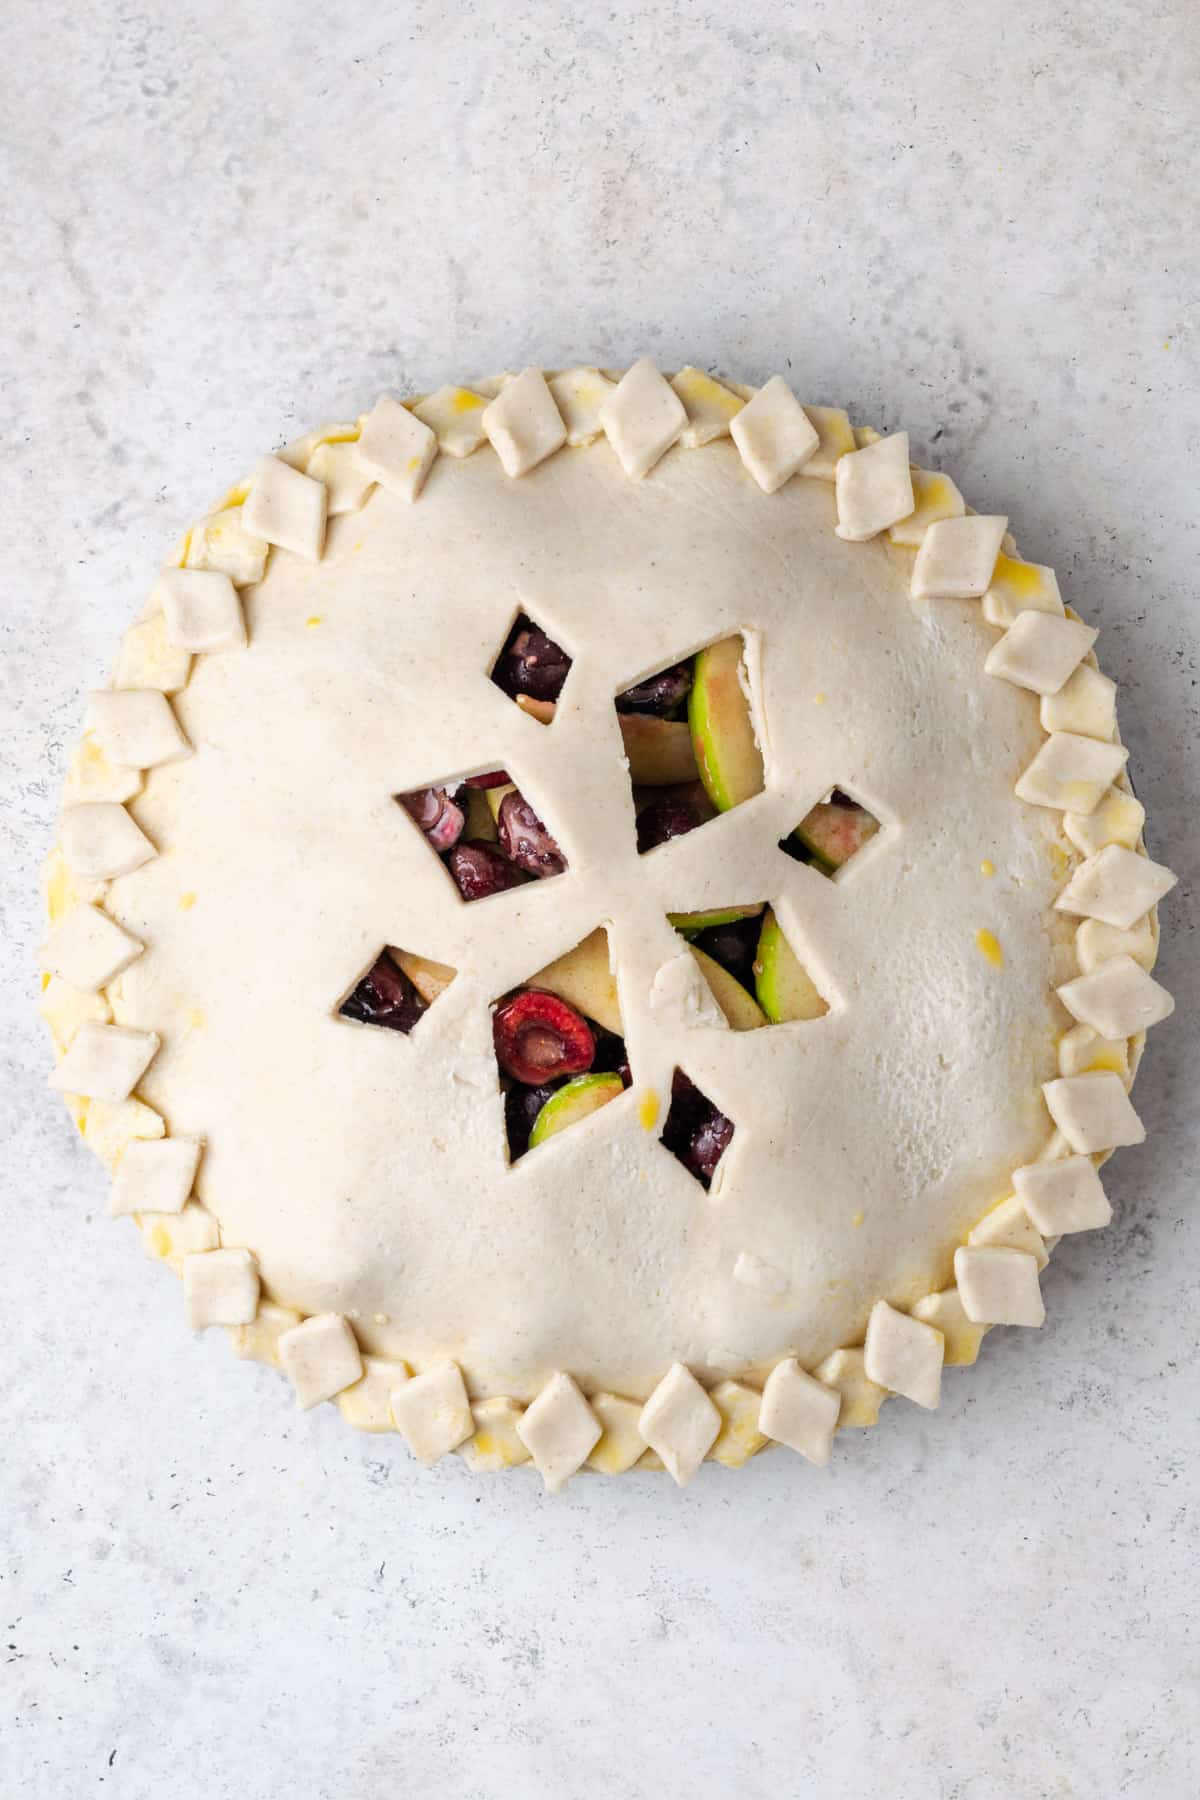
Use This Recipe to Make Decorative Pie Crusts
The only limit to what can be done with pie crust is your imagination. See some examples below.
Recipe FAQs
At the patty stage, where your dough is wrapped in plastic wrap, you can store in the refrigerator up to 5 days before rolling out.
You can also transfer the wrapped dough to a freezer bag or airtight container and freeze for up to 3 months. To use frozen dough, just thaw overnight in the refrigerator and roll out as directed above.
Yes. Once you've wrapped your discs of pie dough, transfer the wrapped dough to a freezer bag or airtight container and freeze for up to 3 months. To use frozen dough, just thaw overnight in the refrigerator and roll out as directed above.
You can also freeze your completed pie shells. I usually make a few at a time so I don't have to go through all the steps every time we want a pie. Prepare your dough, roll it out and line your pan. Disposable pie plates work great for this. Once it's done, place your pie shell in the freezer for about 30 minutes until it's frozen solid. Then remove it and wrap it in at least 3 layers of plastic wrap, making sure there are no openings. Store in a freezer bag or airtight container in the freezer up to 3 months. No need to thaw before using.
Wrap the dough tightly with plastic wrap and place the wrapped pieces inside of a freezer bag.
Pie dough can be frozen for up to 3 months before using. If you've frozen it in disc form, thaw overnight in the refrigerator before rolling out. If you've frozen pie shells, you can use them directly from the freezer - no need to thaw.
No, you should only thaw frozen dough in the refrigerator. At room temperature the fat will be too warm and the dough will become difficult to use.
I don't recommend it. Microwave defrosting will heat the dough unevenly and cause some parts to become too soft to handle.
Gluten Free Pie Recipes to consider:
If you try this recipe, please leave a 🌟🌟🌟🌟🌟 star rating and let me know how you liked it in the comments below.
Recipe
Gluten Free Pie Crust
Ingredients
- 2 ¼ Cup Gluten Free 1-to-1 Flour Blend I use Bob's Red Mill, see notes
- 2 Tablespoon Cornstarch
- ½ teaspoon Salt
- 1 Tablespoon Sugar
- ½ Cup Vegan Butter Vegan or Regular
- ½ Cup Shortening
- ½ Cup Cold Water
Instructions
- Cut the butter and shortening into cubes about ½" in size. Place into the freezer for at least 15 minutes prior to mixing.
- Measure the water and place into the freezer while you mix the remaining ingredients.
- In a large bowl, combine the flour, cornstarch, salt and sugar. Stir well to ensure it's evenly mixed.2 ¼ Cup Gluten Free 1-to-1 Flour Blend, 2 Tablespoon Cornstarch, ½ teaspoon Salt, 1 Tablespoon Sugar
- Add the frozen butter and shortening cubes to the flour mixture. Toss the butter around to make sure it is completely coated with flour. Working as quickly as possible, use your thumb and first two fingers to squish the butter cubes into discs about the size of a quarter.½ Cup Vegan Butter, ½ Cup Shortening
- Once all the butter has been worked into the flour, add half of the cold water. Toss the ingredients together to hydrate the flour. If any large clumps forms, break them apart. Continue to add the water a little at a time and toss it together until the dough forms into a rough ball. You may not need all of the water, but you should need most of it.½ Cup Cold Water
- Form your dough ball into a circular patty about 1 inch thick and wrap in plastic wrap. Place in the refrigerator for 2 hours or up to 5 days.
- Place a large piece of parchment paper on your counter and dust with 1 tablespoon of gluten free flour. Place your dough patty on the floured surface. Dust the top of the dough and your rolling pin with another bit of flour. You don't want a lot of flour, just enough to keep the rolling pin from sticking to the dough.
- Roll out your dough working from the middle and rotating the dough as you go to make sure you're working evenly. Roll until the dough measures 1 inch larger in diameter than the pie pan.
- Place the dough sheet onto a baking sheet and put into the refrigerator for 1 hour.
- Once the dough sheet has chilled, remove it from the refrigerator and flip it over into the pie pan. Work the dough gently into the pan, taking care not to press the dough in as it will stick. If you make any holes in the dough, patch them with leftover dough.
- Trim the dough about ½" outside of the edge of the pie pan. Fold the edge under and crimp however you'd like. Place finished pie shell in the freezer until ready to use. If you will freeze more than 30 minutes, make sure to cover with plastic wrap.
Video
Notes

Tiffany is the recipe developer, stylist and food photographer behind Well Fed Baker. As a lifelong baker who had to go gluten free and dairy free in 2016, Tiffany strives to share allergen friendly recipes that never feel like they are free from anything.
Angela says
This turned out amazing! I have tried a few gf pie crusts and they each turn out tough. The video was so helpful to have a visual of how big the butter should be and the texture the pie crust should be! Thanks so much!
I love to hear this! I hope you enjoy your delicious pie ◡̈
Bonny says
Tiffany, I am making fruit of the forest pies for a wedding and wondering if I can roll out and fill pies several days in advance, and then freeze until ready to bake. The fruit will be frozen when mixed and added to the shell.
Ooh, I've never heard of fruit of the forest pie. I had to search for it - it sounds delicious! You can definitely make the pies ahead of time and freeze them. I do it all the time. You can freeze before or after baking. I usually make my Thanksgiving pies months in advance, so I'm sure the crust will hold up!
Donna says
Tiffany c an I sub gf all purpose flour for 1:1 Bobs red mill? Whenever I've made gf pie crust I follow to the recipe to the T but it's too small. I do have only deep dish pie plates which are 9 and one half inch. Would buying a standard size one help or tin.?Mine are pyrex Also can I sub all butter in place of shortening?
Hi Donna, If you're using one like Pillsbury GF all purpose or Great Value All Purpose those will work fine. Bob's Red Mill All Purpose is made from beans and has a strong savory flavor, which might not be very delicious in pie crust. Whichever you choose, make sure it has xanthan gum or you'll need to add that. Without it the pie dough will crumble apart. I usually use deep dish pie plates and this recipe will definitely make enough dough for one deep dish pie with a top. If you try to make it into two deep dish pies, there isn't quite enough dough to make a nice edge on both bottom crusts. A standard size pan will definitely give you enough for two bottoms and maybe a little piece of dough leftover. And yes, you can use all butter in place of shortening. You will need just a little less water (like maybe 1 tablespoon less). Good luck!