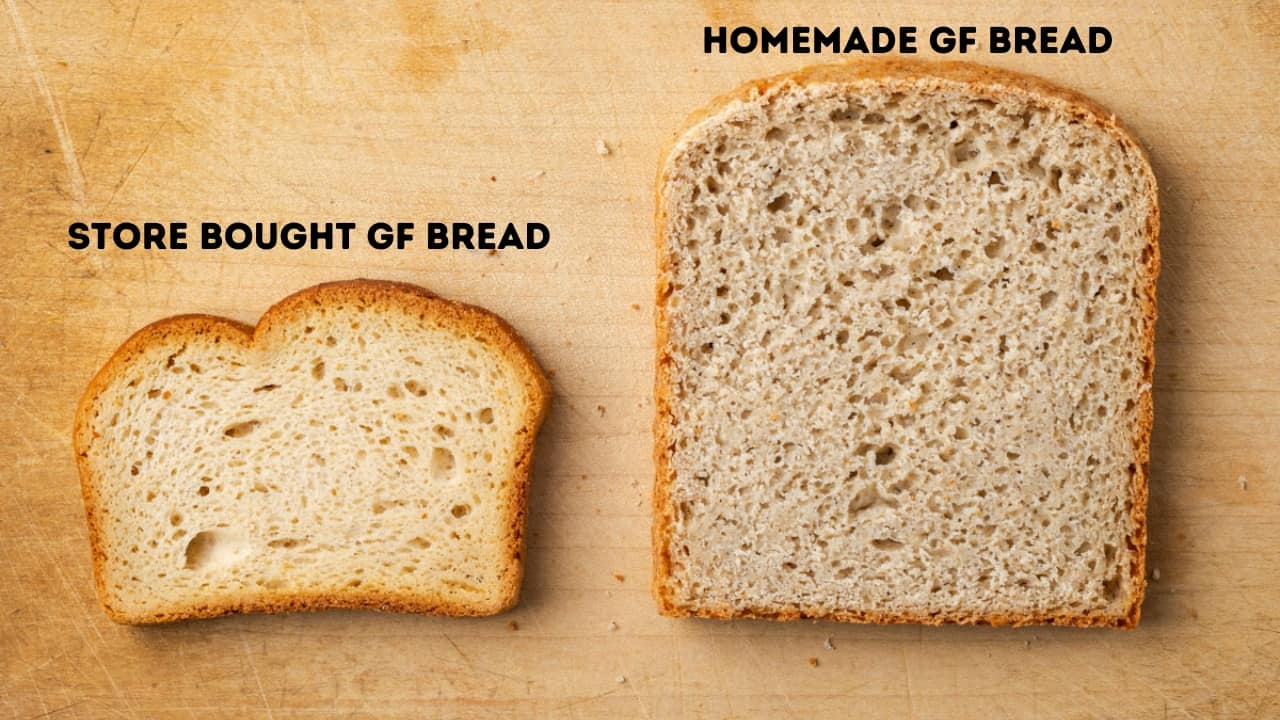
If you've been gluten free for any amount of time, you've probably tried your fair share of expensive and tiny storebought gluten free breads. Well, those days are over because this homemade gluten free sandwich bread is easy to make and the slices are full sized, like a regular loaf of bread. Say goodbye to tiny sandwiches and hello to yummy homemade bread.
This recipe does require four different gluten free flours and starches, but don't let that deter you. The price for each loaf works out to around $5 and the bread is about twice the size of a store loaf. I have tested this loaf ten times over the past two months, so I know the recipe is perfect. I've also made sure to test some substitutions, so be sure to check those out if you have additional ingredient restrictions.

Jump to:
- Want to save this recipe?
- Why You 'll Love This Gluten Free Bread Recipe
- Equipment Needed
- Shop for Equipment
- Ingredient Notes
- Shop for ingredients
- Substitutions I have tested
- Substitutions I have NOT tested but might work
- How to Gluten Free Sandwich Bread
- Baking Tip
- How to Bake Gluten Free Bread
- What is the trick to making good gluten free bread?
- Storage
- Other savory recipes to consider:
- Recipe
Want to save this recipe?
Enter your email below and we will send it straight to your inbox!
You will also be added to our weekly email list.
Why You 'll Love This Gluten Free Bread Recipe
- Easy - Even though it does require some special ingredients, this bread is easy to mix and bake.
- Big Slices - You will rejoice at the size of this bread. It's the perfect gluten free bread for sandwiches! No more tiny slices.
- No Gums - This gluten free sandwich bread contains no gums, so if you're avoiding xanthan gum or guar gum which is commonly found in store loaves, this is the bread for you!
- Allergen Friendly - This gluten free bread recipe is written to be gluten free and dairy free. But I have tested it with other replacements, so you don't have to guess. Need vegan bread? Avoiding tapioca starch? No worries, just check the substitution list below.
Equipment Needed

You will need a few pieces of equipment to guarantee bread success. If you're planning to make homemade bread regularly, then they are worth the investment.
- Kitchen Scale - Gluten free bread is a very fickle thing to make. Sometimes even changing an ingredient measurement by 1 tablespoon is enough to throw things off. So I highly recommend using a kitchen scale.
- Stand Mixer - I highly recommend getting a stand mixer. I know they are expensive, but it makes mixing so easy and they last forever. I've had mine for over 25 years now and I use it every day. It's well worth the money.
- 1 pound Pullman Loaf Pan - Gluten free bread is best baked in a Pullman pan which has tall straight sides that help the loaf rise. If you try to bake this recipe in a regular loaf pan that you would use for something like banana bread, it is likely to spill over the edges in the oven.
- Instant Thermometer - A thermometer is a great inexpensive tool to have in the kitchen. It will tell you when you bread is perfectly baked inside. You can also use it for testing cakes, heating oil for frying, or making homemade caramel.
Shop for Equipment
 Buy Now →
  Buy Now →
  Buy Now →
  Buy Now →
 Ingredient Notes
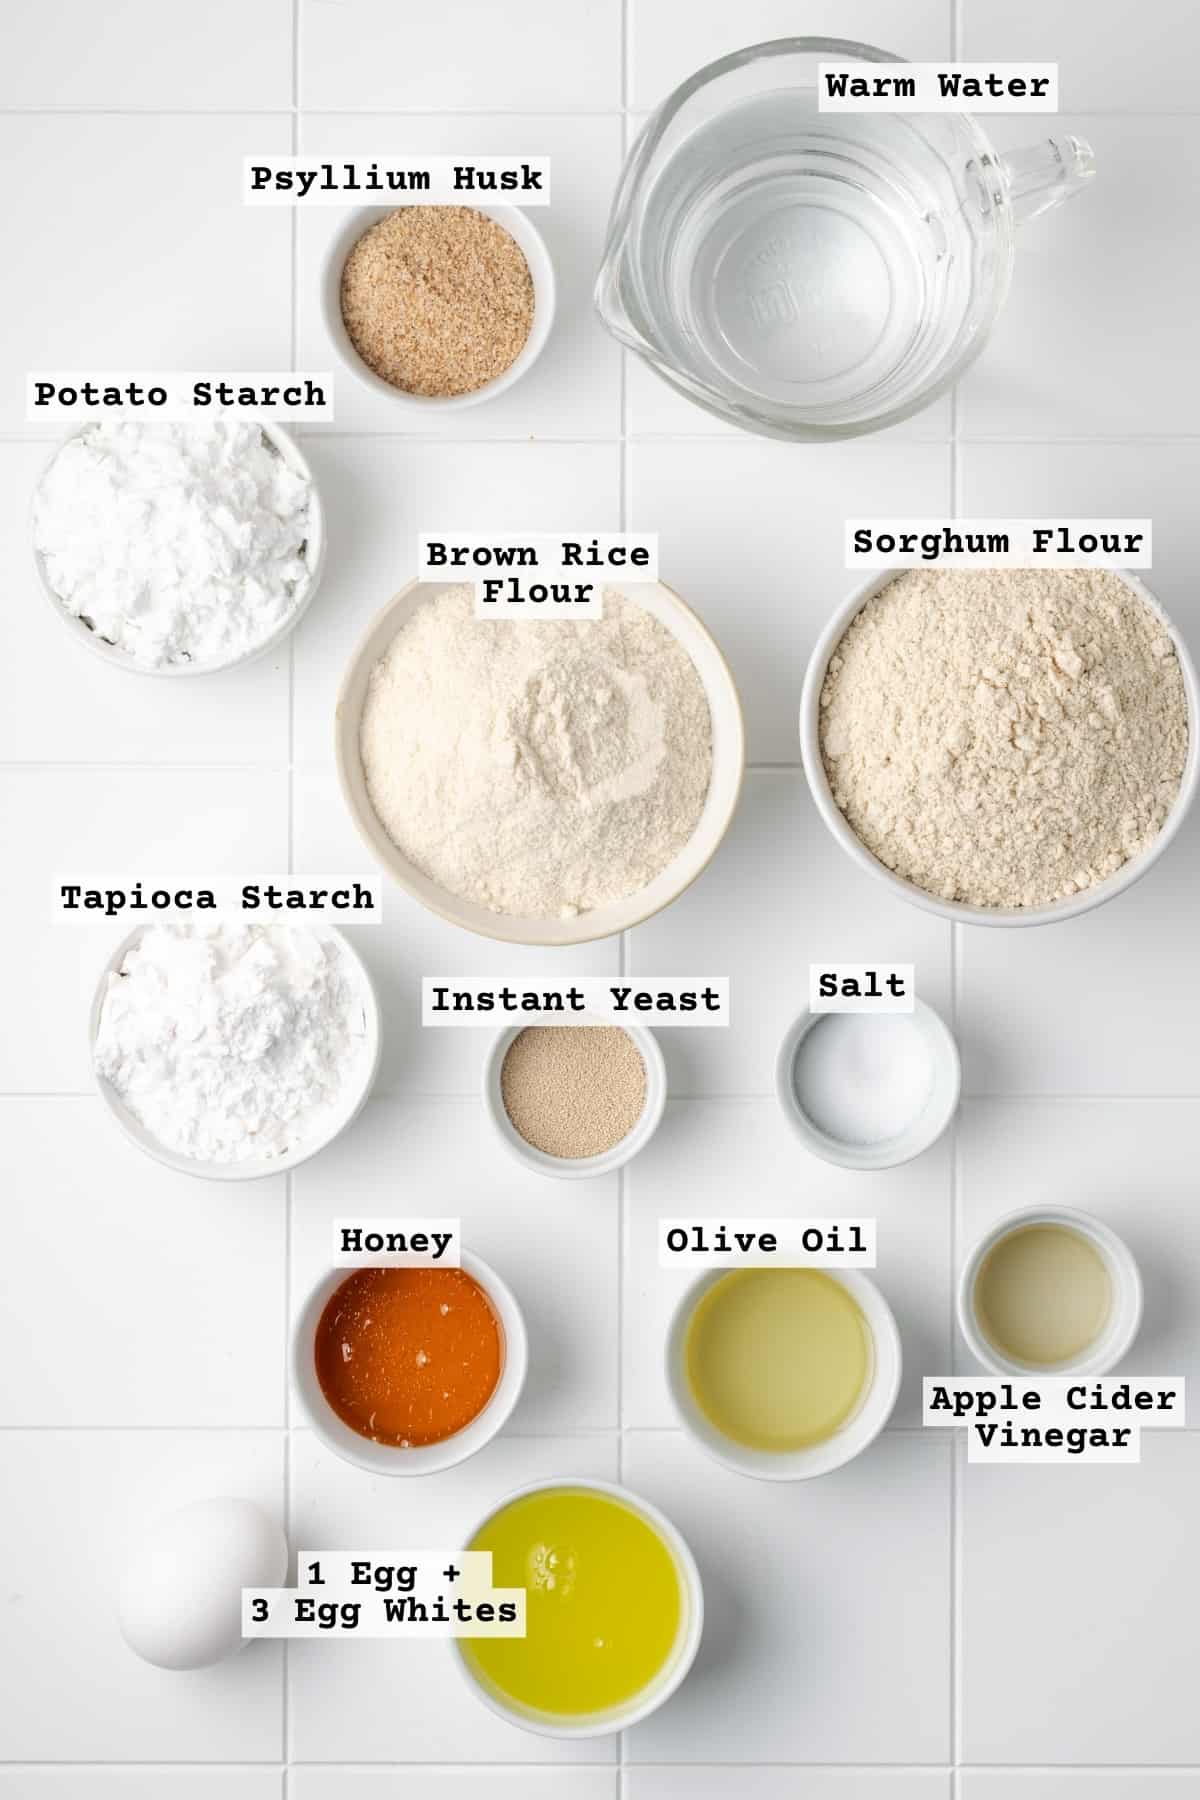
- Psyllium Husk - Yes, the same ingredient in fiber supplements. Psyllium husk is used to great a gel mixture which allows air to be trapped inside the dough so the loaf will rise and hold all those air bubbles in during baking. I use a brown psyllium husk, but you can use a light colored husk to achieve a white bread look. Do not use psyllium powder.
- Warm Water - Needed to activate the yeast.
- Sorghum Flour - Sorghum is a great gluten free flour that provides a little bit of an earthy, sweet flavor to your bread. A little reminiscent of a honey wheat loaf of bread.
- Brown Rice Flour - brown rice flour provides a light texture to the bread. It also helps make the crust crispy. Too much will make the outside of your bread a little hard, so be careful with measuring.
- Potato Starch - Make sure you're buying potato starch and not potato flakes or potato flour. They are not the same ingredient. Adding potato starch to bread makes the loaf softer and able to retain more moisture. This leads to not only a delightful feeling when eating it, but allows for a little longer shelf life.
- Tapioca Flour or Tapioca Starch - Both ingredient names are the same product. Tapioca gels up when mixed with liquid and heat helping to bind the bread dough together.
- Instant Yeast - I always use instant yeast for ease, but you can substitute active dry yeast if you prefer. Instant yeast is sometimes called bread machine yeast or rapid rise. Not all brands of yeast are gluten free, so make sure to check with your manufacturer.
- Salt - Salt is a necessary ingredient here to add flavor to a simple bread. Don't skip it.
- Honey - Not much honey is used here and it mainly feeds the yeast while adding a tiny amount of pleasant taste to the bread. It compliments the sorghum flour nicely.
- Olive Oil - I always cook and bake with Extra Virgin Olive Oil. You can use whatever cooking oil you prefer here.
- Apple Cider Vinegar - Making the dough a little acidic helps with the rise.
- Egg and Egg Whites - Since we are lacking gluten for structure, we are replacing that structure with the protein in eggs. Ensure your eggs are at room temperature before mixing. If you need an egg free or vegan alternative, reference the substitutions chart below or the notes on the recipe card.
See recipe card for full ingredient list and quantities.
Shop for ingredients
 Buy Now →
  Buy Now →
  Buy Now →
  Buy Now →
  Buy Now →
 I am providing links to all the specialty ingredients and equipment for people who do not have many shopping options nearby. My regular grocery stores carry all of the Bob's Red gluten free flours and starches and they tend to be less expensive in store.
Substitutions I have tested
- Flour substitutes - This recipe is written specifically for this flour blend. A store bought gluten free flour blend or all purpose gluten free flour will NOT work in this recipe.
- Make it Vegan / Egg Free - Omit the eggs. Replace the warm water with 375 ml of warm soy milk. A little more milk is required because it is only 94% water. Soy milk is the only milk I tested because it has enough protein to equal the eggs. Replace the honey with an equal measure of maple syrup.
- No Sorghum - You can replace this ingredient with an equal weight of gluten free oat flour.
- No Tapioca - This ingredient can be replaced with an equal weight of arrowroot powder.
Substitutions I have NOT tested but might work
- No Psyllium Husk - Replace with ground flax seed in the same measure. Use it to create a gel just as instructed with the psyllium husk.
- No Brown Rice Flour - Replace with white rice flour, it's a 1:1 substitution.
- No Potato Starch - Replace with corn starch, it's a 1:1 substitution.
How to Gluten Free Sandwich Bread
A stand mixer will make this recipe easy to put together. If this is your first time making gluten free yeast bread, make sure to measure and follow the directions carefully.

STEP 1: Combine the warm water and psyllium husk and stir well. Set it aside to let the psyllium form a gel that will resemble thick applesauce, it will take at least 5 minutes.

STEP 2: Combine the sorghum flour, brown rice flour, potato starch, tapioca flour and salt in the bowl of a stand mixer fitted with a dough hook. Stir the ingredients together for 1-2 minutes until they are well mixed.
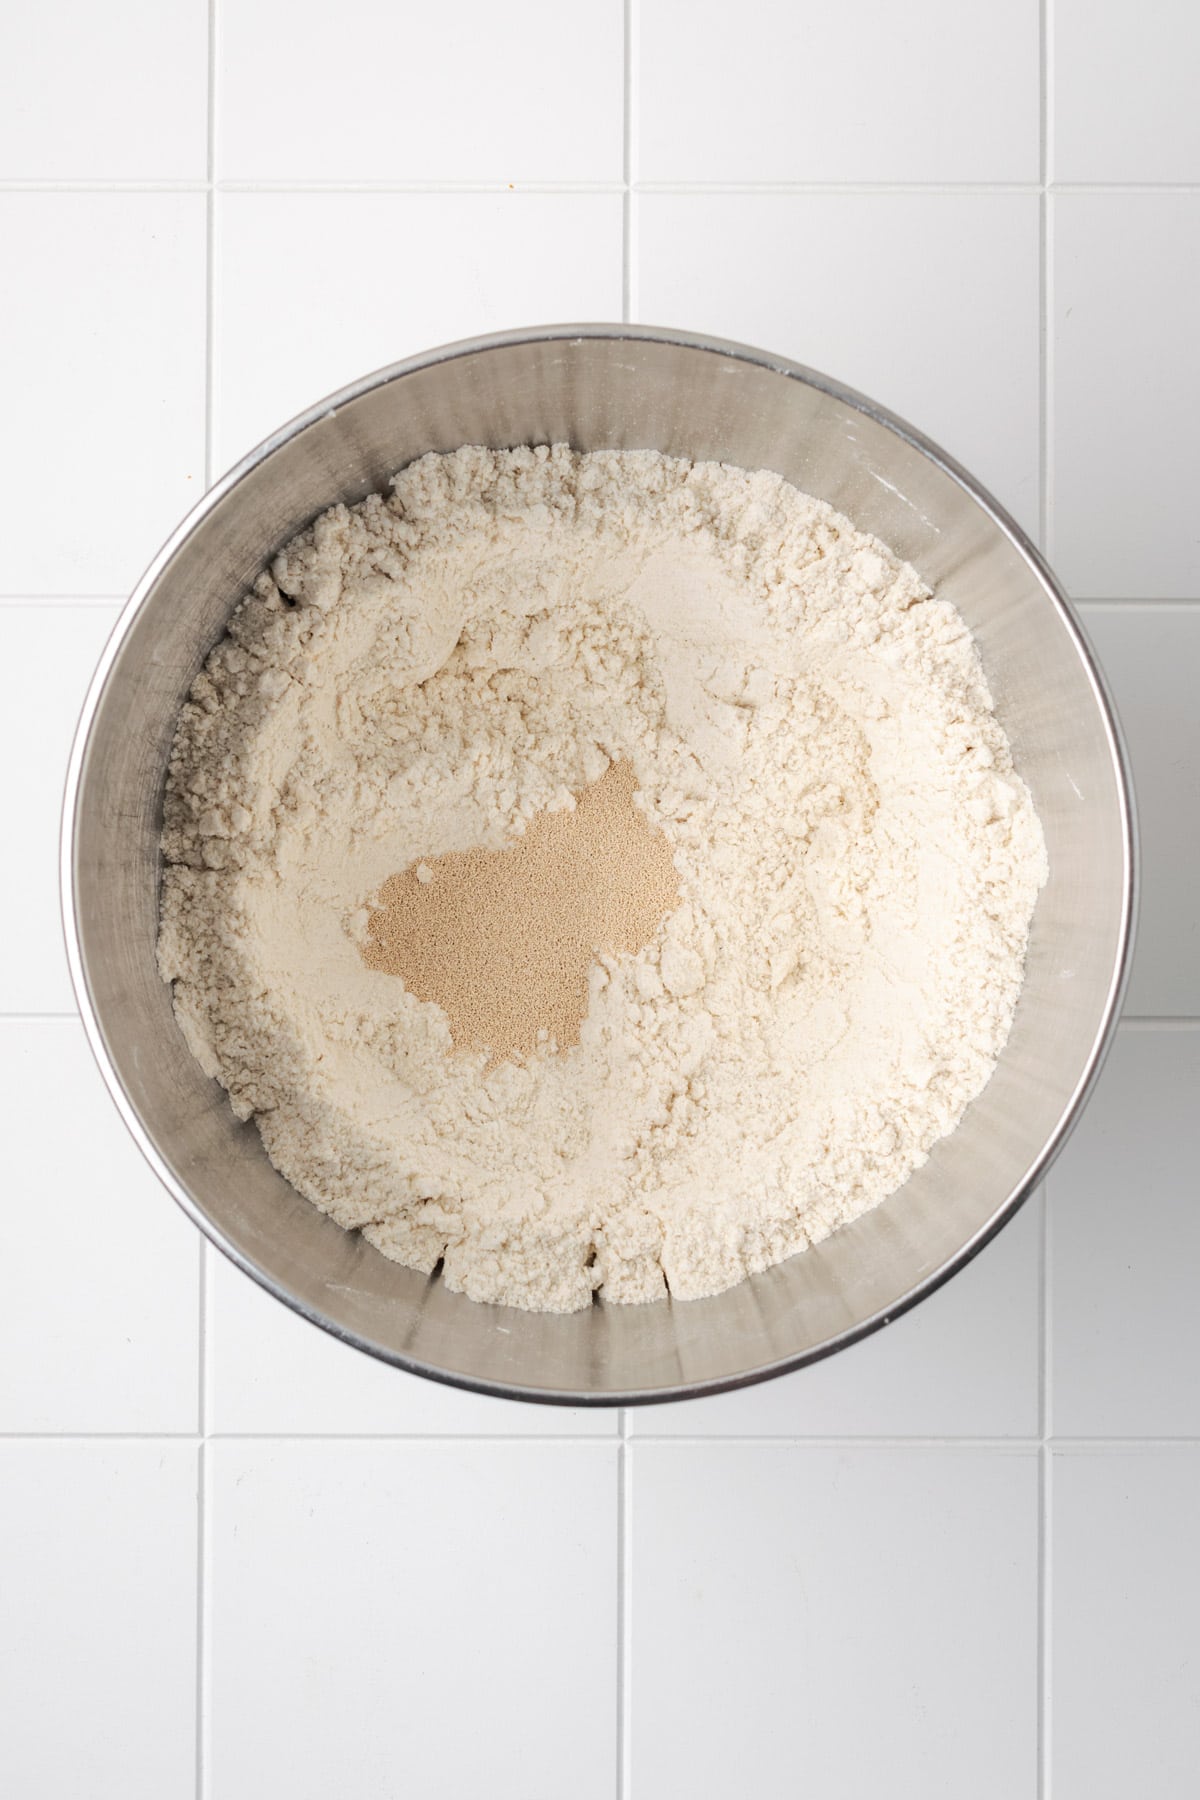
STEP 3: Add the instant yeast to the flour and mix a few more times until it's incorporated.
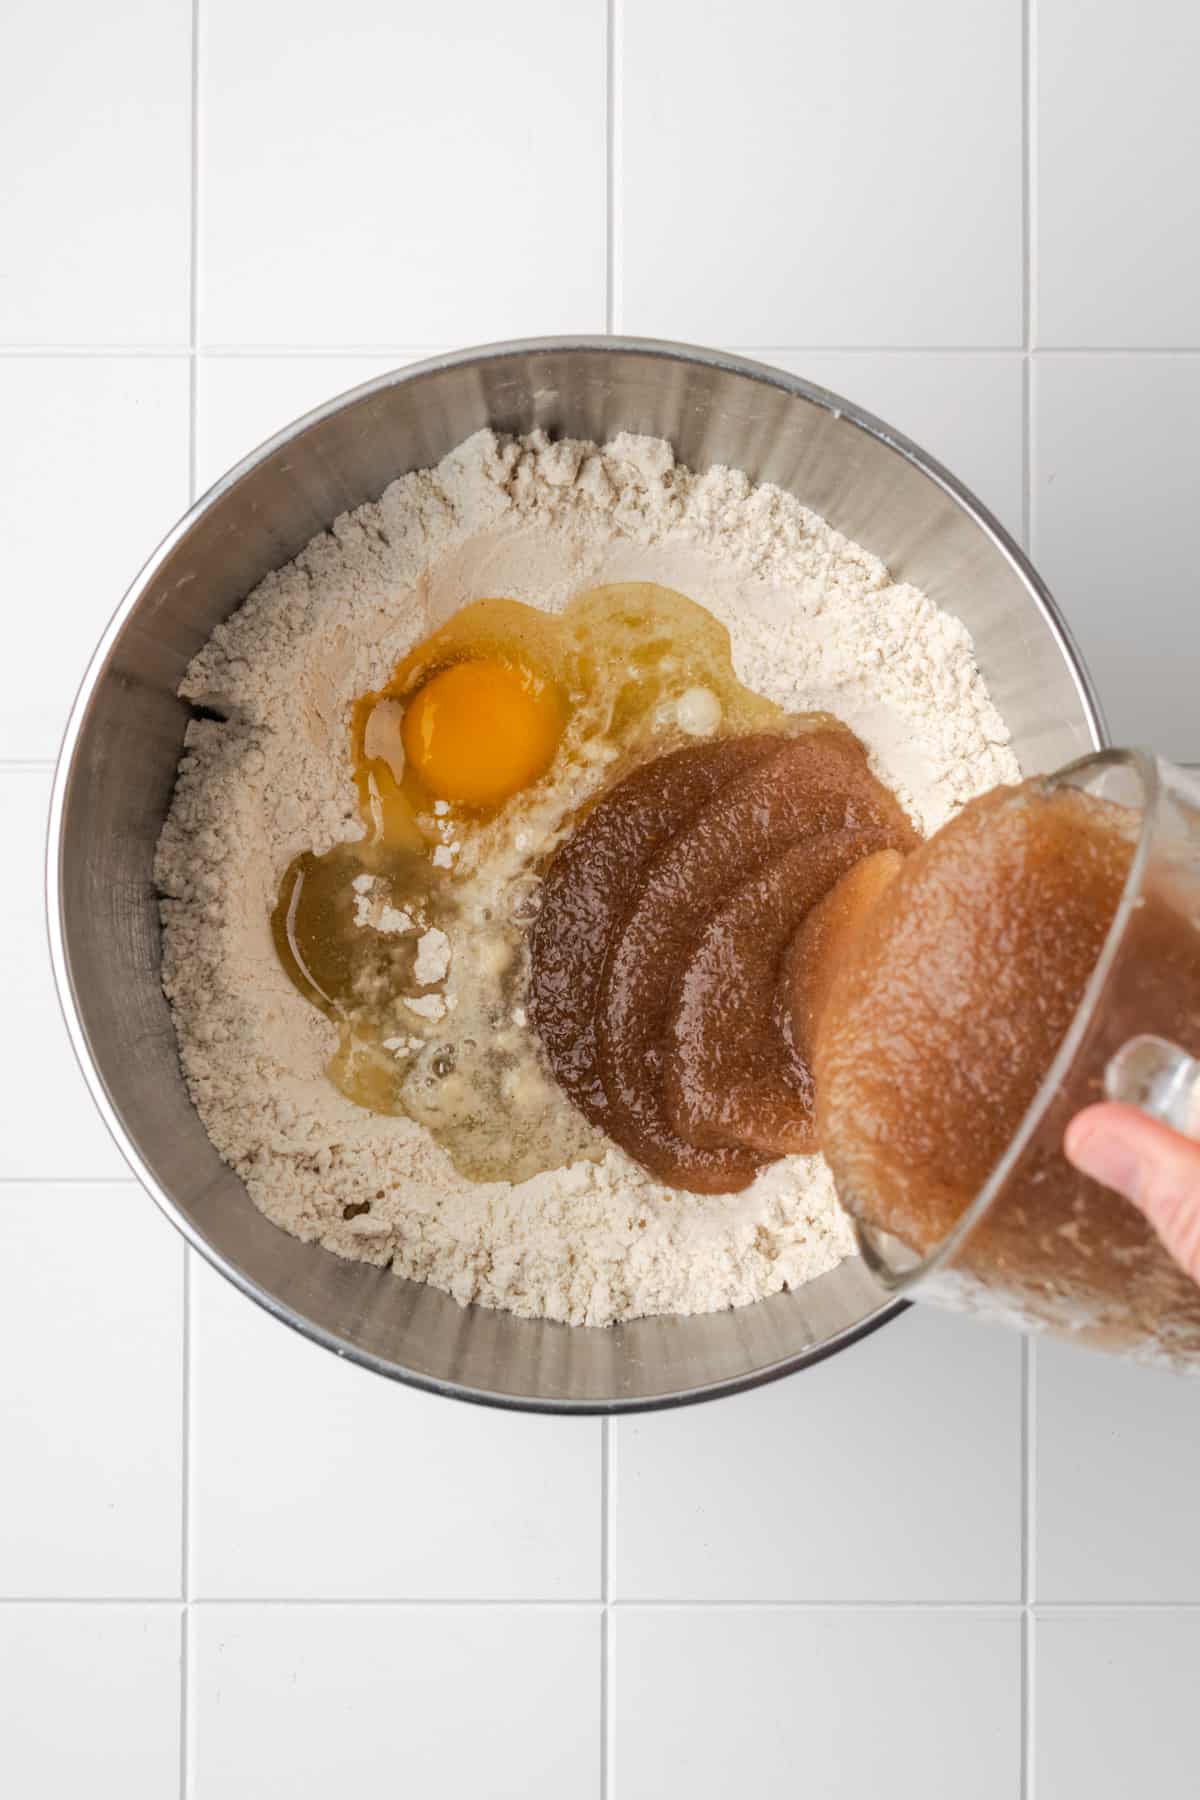
STEP 4: Add the egg, egg whites, oil, honey, apple cider vinegar, and water-psyllium gel to the dry ingredients. Stir on low speed until the dry ingredients are incorporated, scraping the bowl a few times. Then turn to medium low and mix for 5 minutes.

STEP 5: Allow the mixed bread dough to rest for 10 minutes before transferring it to your pullman pan.

STEP 6: Transfer the bread dough to the pullman pan. Cover the pan and leave to rise in a warm place until doubled in size.
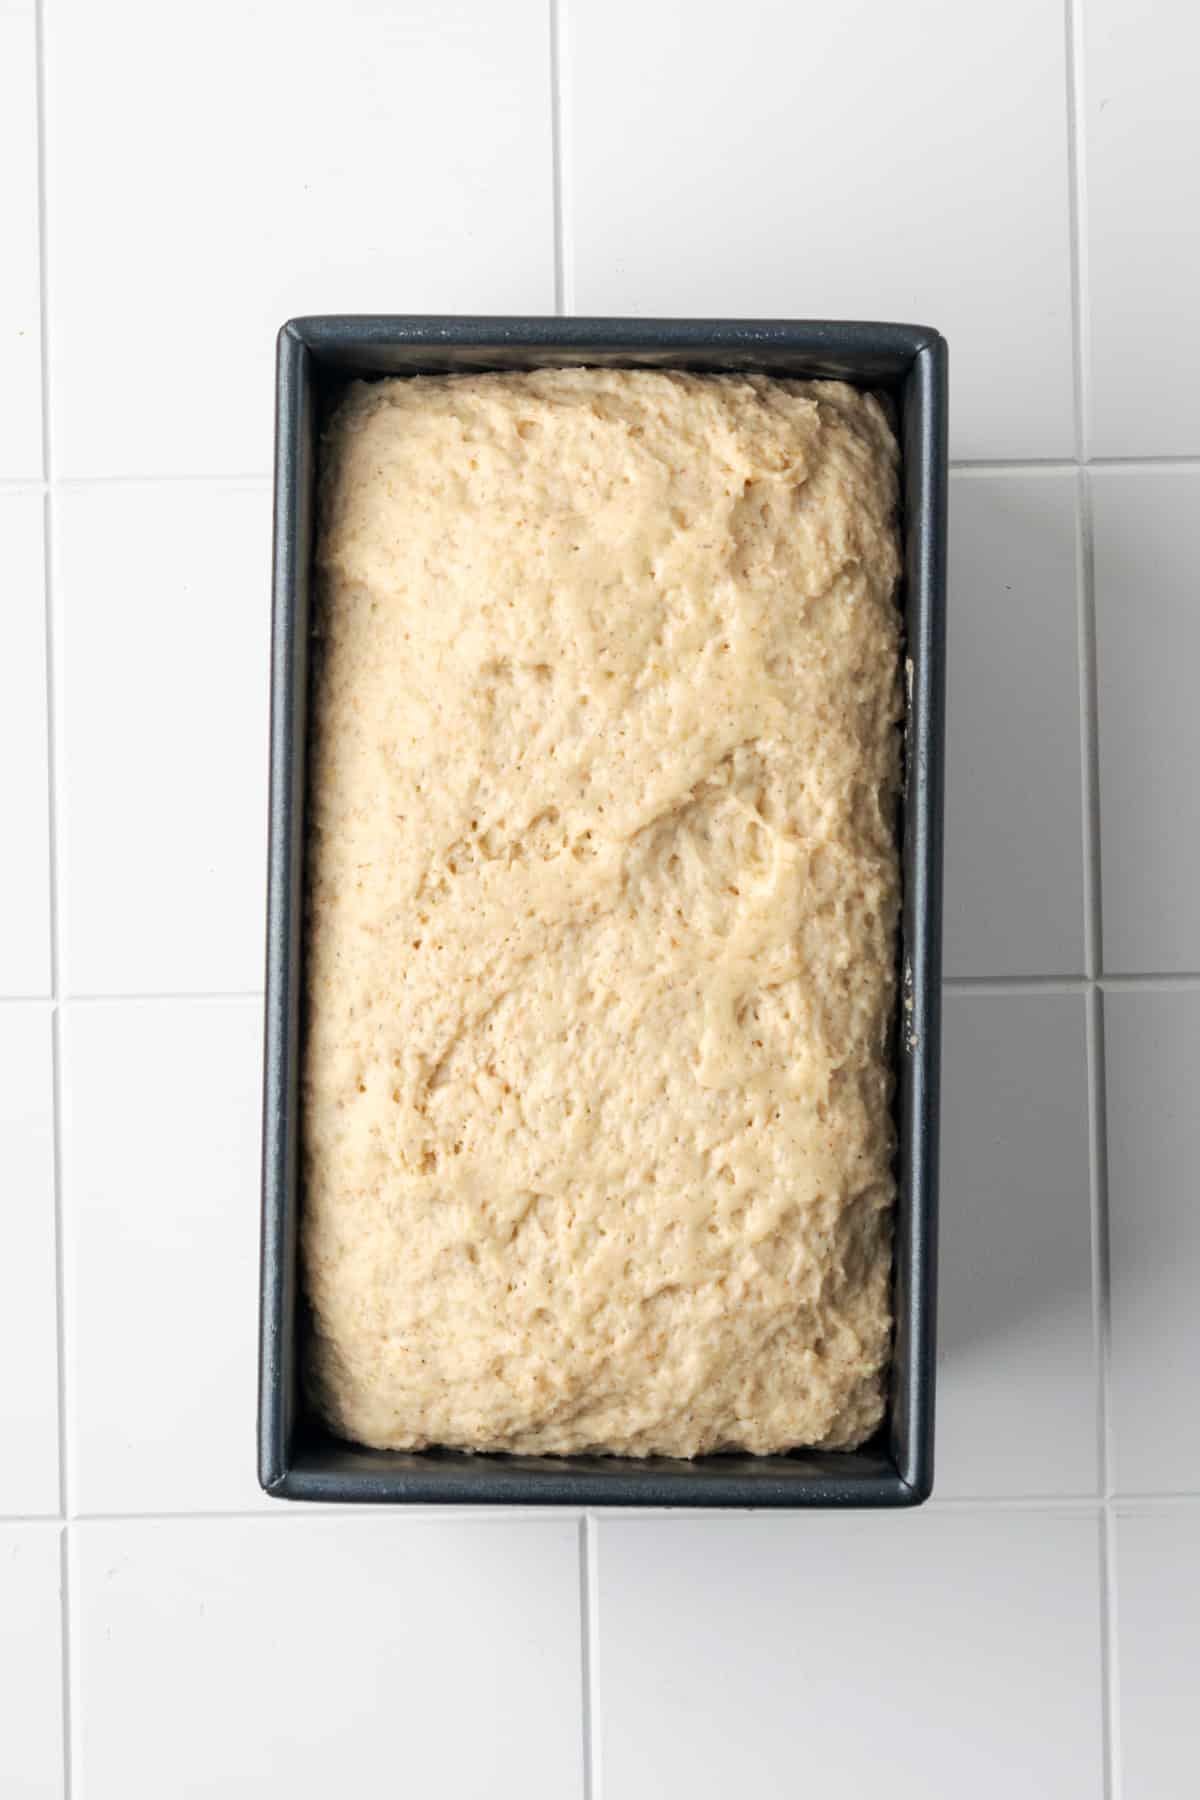
STEP 7: Once the bread has risen, you can remove the cover and bake. If you like a nice shiny top, brush the top with egg white before putting it in the oven.

Baking Tip
The internal temperature of a baked loaf of gluten free bread should read 205 degrees on an instant thermometer. The loaf will also make a hollow sound when tapped.
How to Bake Gluten Free Bread
This gluten free sandwich bread bakes for 30 minutes in a steam oven and the remaining time in a dry oven. The steam helps to keep the outside of the bread moist and soft, so it doesn't get overly crusty.
This recipe has not been tested in a bread machine, so I have no idea if that will work.

What is the trick to making good gluten free bread?
Be precise about following the recipe. That means, use the ingredients listed and measure carefully. Expect gluten free bread to behave differently than wheat bread dough. It's wetter and does not require kneading or a second rise.
Storage
You should store this bread in an airtight container or bread bag. This gluten free bread will last for about 3-4 days at room temperature before molding. You can also store it in the refrigerator for longer life, approx 7 days.
If you'd like to freeze your bread, once it is completely cooled, cut the bread into slices and wrap the sliced bread in two layers of plastic wrap and place it inside a freezer bag. Store for 2 months.
If your gluten free bread goes stale, use it to make these delicious gluten free croutons, our favorite gluten free stuffing or this french toast casserole!
Other savory recipes to consider:
If you try this recipe, please leave a 🌟🌟🌟🌟🌟 star rating and let me know how you liked it in the comments below.
Recipe
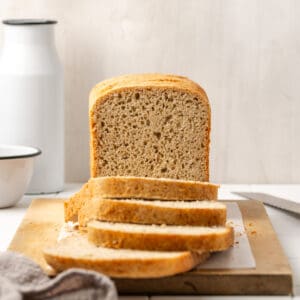
Best Gluten Free Sandwich Bread
Equipment
- 1 Pullman Pan 1 pound size
Ingredients
- 3 Tablespoons Psyllium Husk
- 1 ½ Cups Water
- 1 ¼ Cups Sorghum Flour
- 1 Cup Brown Rice Flour
- ½ Cup Potato Starch
- 6 Tablespoons Tapioca Starch
- 2 teaspoons Salt
- 2 ½ teaspoons Instant Yeast
- 3 Tablespoons Honey
- 3 Tablespoons Olive Oil
- 1 teaspoon Apple Cider Vinegar
- 1 Egg room temperature
- 3 Egg Whites room temperature
Instructions
- Warm the water to 115 degrees. Add the psyllium husk to the warm water and stir well. Set aside to let the psyllium gel for about 5-10 minutes. It will resemble thick applesauce.3 Tablespoons Psyllium Husk, 1 ½ Cups Water
- Combine the sorghum flour, brown rice flour, potato starch, tapioca starch and salt in the bowl of a stand mixer fitted with the hook attachment. Stir on low speed for about 2 minutes until the ingredients are evenly mixed.1 ¼ Cups Sorghum Flour, 1 Cup Brown Rice Flour, ½ Cup Potato Starch, 6 Tablespoons Tapioca Starch, 2 teaspoons Salt
- Add the yeast to the dry ingredients and stir again until it's combined.2 ½ teaspoons Instant Yeast
- Add the honey, oil, apple cider vinegar, egg, egg whites and the water-psyllium mixture to the dry ingredients. Stir on low speed for a few minutes until the dry ingredients are all incorporated. You'll need to scrape the sides of the bowl a couple of times.3 Tablespoons Honey, 3 Tablespoons Olive Oil, 1 teaspoon Apple Cider Vinegar, 1 Egg, 3 Egg Whites
- Increase the mixer speed to medium low and let it mix for 5 straight minutes. Turn off the mixer and allow the dough to rest for 10 minutes in the bowl.
- Transfer the dough to your 1 pound Pullman pan. Spray the cover with nonstick spray (use either the pan cover or a piece of plastic wrap). Cover the dough and proof in a warm place until doubled in size. This will take 30-60 minutes depending on how warm your house is.
- While the dough is rising, place a baking dish with about 1 inch of water on the bottom rack of your oven. Preheat the oven to 400 degrees.
- Remove the lid from the risen dough and place the loaf pan into the warm oven. Bake for 30 minutes without opening the door, so the inside stays steamy. After 30 minutes, carefully remove the pan of water and reduce the oven temperature to 350. Bake another 25-30 minutes until the inside temperature reads 205 degrees and the loaf sounds hollow when tapped.
- Remove the bread from the oven and allow it to cool for 10 minutes in the pan. The remove the bread from the pan and cool completely on a wire rack. It will need to cool a minimum of 4 hours, but overnight will be better. If you slice the bread too soon, the inside will be gummy.
Video
Notes

Tiffany is the recipe developer, stylist and food photographer behind Well Fed Baker. As a lifelong baker who had to go gluten free and dairy free in 2016, Tiffany strives to share allergen friendly recipes that never feel like they are free from anything.


Stephanie Davis says
Can this be made in a bread machine?
I don't own a bread machine, so I've never tried it.
Maureen Pytela says
I don't do well eating nightshades. Can I substitute anything for the potato starch?
Hi Maureen,
I haven't tested it, but I think cornstarch would be the best replacement for potato starch. It should be a 1:1 replacement. Let me know how it works if you try it.
Kathy Kathy says
Could you use 1:1 flour instead of the brown rice flower?
Hi Kathy,
I think white rice flour would be the best substitute for brown rice flour. The 1:1 flour contains other ingredients, like xanthan gum, so I don't think it would work as well as a substitute here.
Dianne says
I don’t see the measurements in weights anywhere yet you say in your notes that you have shared the volume and weights for all your ingredients and that weighing ingredients is the best method. Am I missing them somewhere?
Hi Donna,
On the recipe card, right below the ingredient list click on the link that says metric and it will change to show all the weights. 🙂
Dianne says
Aw yes, thank you. I’m anxious to try it. It looks delicious.
laura sirkovsky says
Can't wait to try it!